Understanding and utilizing Google Classroom's features can help you make the most out this widely used tool. Here are 10 tips for creating even better assignments for your students.
If you’ve used Google Classroom for long (or even if you’re just beginning to use it), you’re likely to see that there’s not a lot to it.
Google Classroom was created to help teachers teach and learners learn so that tech stays out of their way to do it. Less tech, more teach.
And Google Classroom delivers. Here’s how its workflow basically works:
- Teacher creates assignment.
- Student completes assignment and turns it in.
- Teacher collects assignment and provides feedback.
- Teacher assigns a grade and returns the assignment.
- Feedback and collaboration happen throughout.
The magic is not in Google Classroom itself. It’s in how teachers and students use it and how learning is improved. Clicking the “Assignment” button to create an assignment isn’t enough.
For that reason, not all uses of Google Classroom are equal. It can be used poorly, and it can be used to supercharge teaching and learning.
If we understand its features and how they can support solid teaching and learning, we can create better learning experiences.
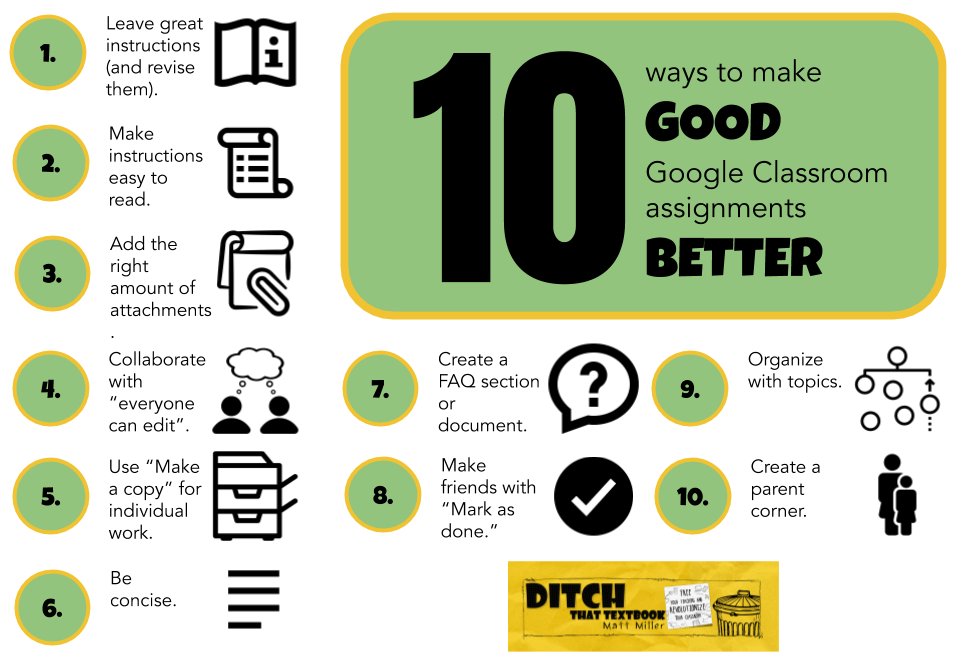
Here are some ways to Google Classroom’s features to make good assignments even better:

1a. Leave great instructions.
This is something I’ve fallen victim to many times. I would create the assignment and give it a title, then get students working on it. But if I failed to write solid instructions, absent students suffered. Students who didn’t finish work in class suffered. Students who didn’t pay great attention to my verbal directions — or those who were unclear — suffered. It all could have been averted. It’s a simple idea, but take the time to write out detailed instructions. Everyone benefits.
1b. Revise your instructions.
When something changes with an assignment, update the instructions in Classroom. This helps you — and students — avoid assignments that don’t reflect the most recent changes.
2. Make your instructions easy to read.
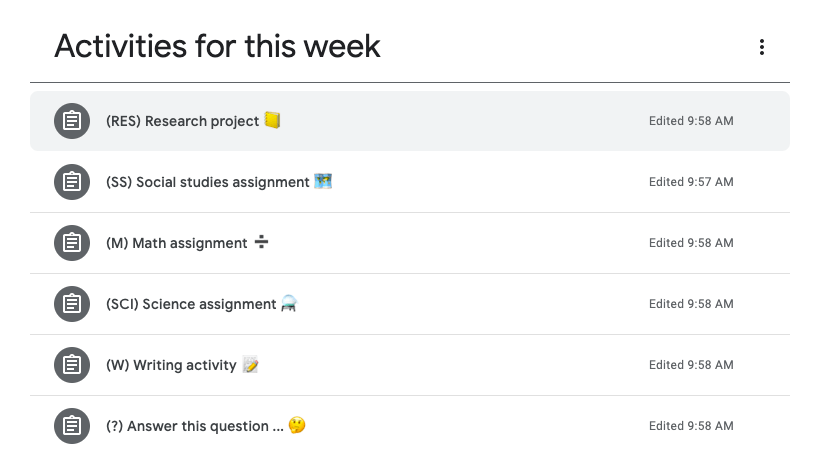
No one likes to read a huge block of text. It’s hard on the eyes. Our brains like to look on a page for white space where our eyes can rest. Break up your instruction with double returns. Don’t just hit return once; hit it twice to create that line of space. And add bullet points. Classroom doesn’t support them (or rich text formatting), but you can create them with hyphens or something else. (Emojis make fun bullet points, and Classroom supports them!) See examples in the image below.

3. Add the right amount of attachments.
It’s super easy to add attachments to Google Classroom assignments. But we don’t want it to become a dumping ground for lots of stuff your students realistically won’t use. Don’t add them because it feels like you should; add attachments because they serve a purpose.
4. Add a layer of collaboration with attachments where everyone can edit.
Some of the best attachments may be files where you don’t do much more than create them blank. Create an empty collaborative space for students in a Doc or Slides. Then attach the file to the assignment. Be sure to think ahead about …
- How collaboration enhances the assignment
- What students should do in the space
- What behavior is appropriate for the space
This shared Google Slides activity I posted about gives a great framework for establishing a space and how students can use it.
5. Add “make a copy” attachments when students need to do individual work.
If students need their own personal space to think through an assignment or reflect, making a copy is great. When you attach a file and choose “make a copy”, it automatically distributes copies of that file to each students AND adds the students’ names to the file name.
A word of caution: This is a great way to distribute digital versions of mindless electronic worksheets. Resist the temptation to do that. Remember that classroom technology is an opportunity to teach differently, to improve what we do. When we use technology to teach the same way we did without it, we’re squandering the gift — the opportunity to do something amazing. Keep asking yourself, “How could the technology make the learning experience better?”
6. Be concise.
Let’s go back to instructions. You can be detailed as well as concise. Students don’t need flowery prose in instructions, and many times, they don’t need a lecture or a longwinded speech. They need exactly what they need to get started.
7. Create a Frequently Asked Questions section (or document).
If you’re creating a bigger, longer assignment, students may come to you with the same question multiple times. Instead of answering the same questions over and over again (the bane of the teacher’s existence), try a FAQ. Here are a couple of models:
- Anticipate questions that students may have and add answers to them in the instructions section (below the directions we talked about above).
- Create an “anyone can edit” FAQ document for frequently asked questions. When any student asks a question, type your response (and the question) in the document. Or ask the student to type a summary of your answer in the document for other students! In fact, students can be encouraged to add questions their peers might come across with their own responses.
8. Make friends with “Mark as done”.
Students can mark an assignment as done without turning in a file (like a document or spreadsheet). This can be useful in many ways …
- Create a Classroom assignment for a physical product (hands-on project, paper assignment) and have students “mark as done” when complete. This opens a channel of communication through private comments and gives you a digital space to leave a grade.
- Use an ungraded “mark as done” assignment as a check-in or reminder on a longer assignment. Schedule an assignment called “Check-in: One week left!” for a week before a project is due. Have it publish automatically by clicking “Schedule” (later) instead of “Assign” (now). Students mark it as done when they see it as a reminder.
9. Organize with topics.
This can save everyone time in the end and make classwork less painless. Use the topics in the “Classwork” section of Google Classroom to organize items in Classroom. Organize by chapter or unit. Organize by type of work. Create subtopics to further organize that look like this:
- Chapter 1: Animals
- Chapter 1: Plants
- Chapter 1: Other living things
This keeps a topic for a single chapter from becoming bloated and unwieldy.
10. Create a parent corner.
I learned about this tip from the incomparable Alice Keeler, one of the world’s foremost experts in Google Classroom. She suggests that, in addition to writing instructions for students, we add a “parent corner” geared specifically toward them. Here’s how Alice puts it:
Consider when creating assignments to also specifically consider how parents will understand what their child is doing and how they can help support their child in learning. Including a parent corner where you can write a note to the parent to explain the activity and the goals provide parents a clearer window into our classrooms. Without having to decode the assignment from the student perspective, writing a few sentences directly aimed at parents can help them feel included and more clearly understand what their child did that day.
For notifications of new Ditch That Textbook content and helpful links:
Are you looking for quality, meaningful professional learning that both equips and inspires teachers?
Matt provides in-person and virtual keynotes, workshops and breakout sessions that equip, inspire and encourage teachers to create change in their classrooms. Teachers leave with loads of resources. They participate. They laugh. They see tech use and teaching in a new light. Click the link below to contact us and learn how you can bring Matt to your school or district!
Is Matt presenting near you soon? Check out his upcoming live events!


Hi
That is very useful for me