This post is written by Laura Steinbrink, a high school English teacher and tech coach from Plato, Missouri. This post was originally published on her blog, Rockin’ the Boat, at rockntheboat.com. Be sure to join her mailing list to get her latest posts sent right to your inbox.
HEY! IT’S YOUR TOMORROW (RIGHT NOW)
My top performing post by far debuted in January, 2018, and deals with how to use the new Google Sites for blogging while combining it with Google Classroom to provide our students with the authentic audience they need and the feedback via comments that are still safe. Since then, I’ve opened up the platforms to include Adobe Spark Page and Wakelet, giving my high school students control over which platform they prefer, but I still sitesmash (like an app smash…but with websites) with Google Classroom to give me the control over the comments that I prefer. While you can still pay for Blogger or other educational blog services to use with your students, I am all about finding free resources whenever possible. Toward that end, let me introduce you to the fab three and how well they all function with Google Classroom.
COME ON, IT’S EVERYTHING (RIGHT NOW)
Before I dive in to the particulars on how to make this sitesmash work, let me throw out another idea. You might want to sit down. Are you ready? While working on this post, I had an epiphany. The world doesn’t just have bloggers and writers. There are more and more podcasts hitting the air, and vlogging is huge too. So how do we use that in our classrooms? Google Classroom to the rescue AGAIN! So using the same steps I outline below for blogging, students can also submit links to their vlogs via Flipgrid and podcasts using Synth or Anchor, or whatever platform you prefer. All of this education awesomeness can be accomplished within one Google Classroom. As I talk about the blogging aspect, remember that it will work the same with links for vlogs and podcasts too if you want them as a separate assignment, but vlogs and podcasts can be embedded within the student blogs too!
CATCH THAT MAGIC MOMENT
STEP 1: CHOOSING A BLOGGING PLATFORM
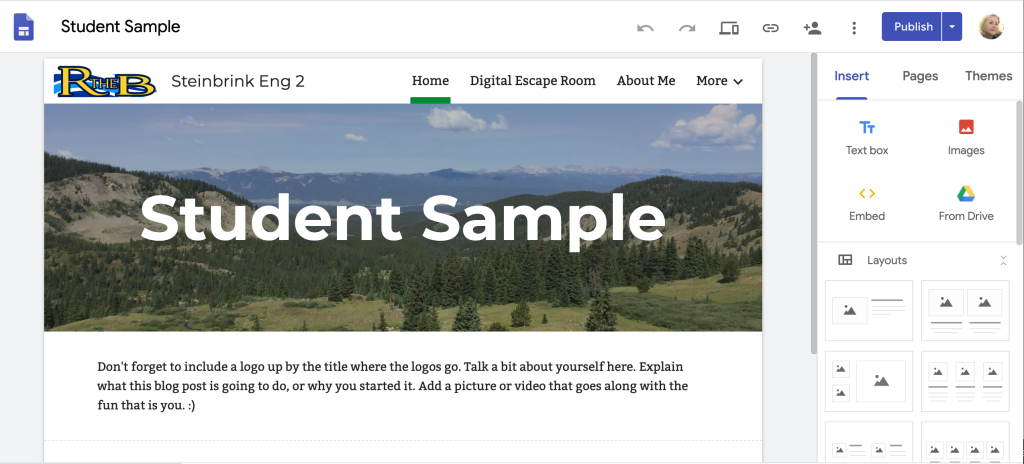
Most of you should be familiar with Google Sites. The new Google Sites offers some nice features and is reasonably easy for older students to figure out. They can use it as an actual website, blog, or portfolio of their work. There are privacy settings, but there is no integration with Google Classroom, so to turn it in, the students have to create the appropriate sharing link to attach to the Google Classroom assignment. I do hope that this feature or integration is added soon, as other companies have figured out how to do the integration.
AND DO IT RIGHT (RIGHT NOW)
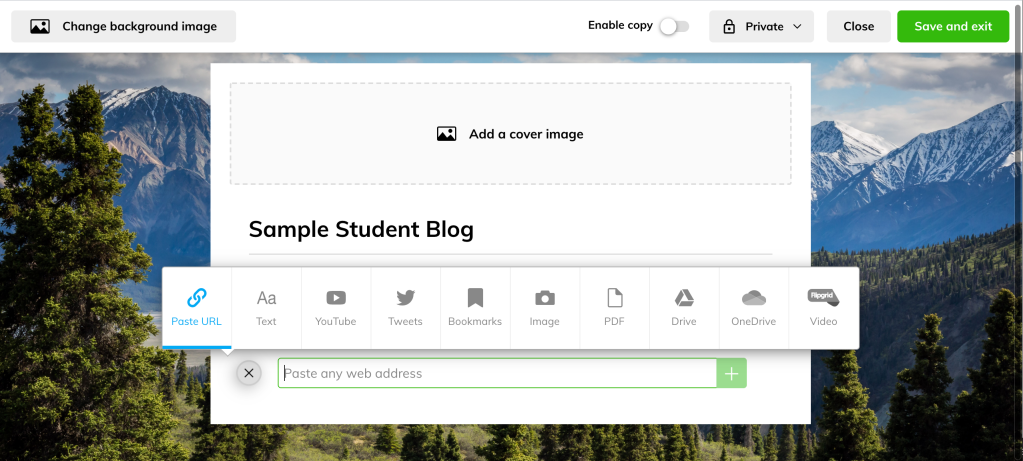
Wakelet is not just a curation tool. It also functions well as a blog, a continuously scrolling webpage. It is extremely easy to use, has partnered with several companies to make integration easy, and my high school students are always delighted to discover how easy it is to create and turn in blogs created by Wakelet. After saving and exiting, students can then click on share, and several options appear, including one for Google Classroom. Below is an example of a post by a student. My students just add a heading that includes a date and title, then put their latest “post” below it. Once they drop the link into Google Classroom, I can then set up the comenting magic. One of the sweetest integrations with Wakelet is Flipgrid. As you can see in the picture below, Flipgrid has its own content tab, so students can click on the Flipgrid Video option, record up to a 3 minute Flipgrid video, and it will be embedded right where they add it. Talk about an amazing tool for student blogging!
OHH, RIGHT NOW
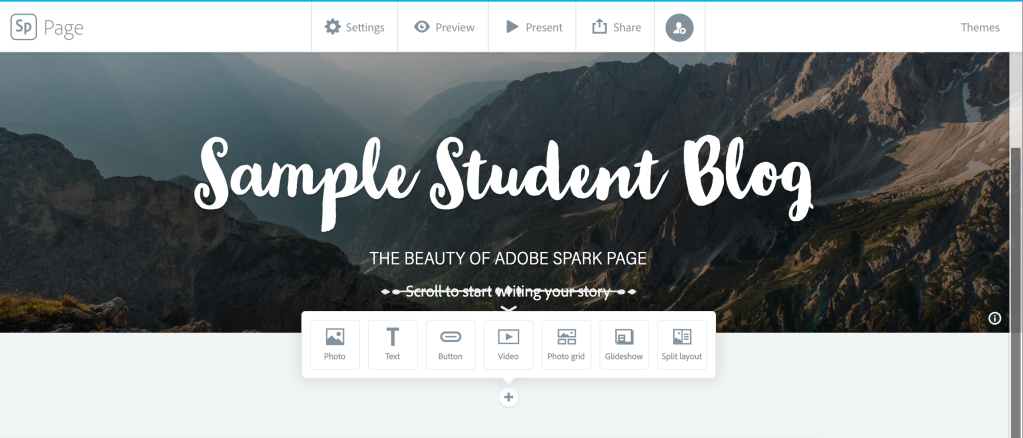
Adobe Spark Page, like Wakelet, includes a Google Classroom integration, and it offers the continuous scrolling webpage too. Spark is not integrated with Flipgrid, like Wakelet, but students can still create the vlog videos in Flipgrid, grab the shareable link, and add it to their blog. While Spark may not have as many integration options as Wakelet, it does have the Glide Show feature, which is aesthetically pleasing and fun, to say the least. Spark also has several different fonts that can tap into the design wow factor.
IT’S WHAT’S HAPPENING
STEP 2: SETTING UP GOOGLE CLASSROOM
Once students have chosen the tool to use for their blogs, collect their links in Google Classroom. Next, create a Google Classroom just for those blogs. Now the fun starts. Setup your classroom and invite or add students into the Classroom. Create an announcement titled something about their blogs, and direct students to drop their blog links in as comments to that announcement. Once you have collected them all, you are ready to start making this work as a way for students to interact with each other’s blogs posts. Not only will this provide them with that authentic audience we know improves the quality of our work, but also with practice giving and providing feedback in a safe space.
The rest of this process is similar to what is in my previous post on this topic, so I will restate and update the instructions from that post here.
RIGHT HERE AND NOW
STEP 3: THE WORK BEGINS
AFTER RECEIVING LINKS, NOW WHAT?
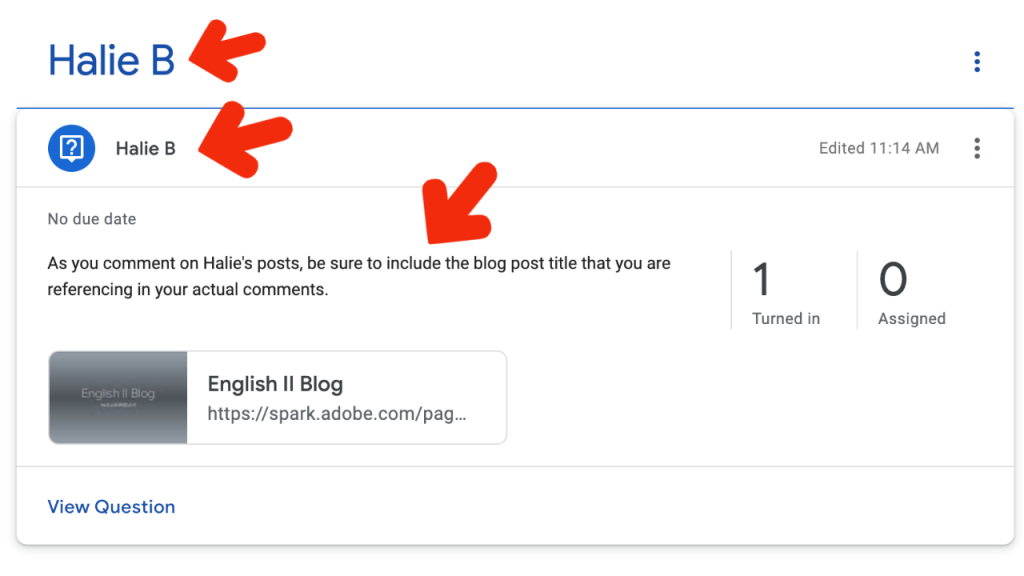
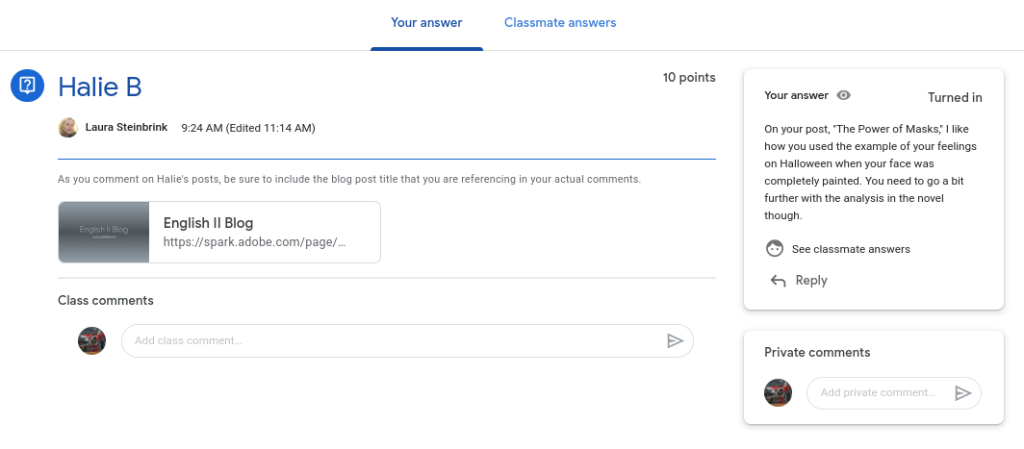
In my original post, I instructed you to create an announcement for each student. Google has since done away with announcements as a feature. Instead of creating an announcement, I now create a “question” for every student in the class/classes you are putting into the Blogging Google Classroom class. This is where the labor intensive part comes into play. The title of the question is one student’s name, which I copy from my gradebook. Then I create the “topic,” which is also that student’s name. I typically use first and last initial, since I frequently have duplicates of some common first names. Below is an image with red arrows showing the information you need to enter.
RIGHT NOW, IT’S RIGHT NOW
STEP 4: THE “CANNED” MESSAGE
Now we’re ready to paste in a “canned” message for each “question.” If you are like me and do not like working hard if technology can make life easier, then open Google Keep and paste in either the two messages I created below, or create your own, one boy and one girl message:
She: To comment on her blog, click the link below. Remember to put the blog post title in your comment so that she knows the one to which you are referring.
He: To comment on his blog, click the link below. Remember to put the blog post title in your comment so that he knows the one to which you are referring.
They: To comment on their blog, click the link below. Remember to put the blog post title in your comment so that they know the one to which you are referring.
OHH
STEP 5: GRAB THOSE DROPPED LINKS
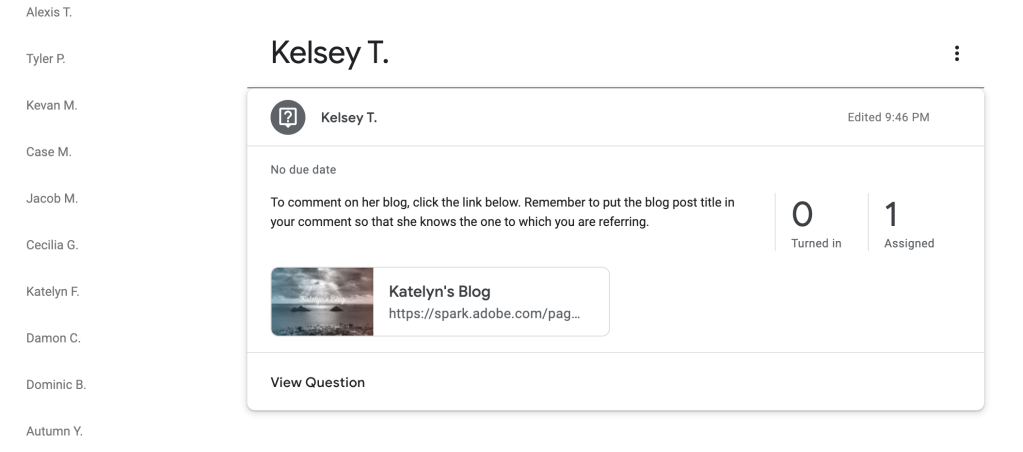
In the question for each student, add the link that was provided by the student. Now, to prevent endless scrolling up and down, I copied all of the link comments into the same Google Keep note where I had my canned messages, split my windows so they were both open, and then copy each link into each student’s question. Whew! As you can see in the image below, the topics are listed on the side and make it really easy to simply click on a student’s name for their question to pop up, click on their link, and read their story/post. After reading, students then pop back into Classroom and turn in their comment, including the post title, so that the student will know which one they are referencing.
TELL ME, WHAT ARE YOU WAITIN’ FOR?
STEP 6: STUDENTS ARE FINALLY READY TO COMMENT
Now the fun begins. Think about how we blog and then share on Twitter as educators. We tweet out that we have a new post and include the link, others click the link, read the post, go back to Twitter and comment. (Yes, some people comment on the blog, but the majority of comments are back on the original tweet.) As I thought about that, I realized something. Huh. I can make that same format work with Google Classroom. So let’s roll it out. The beauty of the new Question feature means students “turn in” their comments, making that even easier for teachers to track. How many posts you require them to comment on is up to you. They even have access to see the comments of their classmates, and then comment on those, so requiring them to engage with some of the classmate comments is very manageable too.
TURN THIS THING AROUND
So whether your have students blogging, vlogging, creating podcasts, or all three, Google Classroom can be the place where students comment, drop their links, respond to comments, and learn how to give and receive feedback. Google Classroom can be that free one stop shop we’ve been looking for to provide that safe authentic audience. Classroom codes could eventually be shared, or not, with another class to provide an even bigger audience. That’s a lot of power for one platform. Let’s tap into that and let our students explore these types of expression, these tools, and enjoy the student voice that emerges.
HEADING TITLES ARE PARTIAL LYRICS FROM THE SONG, RIGHT NOW, BY VAN HALEN.
For notifications of new Ditch That Textbook content and helpful links:
Are you looking for quality, meaningful professional learning that both equips and inspires teachers?
Matt provides in-person and virtual keynotes, workshops and breakout sessions that equip, inspire and encourage teachers to create change in their classrooms. Teachers leave with loads of resources. They participate. They laugh. They see tech use and teaching in a new light. Click the link below to contact us and learn how you can bring Matt to your school or district!
Is Matt presenting near you soon? Check out his upcoming live events!


I really liked this blog. It has really interesting ideas.
Knovva Academy has created an incredible activity academically parallel to Model United Nations with the Model G20 Summit.
[…] google-classroom-to-the-rescue-blogging-vlogging-and-podcasting […]
[…] that Textbook: Google Classroom (still) to the rescue: Blogging, vlogging, and podcasting. “My top performing post by far debuted in January, 2018, and deals with how to use the new […]
[…] Read the full story by Ditch That Textbook […]
Is there a way I would be able to preview posts to questions on googleclassroom prior TO general student viewing?