A teacher sent me a link to a video recently. I think it was probably from Teachers Pay Teachers, and she asked, “How do you make something like this in G Suite?”
The video showed a document with three columns and a bunch of words at the bottom. The words at the bottom were moveable. Students sorted the words into the three columns and turned it in.
At first, I thought, “We’ve got to be able to do better than recreate this activity — a glorified digital worksheet.”
Then, it hit me. Giving students a space to make meaning, to make something out of pieces they’re given, to describe their thinking visually by reorganizing — THAT’S better learning than a simple digital worksheet.
I’m in, I thought. Let’s do this.
How can we use G Suite to make moveable activity boards?
I thought about what these kinds of activities were called for days and how I would title this post. Fair warning: You’ll see me call this idea several different things by the end of this post because I’m still not sure what to call it!
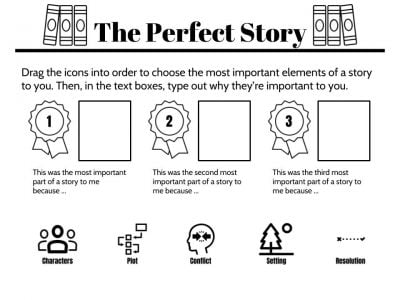
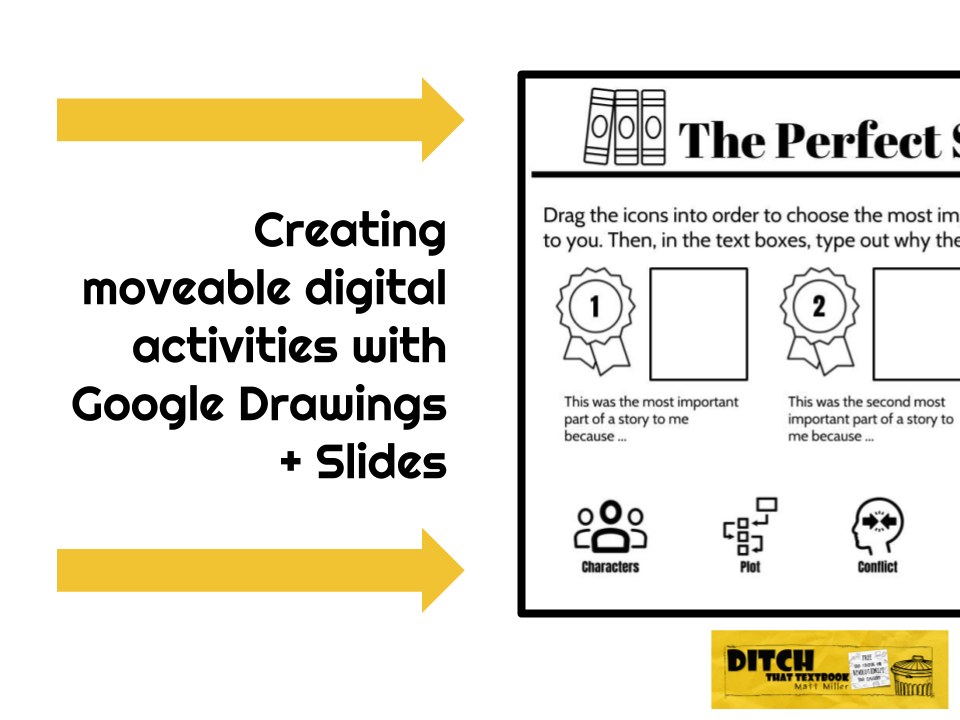
The Perfect Story, a language arts activity where students say why certain elements of a story are their favorite and why. They come with moveable icons and text boxes where students can type.
Moveable activity boards. Virtual manipulatives. Digital interactive activities.
Whatever they’re called, Google Slides and Google Drawings were made for creating them.
As an example, I created this language arts activity called “The Perfect Story.” In it, students look at the elements of a story, rank them in order of personal preference when they’re reading books, and describe why they’re important.
Here are the files if you want to check them out, and then I’ll show you how I created it …
(Note: If you’d like your own editable versions of these files, use the “make a copy” link or open the “view” link and go to File > Make a copy. PLEASE don’t request edit access to these files. If I give that out, people will change my example files around, modifying the original copy that others make copies of. Thanks.)
Use the links below to jump straight to any individual part of the process …
1:22 — Overview of the final product
3:55 — Creating the background image
8:30 — Adding the background image to a slide presentation
11:30 — Creating moveable icons with text
16:45 — Assigning with Google Classroom
18:00 — Assigning without Google Classroom
Click here to jump to the section in the tutorial video about creating a background image.
In this activity, students move icons around on the screen and type text. But there are lots of elements on the page that don’t need to be moved. In fact, if we put those elements on the page like normal, there’s a chance students might move them around.
 By putting those elements in an image file — that can’t be moved around — it locks them in place. Looking at the example, these are the text boxes, the ribbons and the boxes where the icons are to be moved. (See image to the right.)
I built those in a Google Drawing, using text, images and shapes. (The icons, by the way, are from TheNounProject.com. I’ve written about what a powerful tool icons from The Noun Project can be.)
When I finished creating the background image, I downloaded it as a PNG file (File > Download as … > PNG image).
With background image in hand (actually, in my downloads folder), I created a new Google Slides presentation. (FYI: go to slides.google.com/create and it’ll create a new slide presentation, saving you extra clicks from opening up your Google Drive to do it.)
I profess my love of Google Drawings at 9:10 in the video … don’t miss it! 🙂
I right-clicked my slide (Mac or Chromebook: two-finger tap) and chose “Background”. I chose to upload an image and chose my Google Drawing.
Did your background image get distorted or stretched? Mine did, too. To fix it, go back to the Google Drawing and go to File > Page setup. Choose “custom” and it’ll tell you how big your file is in pixels, inches, centimeters, etc. Head back to the slide presentation and go to File > Page setup and make it the same size. Voila … problem solved!
Now that you have your background image in place, start adding the pieces that students will edit into your slide. For me, that was moveable icons and text boxes where they would type their answers.
Adding the text boxes was easy. I drew them in, typed a sentence stem to get students started, and I copied/pasted the text boxes.
Creating the icons was a little more work (but not too much!).
Click here to jump to the section in the tutorial video about creating moveable icons with text.
![]() I wanted to have some icons with labels for the different elements of a story. My icons from The Noun Project didn’t have those labels, so I easily made some of my own.
I wanted to have some icons with labels for the different elements of a story. My icons from The Noun Project didn’t have those labels, so I easily made some of my own.
I started a new Google Drawing (again, drawings.google.com/create will make a new one for you!).
I added all five icons I was going to use. Then, I drew in a text box below each one to label them. When I was done, I went to File > Download as … > PNG image.
I inserted that image with all five icons into my slide presentation. I copied the image and pasted it five times, cropping each image to each of the five icons I created. (You can see how I did that at 14:00 in the tutorial video.)
Click here to jump to the section in the tutorial video about assigning it WITH Google Classroom.
Click here to jump to the section in the tutorial video about assigning it WITHOUT Google Classroom.
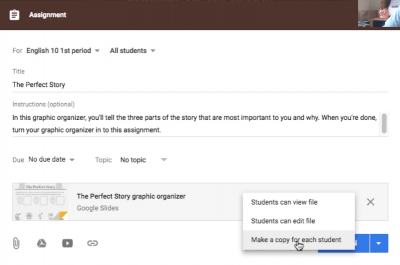 Giving students their own editable copies of these activities is the easiest with Google Classroom.
Create a new assignment. Attach the file to the assignment. Change the drop-down menu on the attachment to “Make a copy for each student.” Then click “assign” on the assignment.
Without Google Classroom, forcing students to make a copy is still pretty easy.
Click the blue “Share” button in the top right corner of the screen of your slide presentation with your activity. Click “Get shareable link.” Make sure you change the sharing settings to “Anyone with the link can view” or “Anyone in <<your district or organization>> can view”. Then copy the link.
Before giving that link to your students (through a learning management system or a link shortener), delete the word “edit” and anything that comes after the word “edit” in your link. Replace the word “edit” with “copy.”
Give students THAT link instead. It will force them to make a copy of the file … their own copy that they can write on and turn in to you.
Creating activities like this can be fun and very meaningful for students!
However, we have to be careful not to create versions of this activity that ask for simple fact regurgitation from students. That doesn’t promote deeper thinking and deeper learning, and it’s pretty low on Bloom’s Taxonomy and Webb’s Depth of Knowledge.
Encourage students to explain their thinking, to create something, etc. Find some verbs on this image of Bloom’s Taxonomy and incorporate some higher-level thinking into your activity.
Seeing students working doesn’t mean learning is happening. Let’s find ways to lead them into deeper thinking activities instead of those that make them feel like they’re running on the proverbial hamster wheel!
For notifications of new Ditch That Textbook content and helpful links:
Interested in having Matt present at your event or school? Contact him by e-mail!
Matt is scheduled to present at the following upcoming events:
[getnoticed-event-table scope=”upcoming” max=”15″ expanding=”false”]
Session expired
Please log in again. The login page will open in a new tab. After logging in you can close it and return to this page.
Thank you for sharing! Can students use their fingers to move the moveable pieces on their end? I work with little ones who are not yet able to use a cursor.
Thank you!
Ok. How will the students get to edit the work? I’ve tried to edit as a student but can’t figure it out can you please help?
Is there a way to import an interactive spinner like the one I made on Wheel Decide into a Google slides presentation?
Hi! This was such a helpful video! I created a interactive notebook that covers a unit of study in reading. Students will need to access this over a period of time and continuously add their responses to the slides. I created the assignment and made it to where it created a copy for each student. It worked perfectly for a week and then the trouble began. Students couldn’t edit it, permission was being requested daily, their past work wasn’t in the notebook anymore. Do you know what might have caused this to happen and do you have a solution? Help Please!
Still a great idea! I created an assignment where my debaters are reading an article about Joe Biden’s top picks for VP and then using the graphic organizer to rank the contenders and provide a justification for the ranks. Fun to put together!
Can you make a two page cut and paste where you drag images from one slide to the other?
Hi,
Thank-you for creating this. I was wondering if you can lock the size of a movable image so that students don’t play with the size of the image as they are moving it to an answer?
Thanks for your kind comment and question. I don’t believe you can lock the size of images. I tried grouping them and they still have the resize boxes on the corners. If they accidentally change the size, you can always coach them to use Ctrl+Z to undo and bring it back the way it was.