Quality bell ringers are crucial — quick activities to get students going at the beginning of class, when the bell has just rung.
For these first five or ten minutes of class (OK, probably more the five than the ten), we have our students’ most attention. It’s the most focused they’ll likely be for us all day.
If we squander that time, the rest of our time with them suffers.
But if we seize the opportunity that it is, we can spark interest and hook students into a lesson.
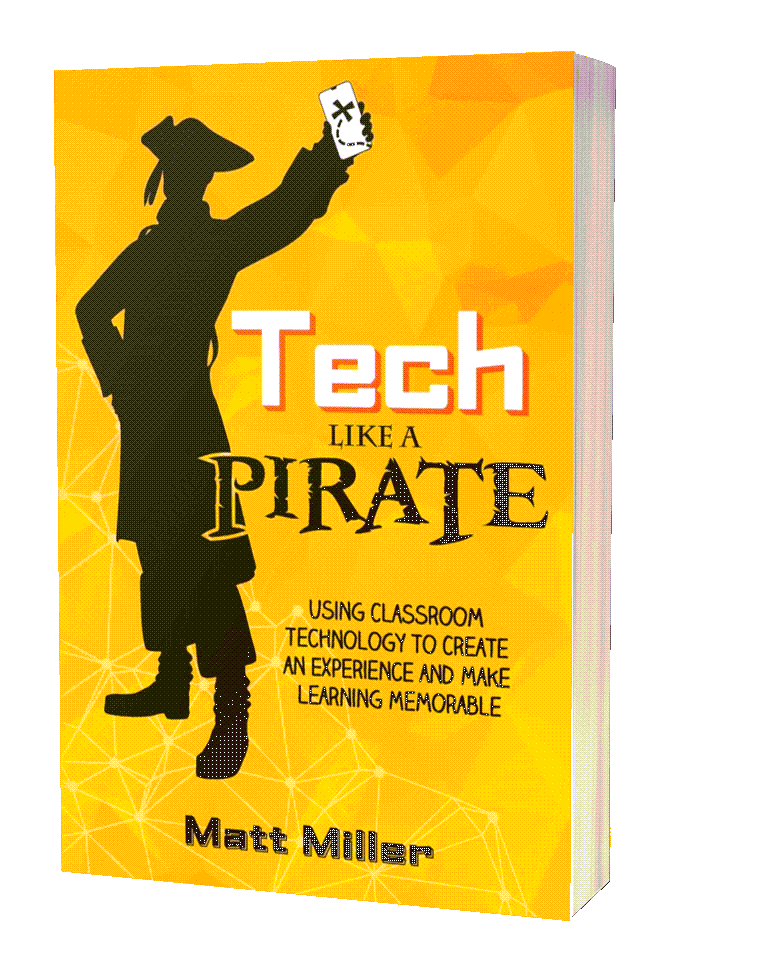
One of the hooks from the book Teach Like a PIRATE that’s most memorable to me is the Board Message Hook.
In a book about engaging students, the idea of meeting students with something that’s eye-catching and thought-provoking — a statement or a picture or whatever — really resonated with me.
- Put a photo of something seemingly random on the board that eventually ties into the lesson of the day.
- Write a controversial or surprising statement on the board.
- Display a QR code on the board and see if students scan it.
The idea here is to meet students in the first moments of class with something that intrigues them and makes them want to dive deeper into the day’s work.
The traditional model for bell ringer activities — the first activities students do before starting into the substance of the class — is to do some basic, quick questions:
- Simple problems in math
- Verb conjugations in foreign language
- Comprehension questions in English/language arts
- Review questions from the previous day’s history lesson
So, so forgettable. So easy to do without any real thinking.
Let’s come up with some bell ringer activities that inspire students, that trigger thinking and discussion. When we pull some of the incredible digital tools available to us, we can kick these bell ringer activities up to another level.
10 digital bell ringer activities you can use tomorrow! FREE ebook
We want to make these bell ringer activities even EASIER for you to use and share with your colleagues. So we have created a FREE ebook (you can print it if you want to!) with 10 activities complete with instructions, templates, and extension ideas.
Some of these activities are listed below, some in other posts, and some are BRAND new.
20 ideas for great digital bell ringer activities
Whether you have digital devices for your students or not, these should stimulate some new ideas for kicking off class in an engaging way:
1. Add speech bubbles to a historic photo.
Add a new twist to a lesson by letting students speak — or think — for the characters. My favorite way to do this is with Google Drawings (for creating individual images) or Google Slides (for having each student create a slide in a shared presentation). Do an image search for a historic photo and add that photo to the drawing or slide. Then add speech bubbles. (If using Drawings/Slides, it’s in the shapes under the “callouts” category.) This is higher-order thinking! Students must know their facts and understand the people involved very well to be able to think for them. Kick the Depth of Knowledge level up even higher by having students justify their thinking and explain why they wrote what they did.

Example: Washington crossing the Delaware. Find the historic painting and add a thought bubble for Washington. (Then, add a thought bubble for a soldier too!)
Resource: Caption This! A fun, deep-thinking Google Drawings activity
2. Ask a character/historic figure a question.
What if students could ask someone they’re studying a question? What would they ask, and how would that person likely respond? This is another that can be done quickly and easily in Google Slides or Drawings. Let students take a photo of themselves using Insert > Image > Take a snapshot. Then, use the image search to find a photo of the person to whom they’ll ask the question. Add speech bubbles to ask questions. Students could ask one question with one answer from the character/historic figure, or they could do a back-and-forth with several photos.

Example: Asking Sir Isaac Newton a question about how he concluded that gravity was due to the pull from the earth.
3. Create a flowchart.
Sticking with the Google Slides/Drawings idea, have students express their understanding of a concept with a flowchart. This can easily be done with shapes and arrows (found under the line tool) in Slides and Drawings. A single line throughout a flowchart makes for more of a timeline and less of a flowchart, so any time it can branch off, the flowchart is made more interesting! (Pro tip: copy (Ctrl+C) and paste (Ctrl+V) the shapes and arrows to save time.)
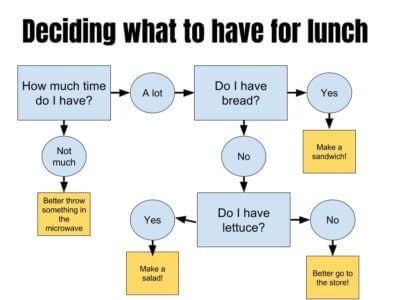
Example: Go through the process of deciding what to have for lunch and all of the decisions made in that process.
Resource: Deeper thinking with timeline projects
4. Make comic strips out of webcam photos.
Those webcams don’t have to be just for selfie-style photos (especially those with peace fingers and duck lips …). Have students back away from the camera and pose to recreate scenes of what you’re studying. Or, have them sit side by side and have a discussion. This makes the students the stars of their own comic strips!

Example: Recreating a scene from a story or having a discussion about something they’re learning in class.
Resource: Crash! Bang! Boom! How to add Google Drawings comic strips to your class
Tech Like A PIRATE encourages teachers to provide those experiences by tapping into technology that grabs students’ attention immediately and redefines learning. We dive into 7 ways to grab your students' attention with technology including resources you can use TOMORROW.
5. Create a quick animation.
Google Slides (or PowerPoint or any presentation slide tool) can be turned into a simple stop-motion animation tool. Create the first slide in your animation, then duplicate it, then move something slightly in the second slide. Duplicate the second slide and move something slightly in the third. Continue duplicating and moving until your animation is complete. Once your students have the hang of this, they can make animations pretty quickly.
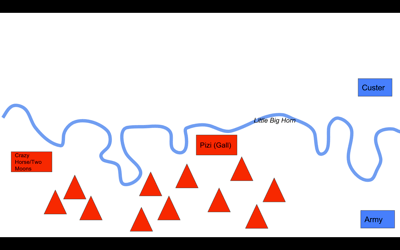
Example: Recreating historic battles with moving maps (here’s a brief, incomplete example of the Battle of Little Big Horn) or showing how a math problem is completed.
Resource: Learning in motion: EASY stop-motion animation with Google Slides
Resource: 11 tips for creating stop motion in Google Slides
6. Create BookSnaps of what you’re reading.
In BookSnaps, students find a passage from a book they’re reading that resonates with them. They snap a picture of it and annotate on it, underlining and adding text reflections and including fun things like emojis and Bitmojis (optional). There are variations of these, like MathSnaps, ScienceSnaps and even GratitudeSnaps. Snapchat is one tool many teachers and students use to create these annotations. (If you use Snapchat to do them, you don’t even have to follow each other or post it to Snapchat … just use the app to create the image!) If you don’t want to use Snapchat, a take a snapshot (Insert > Image > Take a snapshot) using Google Slides or Drawings and add the annotations. See more about BookSnaps on the Twitter hashtag (#BookSnaps).
A2: #Booksnaps are awesome!! Here are some our Ss created! #aussieED pic.twitter.com/rUayhi4F6q
— Amanda Funk(@Techieteach11) August 20, 2017
Example: Reflect on a reading in a book with a BookSnap. Explain parts of a math problem with a MathSnap. Show what’s happening in a science lab with a ScienceSnap.
Resource: #Booksnaps- How-To Videos
7. Shared slide presentations.
Google Slides doesn’t have to be used just to do presentations in front of the class! Create a slide presentation with enough slides for each student in the class. Then share that slide presentation with the class using the blue “Share” button. (Be sure to use the “Get shareable link” button and choose “Anyone with the link can edit” or “Anyone from <your school district> can edit” from the dropdown menu.) Each student gets a slide where he/she can do his/her own work. But you’re also creating a whole class file. Students love to see what each other has put on the other slides, and it’s a great place to interact through comments. Here’s a shared slide presentation I did in a workshop where participants wrote about their ideal vacation destination.
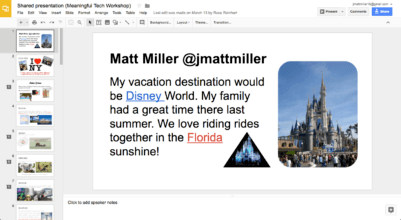
Example: Finding quick facts/photos online about a topic you’ll discuss in class that day.
Resource: Student collaboration in shared Google Slides
8. Ask students “What if …” using a Flipgrid video grid.
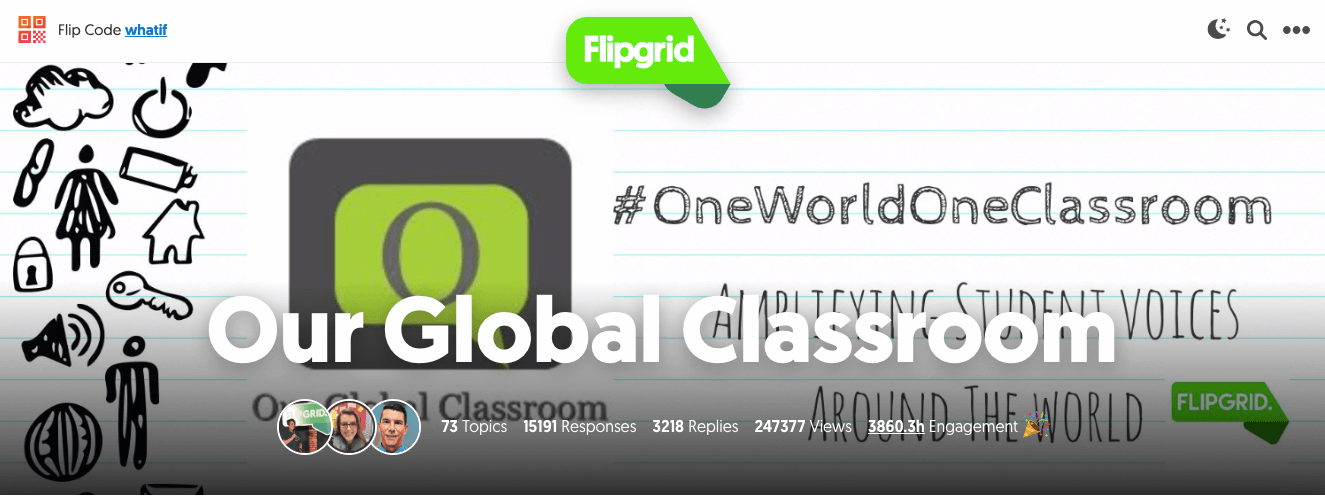
It’s always fascinating to see what students imagine when their minds are allowed to wander. An educator from Australia, Bronwyn Joyce, has gotten in the habit of asking her students — and students around the world — “What if?”. Her prompts have elicited more than 1,000 videos and have prompted interesting discussions about the world’s problems. On a smaller scale (in the classroom with just your students), this can be an interesting way to kick off a class.
Example: Letting students speculate what would happen if history was different, or if a character did something differently in a story, or what they would do if …
Resource: Catch the Flipgrid fever! 30+ ways to use Flipgrid in your class
9. Create Icon boards.
I created icon boards as a way to simplify the infographic process. Think of icon boards as “infographics LITE” or “infographics when you’re in a hurry.”
The “Great Big Icon Board.” Click here for the template in Google Slides.
You can use Google Slides to create your own icon boards — or just use the templates included in this post to copy and distribute mine.
Icon boards include an open space for students to organize what they’re learning visually, combining text and images. They include plenty of icons that students would likely use from sources like The Noun Project or Flat Icon.
The icons — as well as shapes, text boxes and other elements — are placed in the workspace around the board. They’re not actually on the board until students move them there. Think of it like things sitting around your paper on a desk.
Whether you create your own icon boards or use my pre-created templates, there are a few simple steps to using them.
(If you’re using one of my templates, you’ll need to make a copy of your own using the links above first.)
- Distribute the icon boards to students. The easiest way is creating an assignment in Google Classroom and attaching the file to the assignment (choose “Make a copy for each student”). Other options include using the blue “Share” button and getting a clickable link, then changing the word “edit” and anything after it to say “copy” in the URL … OR … creating a short URL students can type in with a service like TinyURL.com or bitly.com.
- Students open their boards (through Google Classroom or the method you choose).
- Students organize their ideas using the items you’ve placed in the space around the board.
- Students add additional items, like icons, shapes, text boxes, etc. that they might need.
Resource: Google Slides icon boards for low-prep, visual thinking
10. Do a shared mind map brainstorm with AWWApp.
Students can interact in a shared whiteboard in AWWApp (awwapp.com). They can draw with their finger (or a mouse or a laptop/Chromebook touchpad). If you have a touchscreen available, this is a really easy, collaborative way for students to sketch out and share their ideas. Because the whiteboards are collaborative, they can share whiteboards with others — students in other classes or anyone around the world — so they can collaborate together.
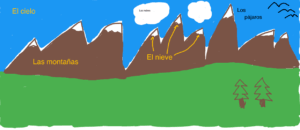
Example: Jot down all of the words that best describe a character. Write out all of the questions they have about solving a certain kind of math problem.
Resource: 10 ways to collaborate digitally + visually in class
11. Tweet for someone.
What would happen if a character in a story you’re reading tweeted about an event in the story? Or about an event in current events … or in another story? What if a scientist or mathematician or notable character in history tweeted? Now, you can let students create those tweets as bell-ringer activities. Use this Google Slides template. (Make sure you make your own copy.) Create a slide for each student. Then share the slide presentation with your students (through Google Classroom, through a learning management system, with a link using the blue Share button). Make it “Anyone with the link can edit”. Students jump on their own slides and add the following: a photo, the name of the person tweeting, the Twitter username (start it with @), and the tweet. Ninja tip: To turn the photo to a circle, click on the photo and use the dropdown button next to the crop tool to select a circle as the crop shape!
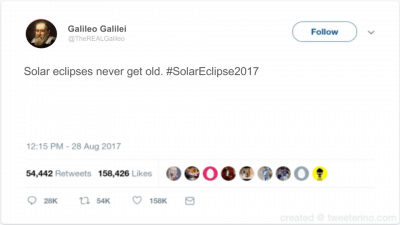
Resource: 10 social media-inspired learning activities: no accounts necessary
12. Draw with your finger (or a computer touchpad).
I doubt that the simplicity of a simple drawing will ever lose its relevance in a classroom. Images are powerful; they’re how our brain thinks anyhow. Having students draw what’s in their brains — or how they understand a concept — can be a quick and easy way to get them on track for the day. Formative (goformative.com) makes this easy AND digital with its “Show Your Work” questions. Create a new assignment in Formative and just add a “Show Your Work” drawing question with a prompt. Share the assignment with students. Then see what they come up with. Now, we don’t want to go digital for the sake of going digital, right? The tech should elevate the activity. Here, all of those simple drawings can be displayed quickly and easily from the teacher’s computer on a projector. Speed and simplicity.
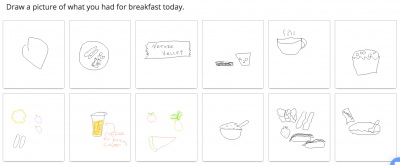
Resource: Draw, choose, write or say: Fantastic formative assessments
13. Create a “What do you know about …” Padlet.
Padlet (padlet.com) is like a digital bulletin board. Use it to tack digital notes to it with push pins. Those notes, though, can have links, files, images and other multimedia attached to them — much cooler than a regular bulletin board. Kick off class for the day by creating a collaborative “What do you know about …” Padlet. Pose a question: “What do you know about dolphins?” and encourage students to add whatever they can — personal experiences, facts, images, videos, whatever. This is a great way to activate prior knowledge.
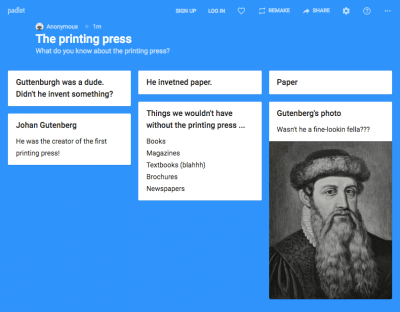
Resource: 20 useful ways to use Padlet in class now
14. Discuss an article digitally with Hypothes.is.
Popular culture, the news and blogs are great sources of relevant, up-to-date content we can connect to our classes. Hypothes.is (hypothes.is) lets us share an article with students and start a digital discussion there. Imagine that the article is clipped out of a newspaper. (I know, old school stuff …) Hypothes.is lets students digitally highlight and add sticky notes all over that article — but with enough room to have unlimited annotations. Discuss an article with your class — or even share the discussion with others outside of your classroom. (Example: The author of the article you’re discussing!)
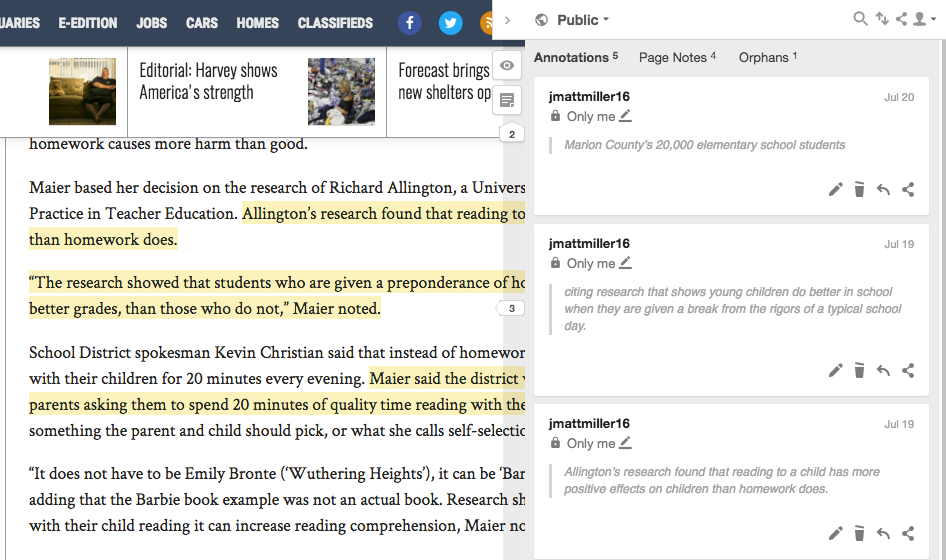
Resource:Try Edji, another text annotation tool. See how with 20 ways to analyze text, images with Edji.
15. Dig into fascinating writing prompts.
Need some new ideas to get students thinking — and then writing? Write About (writeabout.com) has a treasure trove of creative, thought-provoking writing prompts at www.writeabout.com/ideas. Choose one and then get the writing juices flowing, either on student blogs (Write About / blogger.com / kidblog.org) OR by giving students their own individual slides in a shared Google Slides presentation
.
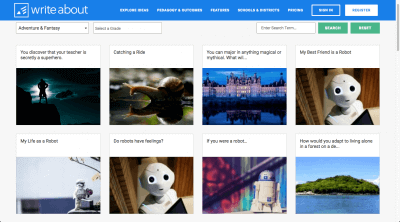
Resource: writeabout.com/ideas
16. Record a short explainer video.
Sometimes, it’s just easier to show someone what you’re talking about than to write it. Students can fire up a screen recording video with Screencastify (screencastify.com) in moments using the tool’s extension for the Google Chrome browser. Students can quickly record their screen, record with their webcam and/or record audio with their microphone to kick off class. It’s easy for them to share those videos with others after uploading them to Google Drive — or to turn them in with Google Classroom or another learning management system.
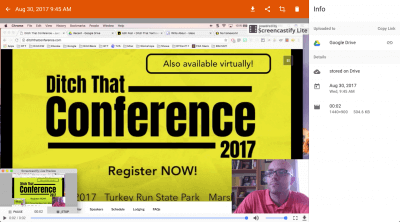
Resource: 24 ways to create great classroom video with Screencastify
17. Play a quick Quizizz game.
Want to review some material? Go over content from a previous lesson? Even give students a fun way to look up new material? Play a quick Quizizz game to start class. (Ever played Kahoot!? Quizizz has many similarities.) When setting the game up, click the “homework” button instead of the “play live” button and set the completion time five or ten minutes into class. The game will display a join code and the Quizizz join site. Just display those to students and have them get started. They can start whenever they get in their seats ready to go, and it’s not synchronous (i.e. their progress doesn’t depend on the progress of other students).
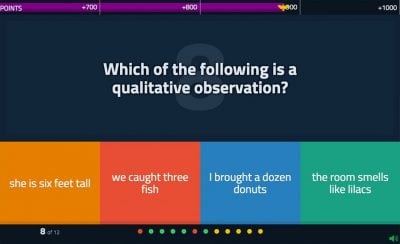
Resource: Game show classroom: Comparing Kahoot!, Quizizz, Quizlet Live and Gimkit
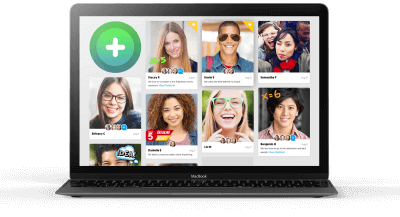
18. Analyze books or articles with Flipgrid.
Flipgrid lets students talk about big world issues they’d like to tackle. Another way to use this platform is to let students talk about and analyze what they’ve just read. Give them a chapter from a novel, a short story or an article, a math problem they’ve solved — even something a fellow classmate has written! Flipgrid lets students record short videos (up to 90 seconds) about a topic. In this case, the topic can be what they’ve just read or worked on. When they’re finished, they can view each other’s videos. (The more interesting the prompt, the more likely they’ll naturally want to look at each other’s videos!)
19. Write emoji poetry or an emoji response.
Brevity is an important skill in writing. Instead of encouraging students to write to a minimum number of words, let’s try constraining them to fewer words — and turn them into emojis! Have students summarize what they’ve been learning using emojis (maybe a maximum of 10?). The Google Chrome web browser has several emoji extensions (a favorite of mine is Emoji for Google Chrome). Mobile devices often have them built in. This encourages reflection on what they’ve learned and creativity in expressing themselves.
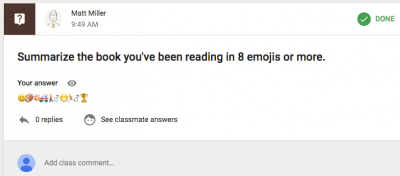
Resource: 10 ways to use emojis in the classroom
20. Write blackout poetry.
Have you ever seen those poems written by marking out all of the words in a news article or book page except a few with a black marker? This is blackout poetry. This can be a fun — and creativity-provoking — way to kick off class. Have students take a photo of a page of text (or a screenshot of an article online). Paste that image into Google Drawings or Slides (or a mobile app that lets them draw with their finger, like Paper by FiftyThree). In Google Drawings, they can use lines or shapes (long skinny rectangles work great) to black out words. (Do a web search for “blackout poetry” for examples.) Students could create them on their own individual slides of a shared Google Slides presentation (see No. 7). If each student has his/her own slide, the whole slide show becomes a big gallery of blackout poetry!
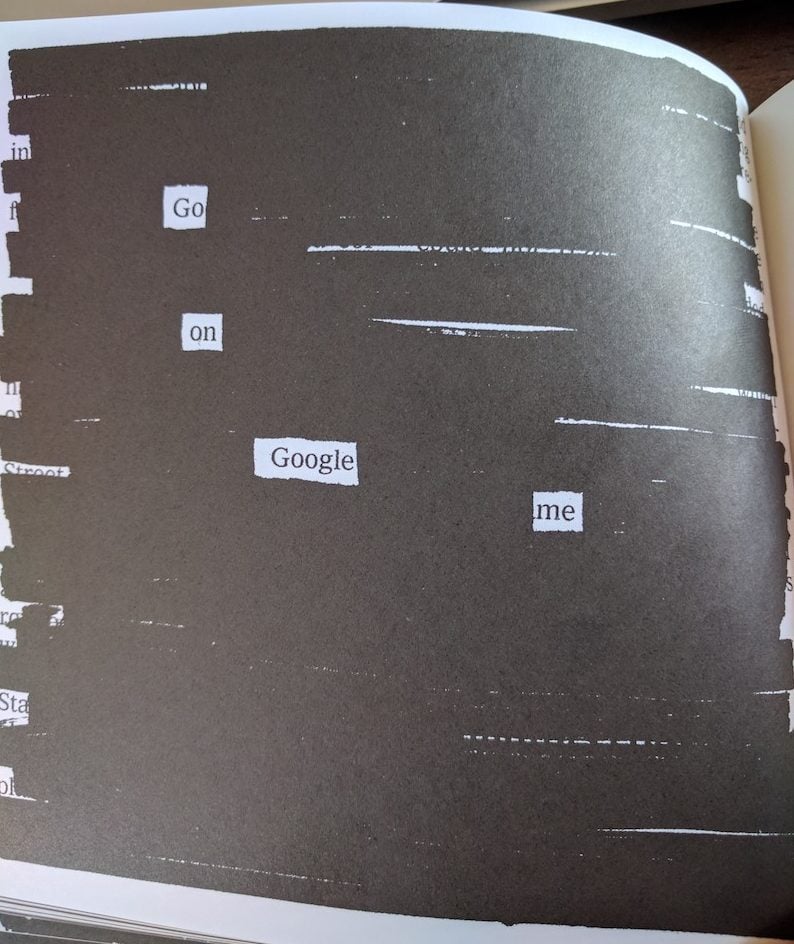
An example of blackout poetry by Austin Kleon in his book, Show Your Work!.
For notifications of new Ditch That Textbook content and helpful links:
Are you looking for quality, meaningful professional learning that both equips and inspires teachers?
Matt provides in-person and virtual keynotes, workshops and breakout sessions that equip, inspire and encourage teachers to create change in their classrooms. Teachers leave with loads of resources. They participate. They laugh. They see tech use and teaching in a new light. Click the link below to contact us and learn how you can bring Matt to your school or district!
Is Matt presenting near you soon? Check out his upcoming live events!



Not totally clear. Are bell ringers supposed to be things you present or things students do (like exit tickets) or both? I was wondering if I could set up a quick quiz (like quizzes) but I want to know when every body on a team has answered (I guess I could do this in Google Forms). I’d like to set it up so that students could log in 10 minutes before class and the first team to have all members take the quiz wins extra points. I might give bonus points for the highest team score.
[…] Resource: 20 digital bell ringer activities to kickstart class […]
[…] 20 Digital Bell Ringer Activities to Kickstart Class, “Ditch That textbook.com” […]
Wow! I just spent two hours wandering through the bell ringer ideas. I am returning to a high school classroom after some years in the counseling office and teaching college adjunct classes. Needless to say, I need to get up to speed with the 21st century classroom, and this is a gold mine of helpful hints and tips for me!