This post is written by Jon Spike. Jon is a Coordinator of Instructional Technology and Integration at UW-Whitewater, collaborating with preservice teachers and instructors to leverage technology in innovative ways. He teaches courses on topics such as Digital Tools and Video Games & Learning. He also hosts the LaughED podcast, where educators around the world share humorous tales from their classroom. You can connect with Jon on Twitter @jonathanspike at and visit his website GameStormEDU.com.
As humans, we’re naturally drawn to competition, play, and socializing through games. And, as it turns out, so are our students. According to a 2018 Pew Research study, approximately 97 percent of males and 83 percent of females play games on a regular basis, and it is safe to say that number has not gone down.
While playing games is a popular and enjoyable way to engage with others, designing a game can be a fantastic way to demonstrate understanding. Game design is a great way to bring the fun and engagement of gameplay into the classroom. Below you will find 8 steps for game creation in the classroom along with game design resources you can use right away!
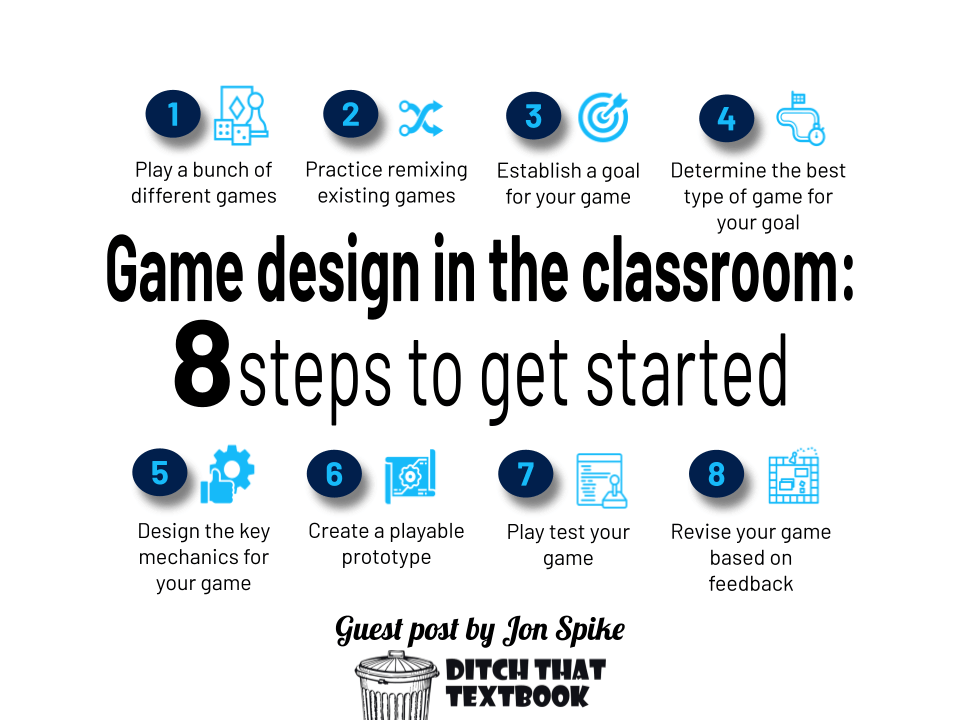
8 steps for successful student game design
1. Play a bunch of different games
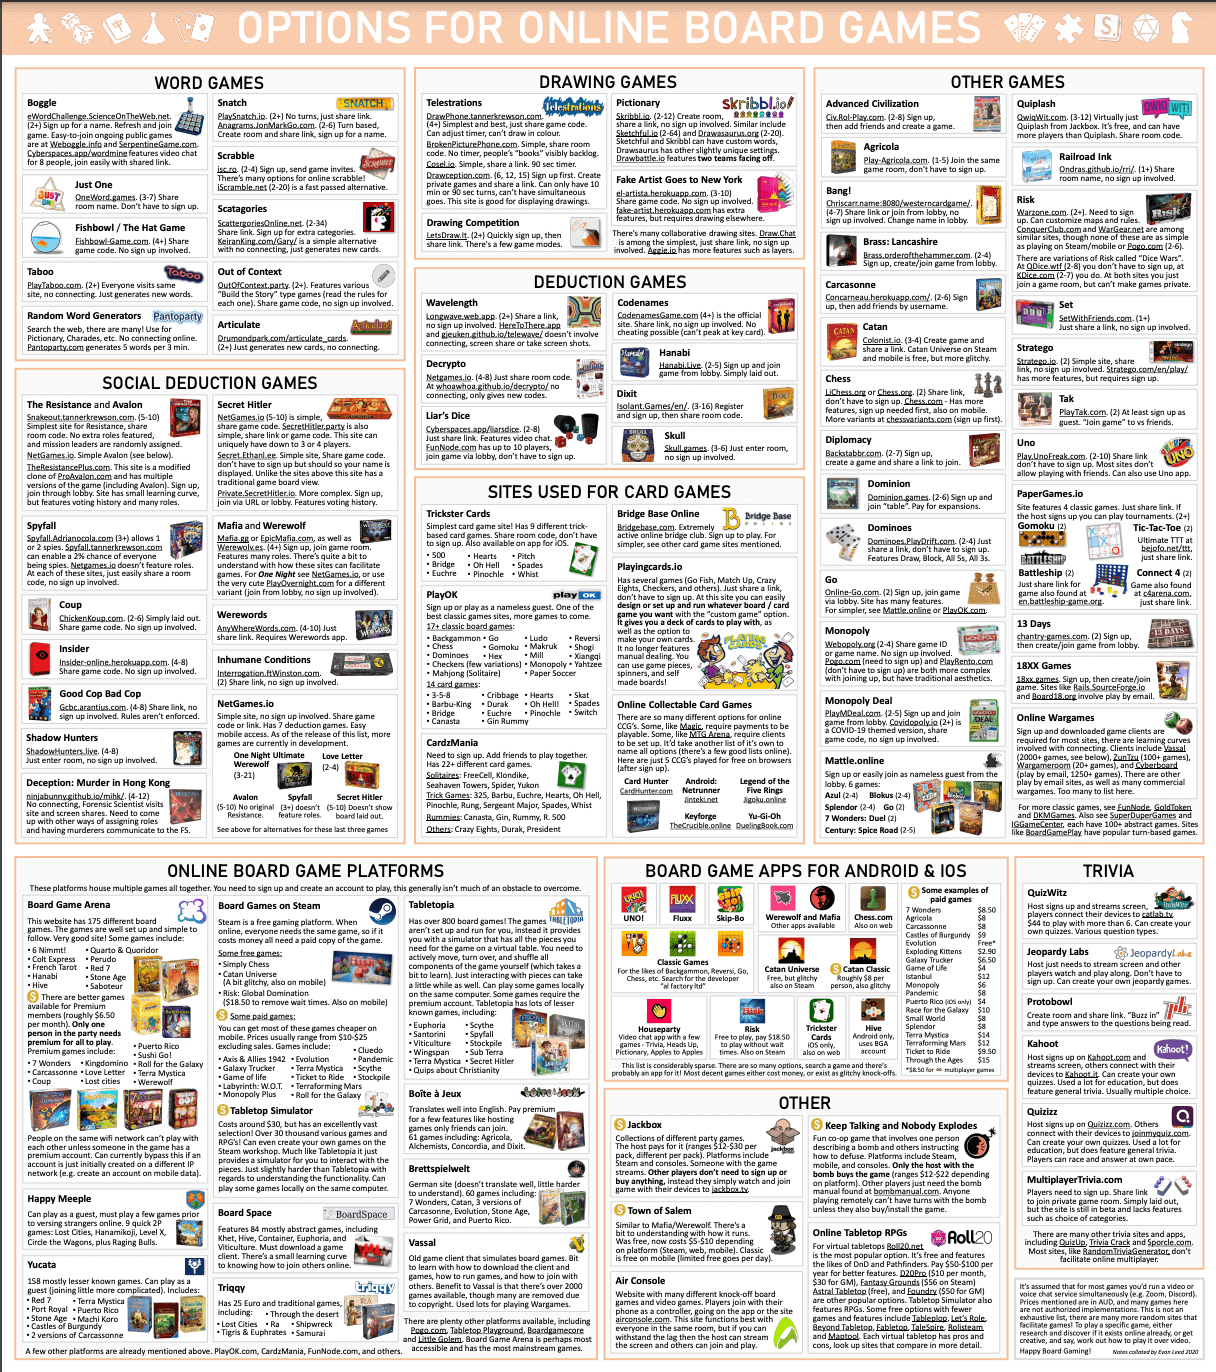
If you want to understand how to design an effective game, it helps to experience a variety of different game types and narratives. I have a collection of affordable and fun games that can expose students to many unique games and get their ideas flowing. In addition, there are many sites online that allow for playing games remotely or via a video call if you do not own the game or cannot get together face-to-face.
2. Practice reskinning and remixing existing games first
Before diving right in to making an original game, I find it best to instead tweak existing games based on their theme or mechanic. For example, asking students to think about how they could take a game like tic-tac-toe and change one aspect of it to affect gameplay would be an act of remixing a game. Similarly, challenging students to replace the common chess pieces with, say, characters from a play or animals in a food chain would be an example of reskinning a game.
Engaging in remixing activities helps students begin to develop their own design skills in a more scaffolded manner, which can be done through the GameStormEDU Designer Workbook.
If you want to brainstorm and plan your very own game, this designer workbook can make it happen. Grab a digital copy and get started!
3. Establish a goal for your game
The most important aspect of a game is its objective - how do I win? When you and your students begin to design a game from scratch, it’s crucial to start with the goal in mind. What does success look like in my topic? How might I measure success? Is it being the first to do something? Doing it the most effectively? Do I need to get somewhere? Earn the most of something? All of these questions help you identify a goal.
4. Determine the best type of game for your goal
All of our students first began playing one type of game: the “roll and do” board game. Many of them will default to making a “roll and do” game because of its comfort and simplicity. To help the students break out of their comfort zone, show them a variety of different game types. Some of these game types include deck games, creative/party games, combat games, cooperation games, and meeple movement games.
5. Design the key mechanics for your game
Think of mechanics as all of the individual actions, rules, barriers, interactions, and more that happen during the course of the game. Often, mechanics are those fantastic choices that a good game forces you to make. Many mechanics answer the questions of how can I get closer to a victory? What stands in the way of my victory? How can I adapt to these challenges and succeed?
6. Create a playable prototype
Now the fun part: building the game. Depending on the game type, it’s key to start with the most important game elements to make what is called a minimum viable product. These items could include game cards, game boards, custom dice, and much more! The GameStormEDU website has many templates and resources on how to make the prototype items, so you do not need to start from scratch.


7. Play test your game
If possible, try to be a passive observer while other individuals play your game. Avoid jumping in and explaining how they should be playing the game, and instead watch how the players interpret the rules, strategize, and approach the game. Sometimes you will discover entirely new strategies, gaps, and lessons by standing back and letting others experiment with your creation. After watching the gameplay, you can create a running list of concepts to keep, remove, or change. If you want to practice playtesting games, check out the collection of student and educator-created games on GameStormEDU’s Games Library.


8. Revise your game based on feedback
Game revisions can take a number of directions, but four areas are really key to a great game. Consider revising your game based on balance, or each player having a chance to succeed, as well as flow, the overall pace and downtime for players. You should also think about agency, the ability to offer tough choices to the player, and clarity, or how understandable the game is to each person. If you can solidify these four areas, you will have a successful game!
For notifications of new Ditch That Textbook content and helpful links:
Are you looking for quality, meaningful professional learning that both equips and inspires teachers?
Matt provides in-person and virtual keynotes, workshops and breakout sessions that equip, inspire and encourage teachers to create change in their classrooms. Teachers leave with loads of resources. They participate. They laugh. They see tech use and teaching in a new light. Click the link below to contact us and learn how you can bring Matt to your school or district!
Is Matt presenting near you soon? Check out his upcoming live events!


I like your toes
good
Hi Jon,
Thanks for interesting post. I like your very thorough chart of game options!
A friend and I created some projects based re-theming some simple games. I agree there is a lot of great learning that can happen there.
We developed some questions that guide students through the process of re-theming, which is where I believe the real learning takes place. We also have some reflection activities afterward, to seal the deal.
We posted everything on our site here:
http://classroomgamedesign.blogspot.com/p/the-games.html
One thing I learned is these projects do take some effort to pull off. It’s not going to be as easy as running off some worksheets and letting the students go at it. Not a bad thing, of course, but teachers need to be aware of it.