
You don't need the Instagram app to create the Instagram Stories experience. You just need Google Slides! Check out this template and how you can use it in class.
Instagram is social media behemoth, and it keeps growing. It has eclipsed 1 billion users, and it’s the second most popular social media platform with teenagers behind Snapchat, according to a report. (Although one statistic says it has more daily teenage users than Snapchat.
It’s just one of a variety of social media and other apps that many students are familiar with — either as users themselves or because (as young children) their parents and siblings use it.
Instagram Stories is a pretty popular feature, and it’s a great storytelling tool. Users can capture important moments of their lives in photo or video and string them together for others to watch one by one.
This might beg a pretty common question among teachers who want to create amazing classroom experiences …
“How can we use that in the classroom?”
I’ve thought about how cool it would be to show what Juliet’s Instagram story would look like after Romeo dies in Romeo and Juliet. Or how cool it would be to show a science lab with an Instagram story.
Thankfully, there’s an easy answer to that question.
If what we really want is the experience that comes with the app, we don’t need the app for that.
We don’t need the app to create the experience!
There are lots of hurdles if you use the app …
- It certain requirements (age, etc.).
- It might be blocked by the school’s Internet firewall. (OK, let’s be honest … it probably is!)
- It requires you to have a device, which not all students have.
Instead, let’s use a digital tool that students have access to …
… like Google Slides. (Or PowerPoint … whatever works for you!)
Using Google Slides for Instagram Stories in class
What would this look like in class? Allow your mind to wander in this direction …
- Characters for a story you’ve read (How would they react to the story’s events in an Instagram story?)
- Historical figures (How would those characters show what happened in an Instagram story?)
- Replaying a science lab (How could students show various parts of the lab?)
- Demonstrating a skill (How could students teach others with photos and video?)
- “A Day in the Life of …” (How could students show what happens in their lives?)
- First day/week back to school (How could students get to know each other better?)
- Practicing a foreign language (How could students get repetitions in the spoken/written language?)
And that’s just the tip of the iceberg!
How to create Instagram Stories in Google Slides
These step-by-step instructions are from a slide deck I made in Google Slides. Feel free to check it out and even go to File > Make a copy … if you’d like! (But please, please, please … don’t request access. Just make your own copy. Thanks!)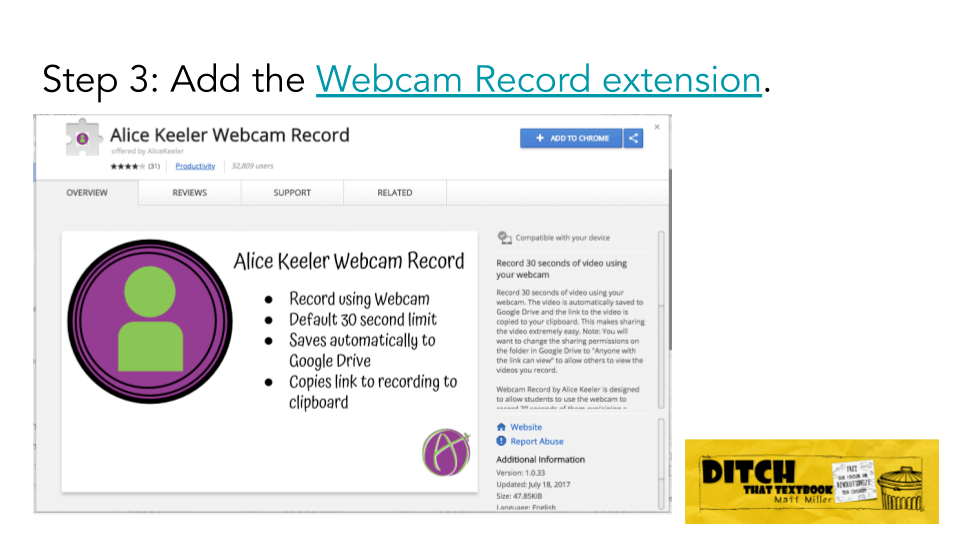
Step 1: Plan out videos to include in your story.
Trying to create an Instagram story about class content on the fly can be a disaster. A little planning ahead can help to ensure success.
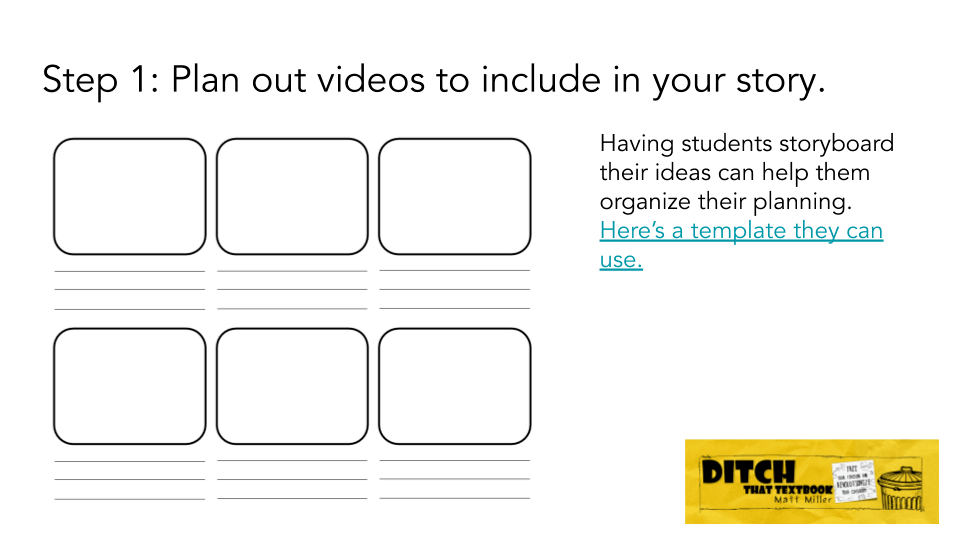
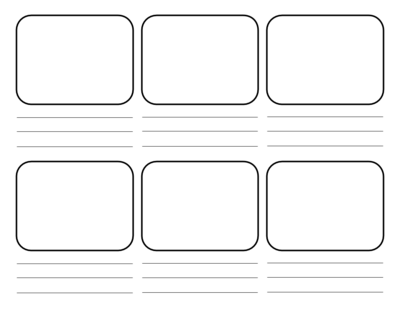
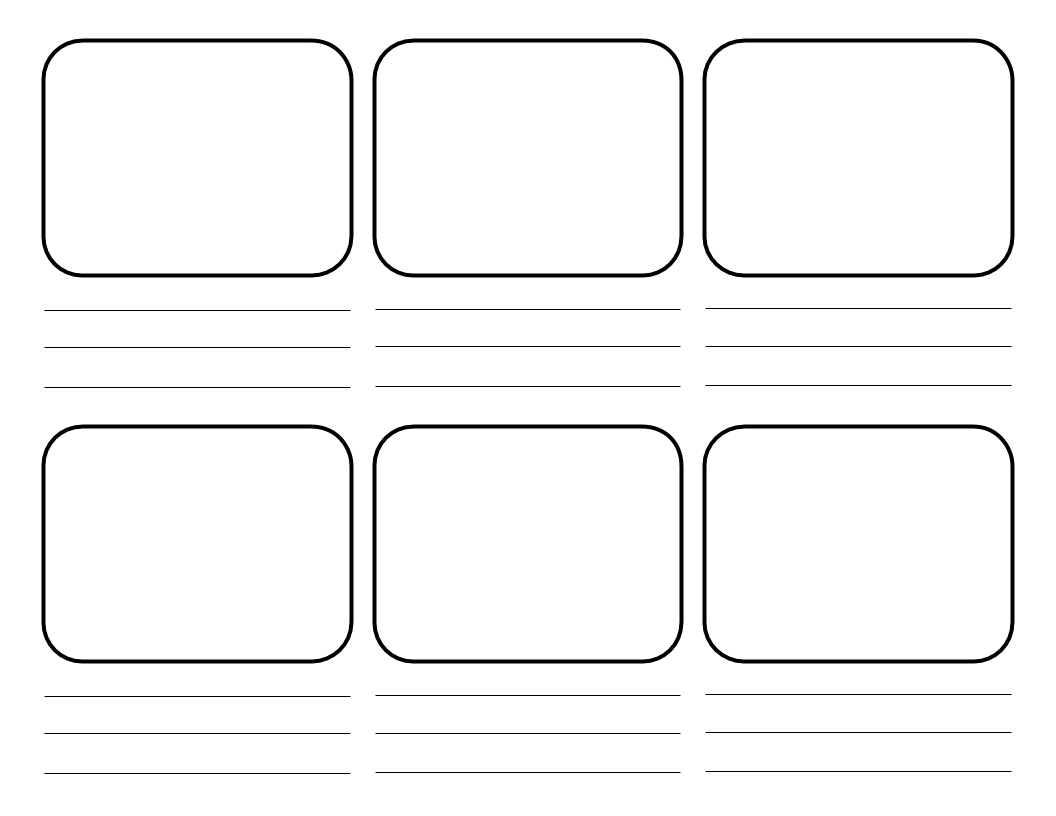
Using a simple storyboarding concept — a sketch and a few lines of text for each scene — helps students think through the whole process cohesively.
Here’s a storyboard template you can copy from Google Drawings!
Step 2: Create a Google Slides presentation.
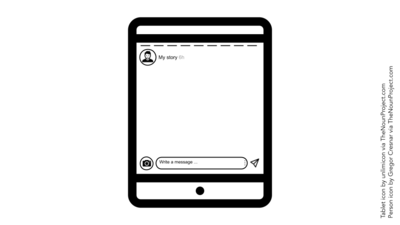
You could have students create a brand new slide presentation and build the whole Instagram Stories interface from scratch.
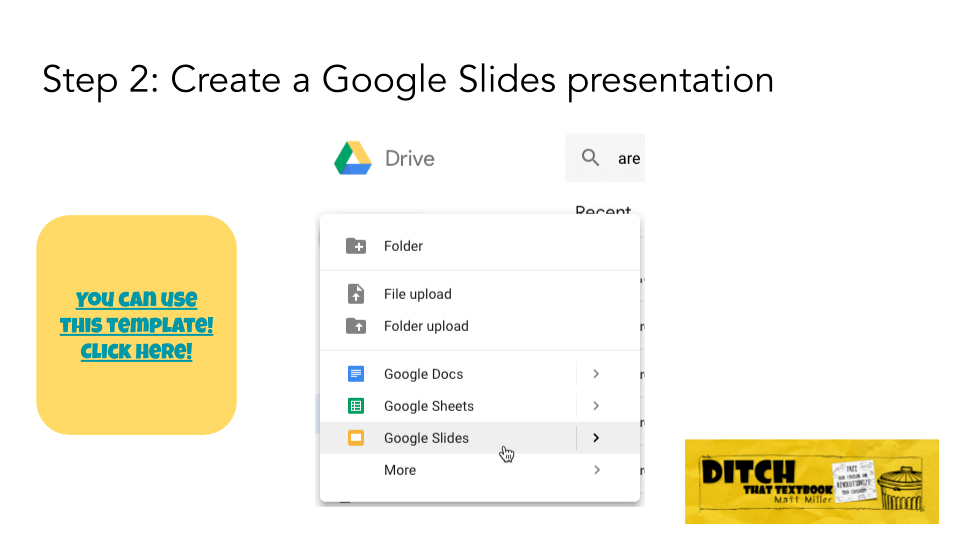
Once you’ve done that, feel free to duplicate the slides as many times as you need (or delete out the extras you don’t need).
Step 3: Add the Webcam Record extension.
Do you want your students to be able to add short videos to their Instagram Stories in addition to images?
(Hint: The answer is YES.)
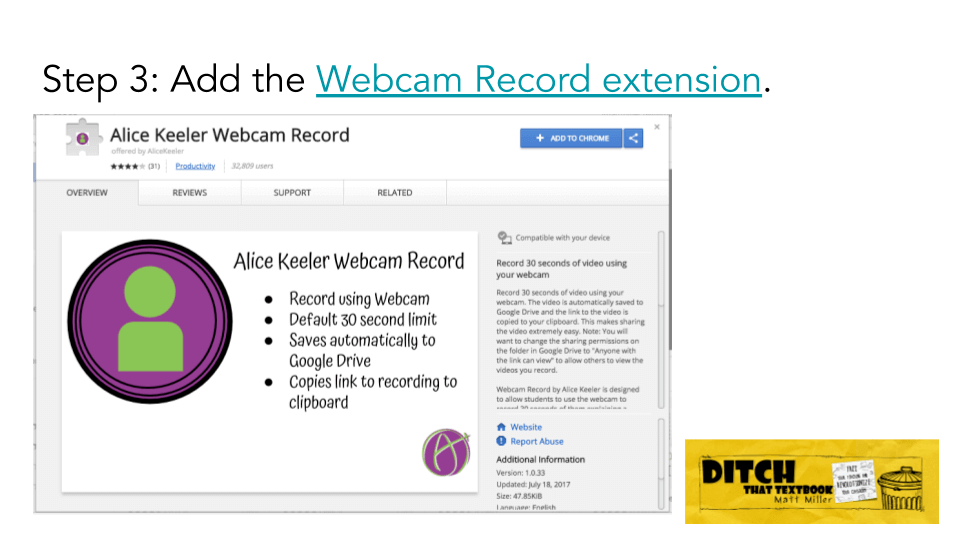
If you’re using Google Chrome (hopefully the answer here is “yes” too!), add the Webcam Record extension by Alice Keeler. It lets you add video clips of 30 seconds (or less), which are PERFECT for Instagram Stories.
You should only need to do this once. Once it’s installed, it’ll stay there until you remove it.
Step 4: Record some video (and/or add some images).
Now’s where it gets fun.
Students can use the Webcam Record extension to record videos. They’re saved in Google Drive. Once they’re done recording, have them go to Insert > Video > Google Drive.
They can also go to Insert > Image > Camera to shoot a still image with your Chromebook/laptop’s webcam. (If you’re using the Google Slides app, just shoot a photo with the camera app and insert it from the camera roll.)
Students can also use images they find on the web … but be certain that they have the rights to use them. Creative Commons images (with attribution) and public domain images (no attribution needed) are useable. One of my favorite places to get images is Photos for Class (photosforclass.com).
Step 5: Insert videos from Drive.
If student shoot videos with Webcam record, they’re saved into Google Drive.
Students may try to insert those videos and they may look totally black.
Here’s the problem …
Often, it takes those videos a little time to process before they’re totally ready. If the videos show up as totally black, they’re just not ready yet. Leave them in the oven a little longer to finish cooking.
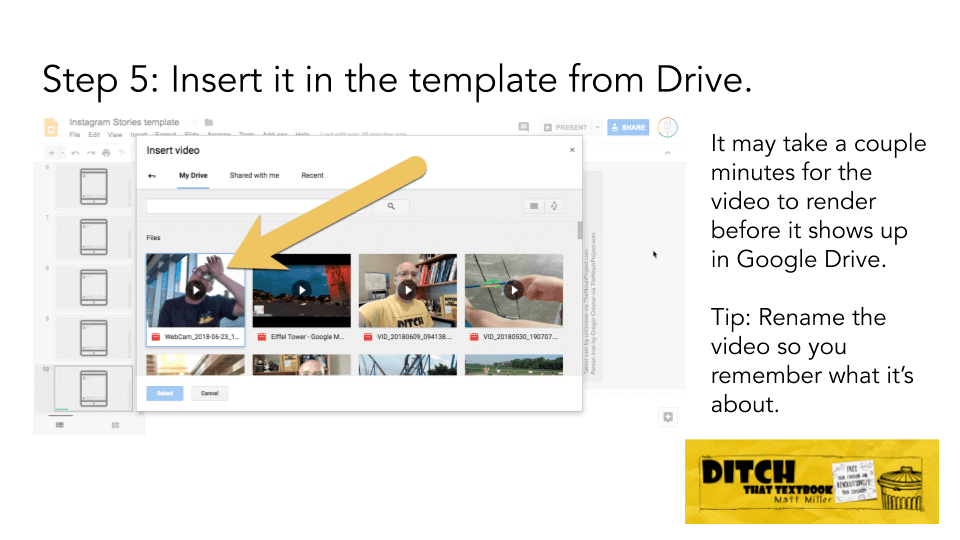
Also, once the video is finished, it’s a good idea for students to go into Drive and rename the file so they know which video is what later.
Step 6: Make videos autoplay when presenting.
When students add videos, it’s good if they click on the video and then click the “Format options” button in the toolbar (see image above). They should select “Autoplay when presenting.”
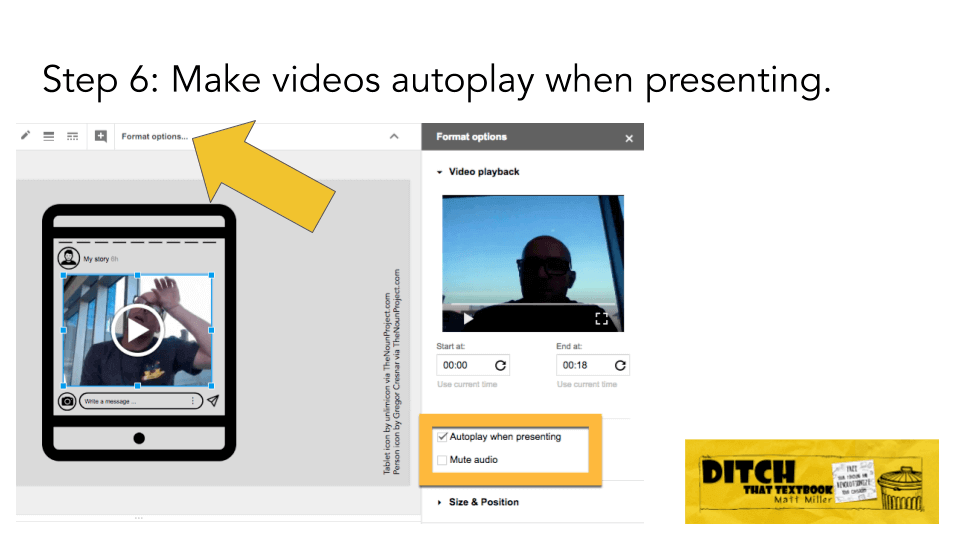
This isn’t a deal-breaker if they don’t do it. However, it DOES make the experience more like real Instagram Stories because those videos DO autoplay.
Step 7: Add videos and images to the template.
Have students add as many videos and images as they need.
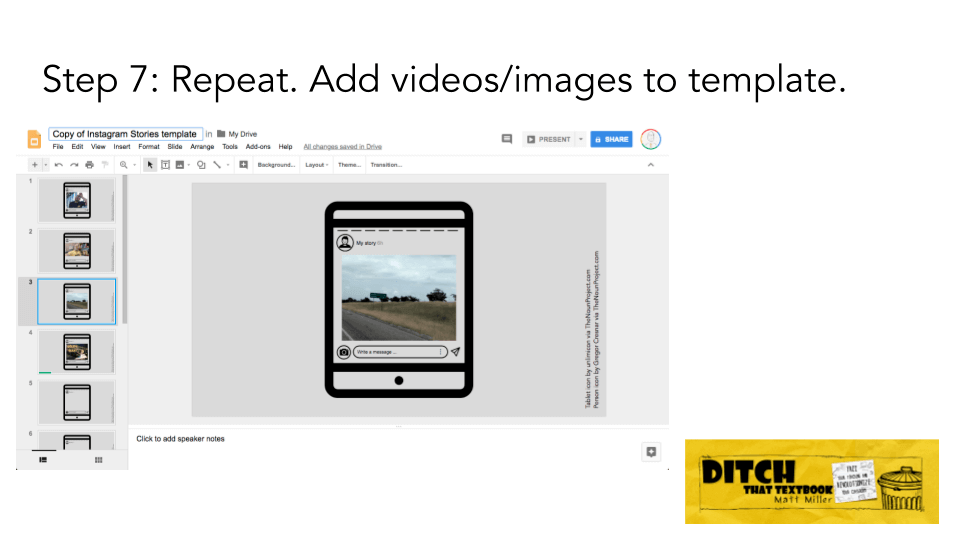
If they run out of slides, they can always duplicate the ones they have to make more …
- Laptop/Chromebook: Right-click the thumbnail on the left and choose “Duplicate slide”.
- Laptop/Chromebook: Select the slide you want to duplicate and push Ctrl+D (Windows/Chromebook) or Cmd+D (Mac).
- iPad app: Long-press on the slide you want to duplicate and copy it. Then paste it.
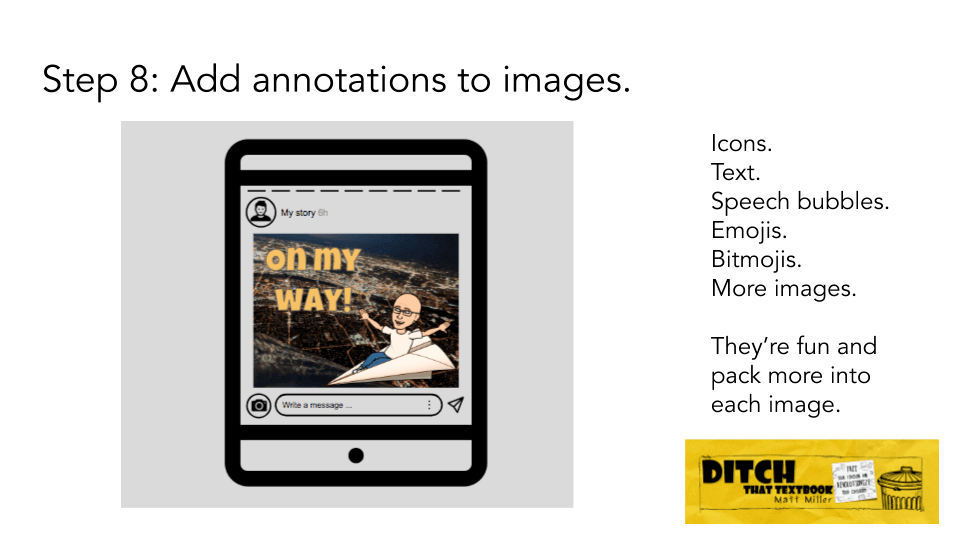
Step 8: (Optional) Add annotations and extras to images.
Adding icons, text, speech bubbles, emojis, Bitmojis and more can make your Instagram Stories even more fun!
Here are some tips for adding them:
- Icons: There are LOTS of sources for icons, but my favorite is TheNounProject.com. If you use their icons for free, it’s under a Creative Commons license and you’ll need to provide attribution. (A simple, small text box at the bottom of a slide will do it.)
- Text: Simple text boxes are great, but don’t forget word art! (Insert > Word art) This gives you more control over the appearance of the text, including a border around letters.
- Speech bubbles: Just go to Insert > Shape > Callouts for several speech and thought bubbles.
- Emojis: If you’re using a mobile device, this is no big deal. With a laptop or Chromebook, use an emoji keyboard extension for Google Chrome like this one.
- Bitmojis: Go to bitmoji.com for these fun cartoonish characters that look like you! You’ll need the mobile app to make one. Caution: Not all Bitmoji images are appropriate for school! If you’d like to provide appropriate ones for students that you choose, this post shows how you can do it!
Step 9: Present slides to watch your story!
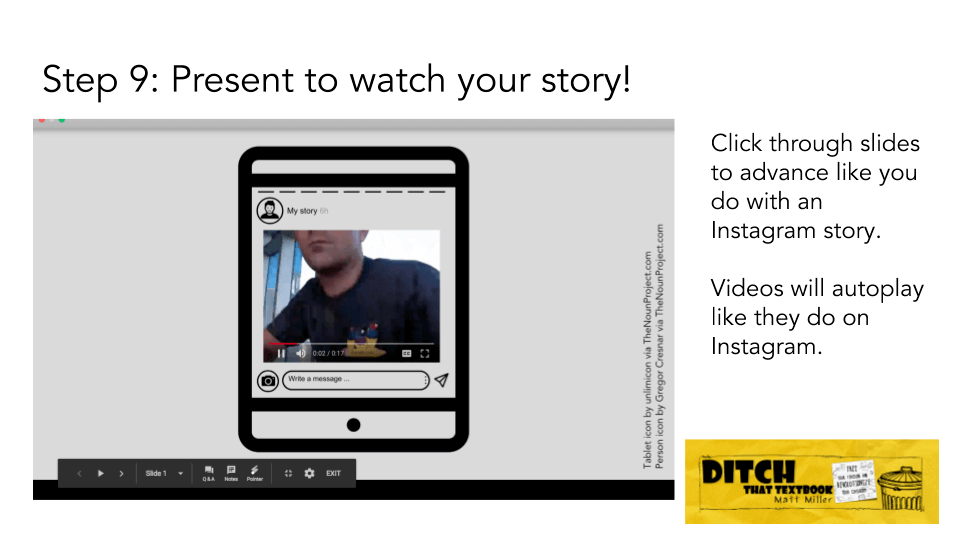
Clicking the “Present” button will put the Instagram Stories magic on display.
When in presentation mode (if you selected it), videos will autoplay. Students can click through slides with images.
Have students present their stories in front of the class on a projector or smart display!
Or … if you want to try something different …
Try a gallery walk. Have students bring up their Instagram Stories on their own devices and set them on their desks. Then, everyone stands up and walks around to each other’s devices. They click “present” and flip through each other’s stories.
It gets students out of their seats. (We all know that being too sedentary isn’t good on kids — or anyone! — and movement has physical and cognitive benefits.)
If students share their Instagram stories with the class, they’ll be able to interact with each other through comments! It’s an easy way to add a layer of collaboration and communication to the activity.
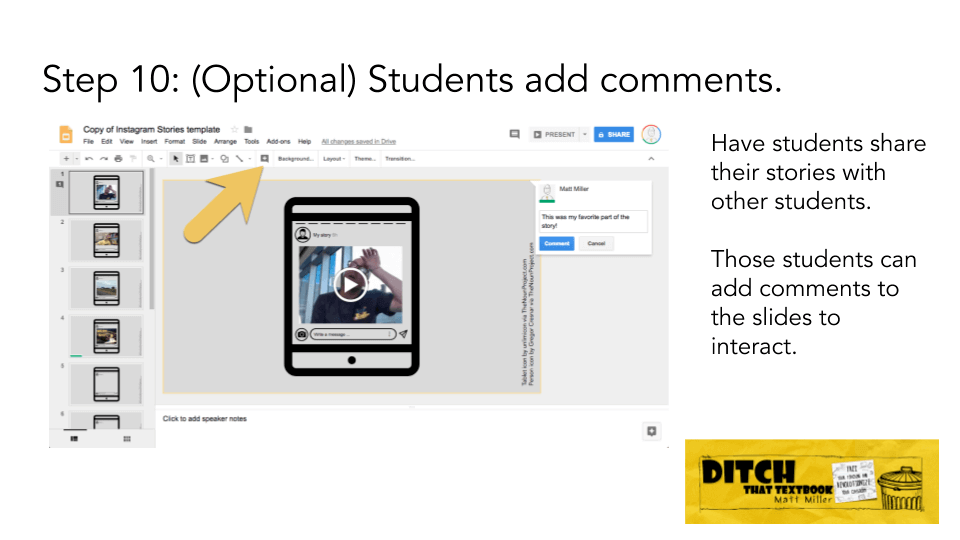
An easy way to do that:
- In Google Classroom or your learning management system, add a new announcement for their Instagram Stories assignment.
- Make sure students can add comments to the announcement.
- Students open their Instagram Stories and click the blue “Share” button in Google Slides.
- They change the sharing settings to “Anyone with the link can comment” or “Anyone in [your organization] can comment”.
- They copy the link to their Instagram Stories slide presentation.
- They paste the link in a comment in the announcement in Google Classroom or your LMS.
- They click each other’s links to open them and add comments.
That’s it!
Follow those step-by-step instructions and you’ll be on your way!
You and your students will be creating with the content they’re learning in your class. Plus, if they’re familiar with Instagram Stories, they’ll be tapping into a skill they already use in their everyday lives — creating stories!

Looking for FREE Tech Like A PIRATE resources?
You’ll find a treasure trove of additional ideas and activities related to the book at TechLikeAPirate.com!
For notifications of new Ditch That Textbook content and helpful links:
Are you looking for quality, meaningful professional learning that both equips and inspires teachers?
Matt provides in-person and virtual keynotes, workshops and breakout sessions that equip, inspire and encourage teachers to create change in their classrooms. Teachers leave with loads of resources. They participate. They laugh. They see tech use and teaching in a new light. Click the link below to contact us and learn how you can bring Matt to your school or district!
Is Matt presenting near you soon? Check out his upcoming live events!





blm
[…] Read original blog post […]
[…] Create Instagram Stories using Google Slides where students demonstrate a skill and teach others through […]
[…] the Instagram Stories template for Google Slides. (Or download it as a PowerPoint to use with […]
[…] But that doesn’t mean you can’t steal some of their templates and ideas. Why not create Instagram profiles of historical characters? Or Amazon and Yelp reviews of government policies? Maybe Snapchat updates […]
[…] Give students a slides template that recreates the Instagram Stories experience. They show what they know with images and videos! Click here to learn how! […]