Unboxing videos can be a really fun, effective way for your students to show what they know. Here's how to use this activity in your class!
Wait ... really? An unboxing video? People really record themselves opening boxes -- and upload them to YouTube? And people really watch them?
Yes! Unboxing videos are a hit on YouTube. Videos of people opening electronics, toys, makeup, and more are viewed millions of times on YouTube.
Chances are your students have probably watched an unboxing video -- or are familiar with the genre.
Unboxing videos can be a really fun, really effective way for your students to show what they know. Instead of showing off a box full of makeup, students can open a package of items sent by or to a character you've just met, from a time you're learning about, from a location you're studying.
Open the box. Show and describe what's inside. React to the contents. Fill the viewer in on the backstory or history.
Unboxing videos have several important components that can translate into a great academic task:
- The audience: Who is watching the video?
- The recipient: Who is receiving the box? Why?
- The sender: Who is sending the box? Why?
- The setting: Where is the recipient opening the box? At what time?
- The box: What does the box look like? What kind of packaging is there? Is there a message on it?
- The contents: What items are in the box? Is there a note in the box? What is the significance?
While creating a video with all of this, the student is constantly asking: How does this show what I've learned?
In this post, you'll learn how to create unboxing videos with your students. (Click the links below to jump to a specific section.)
Example unboxing videos
To understand what unboxing videos are all about and get ideas for creating them in the classroom, let's take a look at some examples.
Petite 'n Pretty PR MAKEUP UNBOXING!!! by Jessalyn Grace
Jessalyn is now a 11-year-old YouTuber who has more than 50 videos with +1 million views. Her subscribers look to her for videos on clothing, school supplies, her daily routines, and more.
- She does a nice job of showing the viewer the items in her box -- many times in a close-up view.
- Her setting is on her bed in her bedroom, which fits with the message she's sending nicely.
- She sets up her video clearly by describing what she's unpacking, why, and even why it's OK that she's using makeup as young as she is.
Unboxing The Top 10 Sneakers of 2018 by Harrison Nevel
Harrison is a sneaker and clothing YouTuber. His channel is full of videos of rare sneakers, clothing reviews, deals, and shenanigans and tricks he's played.
- His introduction takes a long time and doesn't really add anything for us, the viewers. Brevity is key!
- He describes each shoe thoroughly, and even makes sure to show us the packaging and anything else included.
- He uses text labels in the corner of the video to show the number in the top 10. He could have added the name of the shoe to those numbers to make it more complete.
Samsung Galaxy Fold Unboxing: Magnets! by Marques Brownlee
Marques Brownlee is a consumer electronics reviewer. He creates videos showing off cell phones, cameras, headphones and all sorts of other gadgets. One of Google's senior vice presidents called him "the best technology reviewer on the planet right now."
- Marques does this unboxing video without his face on camera. This shows that there are different ways to record any kind of video.
- He uses a variety of camera angles: top view, side view, close up.
- His audio is REALLY clear. You don't need a fancy microphone to have good audio, though. Just make sure you're close to the microphone with as little background noise as possible.
How to create an unboxing video
Now that we have a good grasp on unboxing videos, let's get to planning. Remember from before, there's a handful of key elements of a good unboxing video:
- The audience: Who is watching the video?
- The recipient: Who is receiving the box? Why?
- The sender: Who is sending the box? Why?
- The setting: Where is the recipient opening the box? At what time?
- The box: What does the box look like? What kind of packaging is there? Is there a message on it?
- The contents: What items are in the box? Is there a note in the box? What is the significance?
And again, while creating the video, the student is constantly asking: How does this show what I've learned?
The hardest part of the whole process is planning! A well planned video connects well to the content. It makes sense to the reader. And it looks good!
Thankfully, we've got you covered when it comes to planning ...
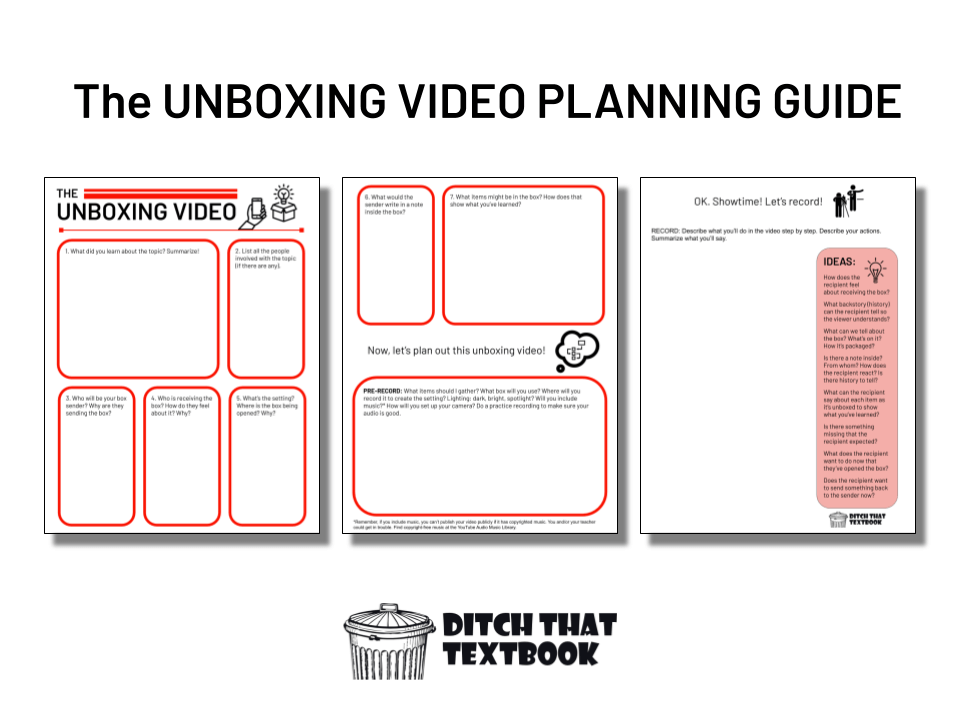
The Unboxing Video Planning Guide is a three-page document that guides students through the planning and recording process of doing an unboxing video activity.
It's available in three formats:
- A fillable Google Slides file: Make a copy of the planning guide. Attach it to a Google Classroom assignment and choose "Make a copy for each student."
- A fillable PowerPoint file: Download the PowerPoint file. Attach it to a Microsoft Teams assignment and choose "Students edit their own copy."
- A downloadable PDF file: If you want students to write on their own paper copies, download and print the PDF file. (No shame!)
Part 1: Planning the unboxing video
Before students get started recording, they have to plan. This is where they pull out all of the information and connections they've learned and find ways to apply them to the video. If this part is done well, the video becomes a great demonstration of learning. Plus, when classmates watch, the videos are great recall of previous information and show new ways of thinking about material.
- What did you learn about the topic? Summarize it! (This is a brain dump area for everything they've learned that might be pertinent.)
- List all the people involved with the topic (if there are any). (These might be characters or mentions in the video.)
- Who will be your box sender? Why are they sending the box?
- Who is receiving the box? How do they feel about it? Why? (This is the part the student plays. The recipient could be them, or they could play the part of another person.)
- What's the setting? Where is the box being opened? Why?
- What would the sender write in the note inside the box? (A note can help provide context and add extra evidence of learning -- especially when the recipient helps the viewer connect the dots.)
- What items might be in the box? How does that show what you've learned? (This is a brainstorming area to list as many items as possible.)
Part 2: Pre-record planning
This is where we start thinking about the recording itself. By thinking through the recording process ahead of time, students won't spend as much time on it on the day of recording.
- What items should I gather? (Items can be things found around the house, classroom, or school. But items in the box can be made out of paper, clay, Play Doh ... anything!
- What box will you use? Will you cover it with paper or packaging? Will there be a message or something identifiable on the box? (If students don't have the exact right box, they can always borrow one being used for something else and return it.)
- Where will you record the video to create the setting? What props, background, costumes, etc. could be used to create the setting?
- What will you do about lighting? Are you, the box, and the items clearly visible to the camera? Do you want a dark setting, a light setting, a spotlight? (Many of these effects can be created with lamps or other lights you might have lying around. For good bright lighting, consider recording in front of an open window for natural light.)
- Will you include music? (You can always play music through speakers on another device while recording. Remember that you can't publish a video with copyrighted music in it without permission. The YouTube Audio Music Library has thousands of songs and sound effects you can use in your videos for free. Just do a web search for "YouTube Audio Music Library".)
- How will you set up your camera? (Remember that your camera can be the webcam on a computer, Chromebook, tablet or smartphone. Think about what camera angle you want to use: top view, high view, low view, eye level, etc. Set your camera/device on something that will give it that angle.)
- Do a practice recording to make sure your audio is good. (The closer you stand to your microphone, the better your sound quality will be.)
Part 3: Record the unboxing video
It's showtime! In this part of the planning guide, students "storyboard" their video, writing out how the video will go step by step. They can describe their actions here, too. Instead of scripting out every word they'll say in this part, they might just summarize what they'll say. (They can always type a word-for-word script in an online document.)
Here are some ideas to think through ...
- Character introduction: The recipient introduces himself/herself. He/she gives any history or backstory about themselves and provide any context for the time and place where he/she is.
- The box: The recipient shows the box. He/she might talk about how it was received, who delivered it, etc. The recipient discusses how he/she feels about receiving the box and why it's important (or not important) to him/her. He/she looks the box over, describing the packaging as well as any writing or marks or stains on the package.
- The opening: The recipient opens the box and describes what he/she sees (and/or smells!) at first glance. He/she might show the viewer an overview of the inside of the box before pulling items out. If there's any packing material, that might be relevant to the story.
- The note: If the sender included a note in the box, the recipient pulls out the note and reads it. The recipient can also describe anything he/she notices about the note, if it has a scent, etc. As the recipient reads the note, he/she can always pause to fill the viewer in on any context about a specific sentence or point before moving on. After reading the note, the recipient can share reactions or feelings about it.
- The items: The recipient starts pulling individual items out of the box. He/she pulls each item out of the box. The recipient's immediate reaction (excitement, fear, disappointment, etc.) can be another way the student can show understanding. He/she describes the item, its significance to him/her, and his/her feelings about the item. Keep working through the items until the box is empty.
- The review: The recipient looks over the contents of the box as a whole. He/she can comment on the items as a whole, why certain things are particularly useful, important, etc. The recipient might also notice that something is missing or wasn't included and can talk about why he/she wishes that was included. Now that the box has been opened, what does the recipient want to do? Act differently? Think differently? Do something for the sender? Send something back? How does the box change things?
One of the keys to making a successful unboxing video is to play the part of the character! The student can think about how the character would talk, move, act, react, etc. This works even if the student is playing himself/herself! Get into the role and think deeply about what the character would actually do in that circumstance ... then do it!
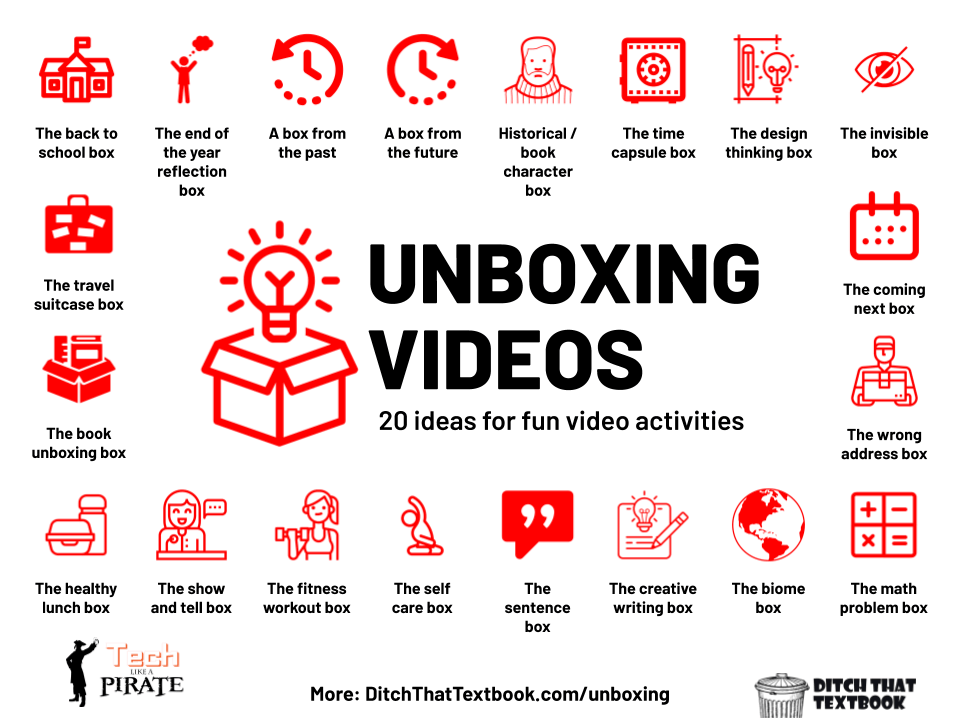
20 creative ideas for unboxing videos
How can you use unboxing videos your class? Here are some ideas to jump start your thinking ...
The back to school "get to know you" box
Students pick four things to put in their boxes that represent them. They can decorate the box to add even more personality. A note can be included as a letter to classmates telling them what they need to know about you.
The end of the year reflection box
Students pick several items that represent their journey through the school year. As they unbox those items, they explain their significance, talk about successes and struggles, and describe what they learned from them.
A box from the past
Someone from the past sends the student a box. The student unboxes it, providing context on why the person from the past would send that and what it means.
A box from the future
Similar to above.
A box from a historical figure or book character
This box can be received by the student or by another figure/character (as played by the student).
A time capsule
The student opens a box that has been buried since a specific time (i.e. 20 years ago, 100 years ago, pre-COVID times, etc.) The student, living in the future but looking back to the past, describes where the box was, what was around it, and the significance of its items.
A design thinking box
The student creates something (or envisions or prototypes something) and shares it with the specified audience through an unboxing video. During the presentation, the student tells why this was designed as it was, how it will benefit the user, and more.
The invisible box
The viewer can only see the student and not the box. The student has to describe what's in this imaginary box so well that the viewer can picture it. This is great for descriptive, creative writing.
The travel suitcase unboxing video
Students unpack a suitcase (or a box is OK, too) with artifacts, souvenirs and important items from a location they just visited. This can be a real life trip, an imagined trip, or even a recap of a virtual field trip. (See this post on easy virtual field trip ideas.)
A book unboxing video
Students can unbox items that relate to a book they just read. Their video can serve as a book trailer, letting other students know why they should read that book. (But be careful not to give any spoilers!) Teachers can also make these unboxing videos to get students excited about reading an upcoming book.
The "coming next" box
Teachers can box up items that represent something students are going to learn in the next chapter, unit or lesson. The teacher can reveal lots of details about that upcoming unit (preview vocabulary, topics to cover, etc.). Or the teacher can be vague and mysterious, leaving students curious about what's to come.
The "wrong address" box
This is a box full of items that seemingly don't go together. It's the students' job to make sense of the box or try to figure out why the sender put those items in the box.
The healthy (or unhealthy) lunch box
Students unbox a lunch with foods they've chosen that are healthy or unhealthy. They can explain their choices and why they should or shouldn't eat them.
The "show and tell" box
Students pick a few items that they'd like to share with the class and talk about why they're important to them, where they came from, how they use them, etc. Students can describe the items as they unbox them -- or they can describe them before unboxing to see if others can guess. Show and tell is fun for younger students, but you also may be surprised at how much older students enjoy it, too!
The fitness and workout box
What items do students need to stay healthy and fit? They share what they use, why they use them and how they use them. For remote learning, they can create an at-home workout box to share how they can stay healthy while at home.
The math problem box
Students can write the parts of a math problem on various slips of paper and put them in a box. When they unbox them, they can put them in order, look at the step and talk about their process for doing that step, and their overall tips for solving the problem.
The self care box
What items do you use to help yourself feel better and live your best life? Students can unbox them and give their best self care tips and tricks. (They can even unbox a device so they can play music that helps them feel good!)
The sentence box
Put individual words on slips of paper in a box. In the video, students unbox the words, put them in order, talk about the part of speech, and share sentence as a whole when they're done. The sillier the sentence, the better!
The creative writing box
Use this box as a writing prompt. The teacher unboxes several items and the students write a story about the character -- including the items from the box!
The biome box
Students collect items that are featured in a given biome. If they don't have actual physical items, they can create them with paper, clay, aluminum foil or something else. Students describe these items and why they fit in a given biome.
Looking for FREE Tech Like A PIRATE resources?
You’ll find a treasure trove of additional ideas and activities related to the book at TechLikeAPirate.com!
FREE tech tools to make an unboxing video
There are LOTS of great FREE video creation tools to use in the classroom. Some possibilities include Adobe Express, Canva, Screencastify, Screencast-O-Matic, Loom, iMovie, and Windows Video Editor.
For these unboxing videos, I'm going to focus on Microsoft Flip (flip.com ... formerly Flipgrid) because it's a great fit for what we're doing.
- Students can record from any device (laptop, Chromebook, tablet, smartphone).
- It's easy for students to watch each other's videos when they're done.
- There's lots of video editing they can do on the fly while they record and after they're done.
- Oh, and did I mention it's FREE?
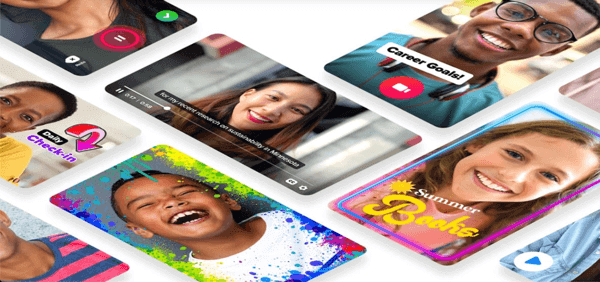
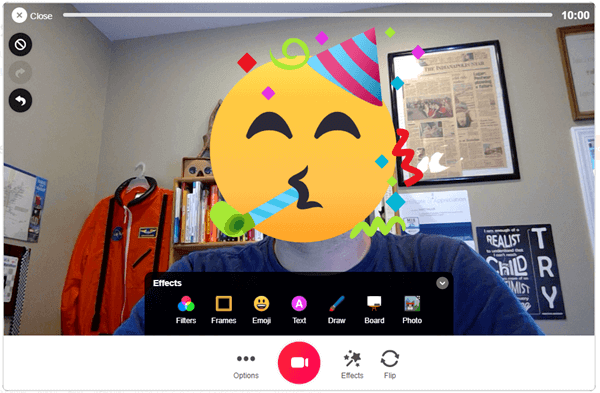
The camera in Microsoft Flip is a winner when it comes to recording unboxing videos! Students can select from a variety of effects to include in their recordings, such as ...
- Colored filters to give their videos the right feel
- Unique frames to put around their videos
- Emoji stickers to add personality and fun
- Text boxes to add details and context
- Photo stickers to add images to their recordings
Plus, they can pause the recording and start back up as much as they'd like. This lets them create the "jump cuts" that they see in their favorite YouTube videos very doable in their unboxing videos.
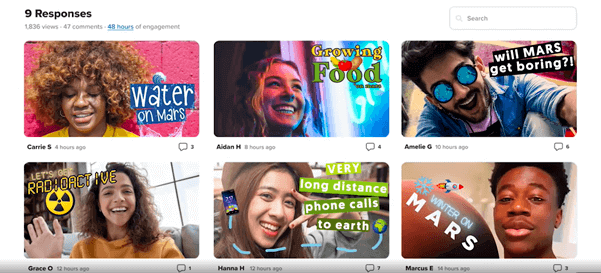
When they're done recording, your students can see each other's videos. From there, they can leave video or text replies to each other about what they've seen.
(You can turn this off by enabling moderation when you create the topic. But hey, if students are going to create cool unboxing videos, they should be able to see each other's work, right?)
Top Microsoft Flip tips for unboxing videos
1. Keep the camera steady. If you're using a laptop or Chromebook, set it someplace stable. If you're using a tablet or smartphone, prop it against something (like a stack of books) or use a tripod.
2. Use the pause button to cut from scene to scene. After a student presses record, he/she can pause the recording and then start again. While the video is paused, the student can move items around in the camera frame, go to a different location, change costume, bring in a prop, etc. Then, the student can just click record to continue on.
3. Use text to add context or label. The text boxes can be very helpful! Add them at the top or bottom of the video to label who is speaking, what you're pulling out of the box, where you are, etc. The more you can tell your viewer, the less the viewer will have to guess.
4. Show everything to the viewer up close. When you get the box, when you open the box, when you pull an item out, show them to the viewer! Put it close enough to the camera that the viewer can see it clearly. Rotate it around if necessary. If you're talking about a small detail, put it close enough to the camera so the viewer can see the small detail, too. Help the viewer to experience what you're experiencing!
5. Use filters and frames to set the scene. If you're pretending to be in the past, the "old town" or "black and white" filters might help your video feel that way. The "duotone" filter has an effect that looks like night vision goggles. The "breaking news" frame makes your video look like a TV news report. Use filters and frames only for a good reason, though ... not just because they look cool!
6. Do a whiteboard segment to recap details. Your viewer wants to see your face, your expressions, your reactions, etc. But you can use the whiteboard with some text/images to present important details or recap what you got in your box. It also provides a bit of visual contrast -- a whiteboard scene is different than seeing your face.
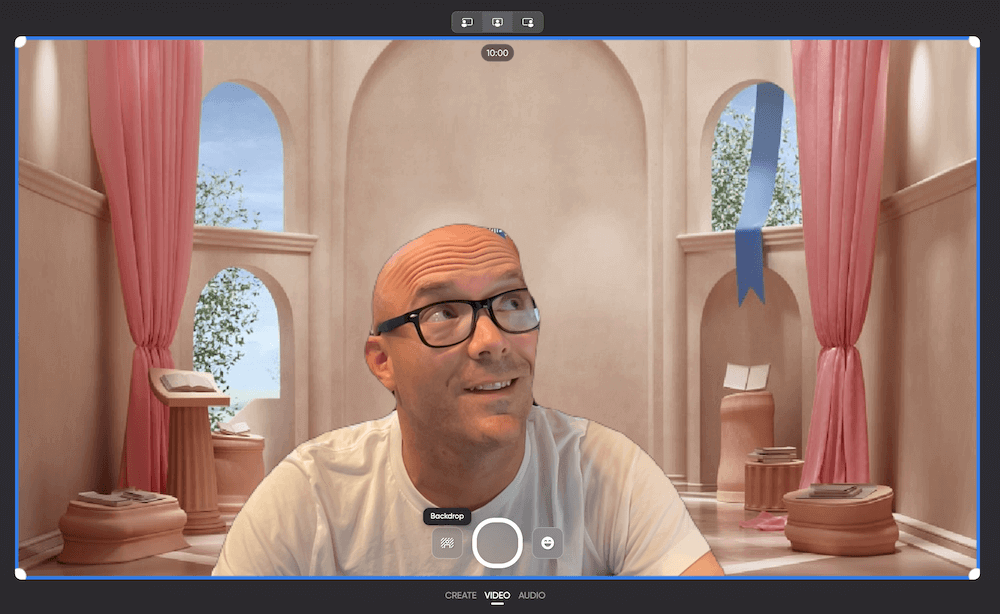
7. Use backdrops to change the setting. Backdrops superimpose a new background behind you. You can choose from those Flip offers or upload your own. This would be a great way to create a new setting for your video -- maybe a different place in the world, a different time period, etc.
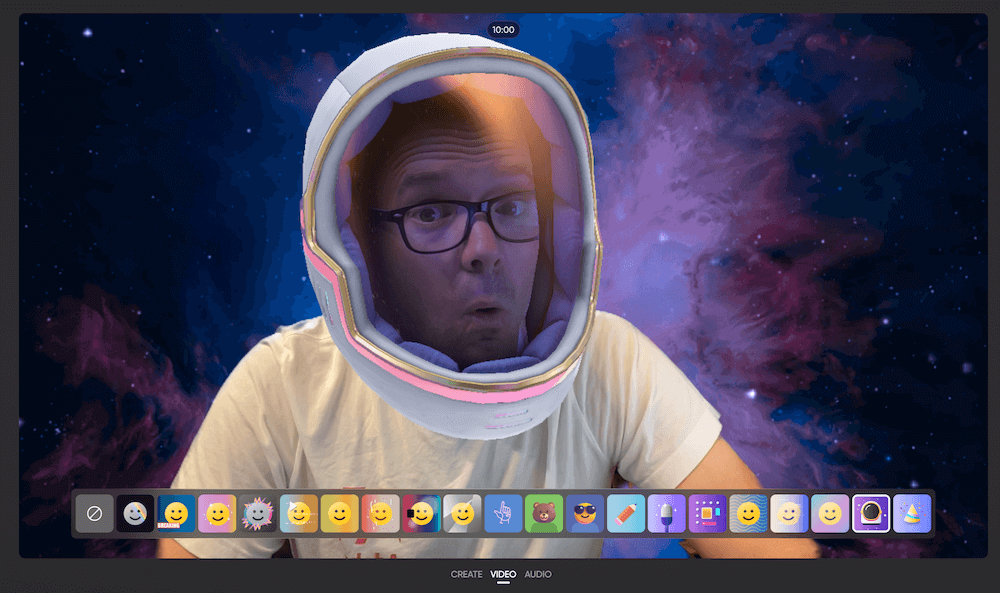
8. Use lenses to create a new experience. Microsoft Flip offers lots of lenses -- something your Snapchat-using students will relate to quickly! These lenses make it look like you're in a different place -- or are someone else. Use these lenses to level up the "wow factor" in your videos.
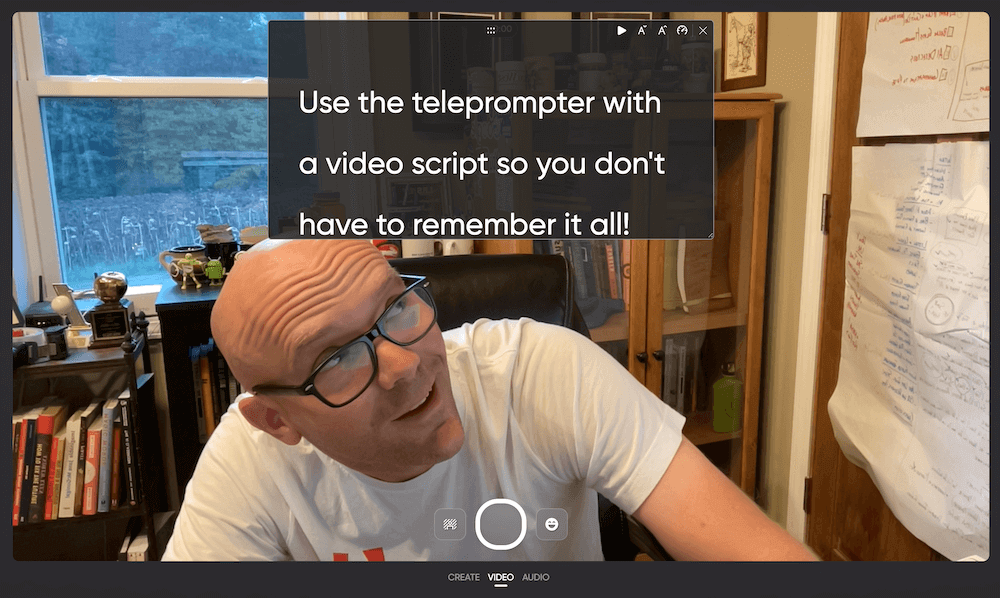
9. Use the teleprompter. Sometimes, your students might want to use a script. It's hard, though, to remember all of the words -- even in small chunks. Have them write (or copy/paste) their script into the teleprompter. (It's in the three dots menu.) They can put the teleprompter at the top of the screen -- even right over their face. It doesn't show up on the final video. (You don't have to duck under it like I am in the image above!) Adjust the speed it advances until it's just right. Then have students read the script as they record.
10. Don't be afraid to make mistakes! For lots of students, when they record, the feel like they have to get it perfect. No stuttering. No repeating themselves. No mistakes. And if they make a mistake, they feel like they have to restart the whole video. Here's reality, though ... mistakes are OK! In fact, if you're a little less than perfect in a video, it can make you more relatable and human to your audience. Encourage students not to re-record their entire video whenever they make one little mistake.
Ready to get started?
Your students will love this unboxing video activity!
How can you use this in your classroom? Share your ideas and tips in the comments below!
Also, if you have used it and have an example you can share, drop a link in a comment below. (But be mindful of student privacy when you share.)
For notifications of new Ditch That Textbook content and helpful links:
Are you looking for quality, meaningful professional learning that both equips and inspires teachers?
Matt provides in-person and virtual keynotes, workshops and breakout sessions that equip, inspire and encourage teachers to create change in their classrooms. Teachers leave with loads of resources. They participate. They laugh. They see tech use and teaching in a new light. Click the link below to contact us and learn how you can bring Matt to your school or district!
Is Matt presenting near you soon? Check out his upcoming live events!


Do you have any examples made by students?
[…] “The Unboxing Video: A Fun Classroom Video Activity”, Miller shares extensive directions for how to have students create unboxing videos for a […]
[…] The Unboxing Video: A fun classroom video activity – Ditch That Textbook […]
[…] Read the full story by Ditch That Textbook […]
This is a really unique way to get kids excited for school. Kids will love this activity, and it will make them excited to learn!
Thank you for providing me with a unique first day(s) of school activity!!!
Mind opening. Thank you so much. I can’t wait to try it !!