Seesaw lets students create, reflect and share. It’s not just for elementary classes and iPads. See how K-12 classes can use it with Chromebooks as well.
Creating is memorable. When students learn something and then can create something with it — a digital project, a story, a video — that’s something they can be proud of.
Sharing what you’ve created enhances the experience. Who wants to work hard on something that no one else sees?
Creating and sharing, all in one place. That’s the power of Seesaw (http://seesaw.me), a free platform with powerful creation tools and a place for students to see each other’s work.
In the past, here’s been the knock on Seesaw:
“It’s just for little kids with iPads.”
Elementary teachers have been the majority of its users in the past. With their touchscreens, iPads have been a perfect fit for those classes.
But Seesaw has made some recent additions — some impressive creation tools.
Plus, it’s put an emphasis on improving the experience for students with Chromebooks.
It’s not just for little kids with iPads.
I don’t think enough people know about what this tool can do — for FREE — with students of any age.
(FYI: This isn’t a sponsored post. No payment. No partnership. I think it’s a great tool that you can use for free that you should know about.)
What Seesaw can do
Seesaw boasts that it’s three tools all in one place:
- Student portfolios
- Formative insights
- Family communication
To me, it’s a place where students can make things with what they’ve learned, give and receive feedback and share it with class.
Let’s start with making things …
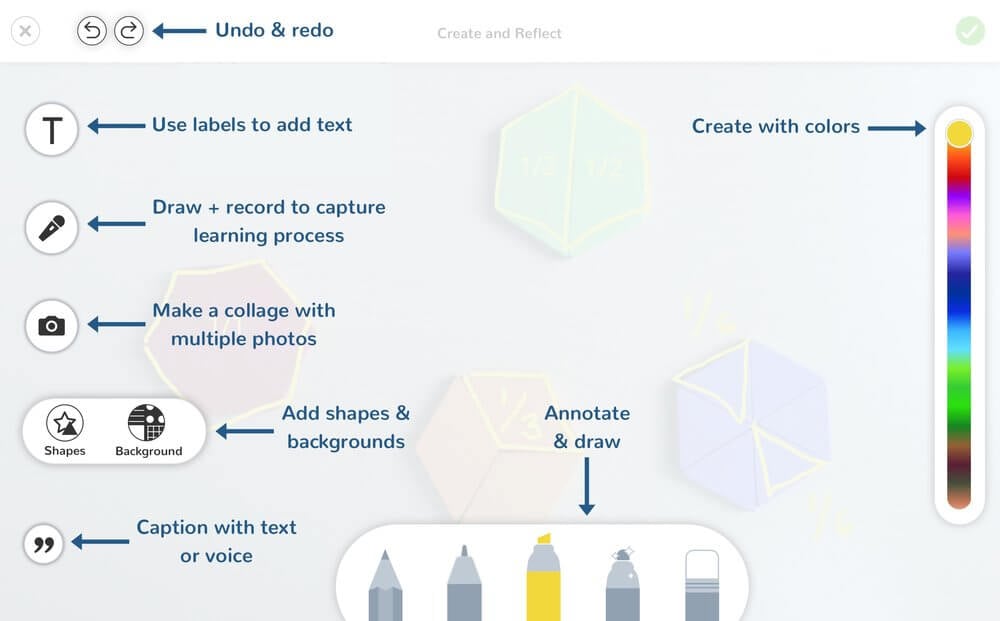
Seesaw’s creative canvas lets students capture their learning visually and share it with the class. (Image courtesy of Seesaw. Click for full-size image.)
Here’s what students can do with the creative canvas:
- They can snap pictures. They can draw on the screen. They can add text to label.
- They can record their screen — and their voice — to explain things in their own words.
- They can add background images and photo collages. They can add shapes to drag around.
Once they’ve created something, it goes in the journal.
- Students can see each other’s work to comment on it and/or like it.
- Student work and activities can be organized with folders.
- Parents can get access to see student work and comment on it, too.
Seesaw integrates with G Suite and Google Classroom.
- Grab a link to an activity in Seesaw and share with students in Classroom.
- Students can create in G Suite and add to Seesaw from Google Drive.
- You can import your Google Classroom rosters to Seesaw.
If you need more information or want to see it in action, check out these links:
- How to set up my class in Seesaw
- The Seesaw Help Center
- Webinars full of ideas for grades PK-2, 3-5, 6-8, and 9-12
- Videos and more ideas on the Seesaw YouTube channel
20 ideas for using Seesaw
How can you use Seesaw in your own class? Here are some ideas. Each one can be scaled up or down to the age/grade level of your students. Think: “How could I modify this to use in my own class?”
1. Math problem deep dives. Have students do a video recording of the canvas. They work a math problem and explain the steps they take and why they take them.
Click to watch an example of a math problem deep dive.
2. Science cycle/process drag and explain. Students can set up photos or diagrams of a cycle or process on the canvas ahead of time. They start a video recording and drag the parts of the cycle/process into place, explaining why they go there. Think: the water cycle, the Calvin cycle, the Krebs cycle.
Click here to watch a water cycle example (0:17)
3. Poster with presentation. For years, we’ve made posters with posterboard and hung them up in the hallway. Students can create posters with Seesaw. Instead of writing a bunch of small text no one will read, they can video record and present their digital posters.
4. Step by step photo collage. Show the steps with photos students have captured themselves. They can demonstrate their writing process, a science lab, or the parts of a soccer play in PE class.
5. Write text and talk. Give a writing activity a new dimension. Have students write with text on the Seesaw canvas. Then ask them to record a video explaining their writing process or the choices they made.
6. Annotate text. Take a photo (or grab a screenshot with the Seesaw Chrome extension) of something students have written. Then, using drawing, text labels and/or shapes, have students annotate and analyze the text.
Click here to watch a text analysis example (0:31)
7. Comic strips. I’m a big fan of using Google Drawings to create photo comic strips. Students can use these to demonstrate learning — and they’re the stars of the show! In Seesaw, students can bring in Google Drawings comic strips to explain or to share with the class for commenting. Or students can create comic strips with the creative canvas in Seesaw.
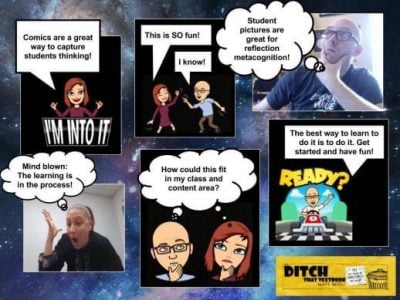
Here’s an example of what a comic strip in Drawings could look like. Students can create in Google Drawings to share in Seesaw. Or they can create and share completely in Seesaw!
8. Tell a story by moving characters. Students can add photos or images of characters on the creative canvas. It can be a story they make up or a story they’ve read/heard in class. Students do storytelling in a video by moving the characters around as manipulatives. (Bonus: Add a photo or drawing in the background for the setting!)
9. Caption this! I’ve suggested that students use a photo and add annotations, captions and speech bubbles with Google Drawings. This is a natural crossover to Seesaw. They can do all of this in Seesaw and share it with the class for liking/commenting.
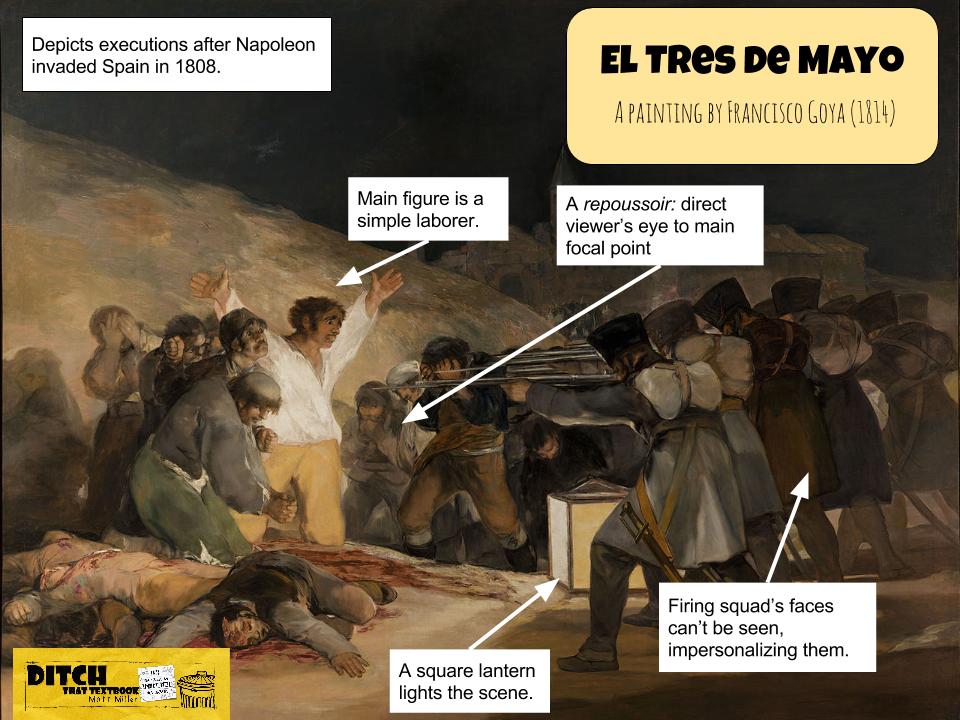
Google Drawings let students annotate images (above) and create graphics and charts. Seesaw can help them do the same.
10. Create in Drive, present in Seesaw. You’ve seen a few examples of activities that can be done in G Suite that you can do in Seesaw, too. If students create in G Suite, it’s easy to share them with the class in Seesaw. Download the G Suite activity as an image file (if available) and share. Or create a share link in G Suite and share it with the class by choosing “Link” when sharing with the class.
11. Post a question, reply with a comment. Using the “Note” option when sharing with the class, type a question for students to ponder. Students can respond with comments.
12. Spark curiosity with family/student announcements. Have a unique activity planned for tomorrow? Want to get students excited and talking? Send a family message home to parents (or a student message if students have their own phones) in the evening. Make it something fun that will spark student curiosity for the next day.
13. Record class instruction videos. Want a video of your instruction that students can reference later? Use the “Record a video” option when posting to the class. Want to record a more creative video? Use the creative canvas and create whiteboard-style instructional videos. Pro tip: the more concise, the better!
Click here to watch an interactive science report.
14. Record small group videos. Be a fly on the wall during student group discussions. Have students use the “Record a video” option to record their conversation so you can see it later.
15. Record video self assessment. Students don’t have to get all their assessment and feedback from the teacher. When they do it themselves, it empowers them to be lifelong learners. Recording a video and posting it to Seesaw gives students a place for that self assessment.
Students assessed themselves during independent reading today. We are checking for, is this a just right book!? Students were asked to record their reading and reflect on @Seesaw. LOVING this idea, thanks @ms_toland 💓💓 #FISD4 pic.twitter.com/0LtRPbEoHp
— Meredith Miller (@hosp_fourth) August 26, 2019
16. Video interviews. If you can record video of yourself, you can record video with others, too. Use the webcam in a Chromebook/laptop or the mobile app on an iPad or smart phone. With the “Record a video” feature, video interviews can be recorded and added from anywhere. Interview fellow students, parents, community members … anyone!
Mrs. Antone’s 5th graders hit the ground running!🏃♂️🏃♀️Ss engaged with one another as they conducted video🎥interviews to upload to their @Seesaw Journals.📲They will revisit their videos at the end of the year to see how they have changed as well as reflect on goals met! ⭐⭐⭐⭐ pic.twitter.com/LVo0B1oHM6
— Lloyd M. Bentsen Jr. Elementary (@bentsenljisd) August 20, 2019
17. Build community within the class. If there’s a big game, an academic competition, a music performance, take a picture. Shoot a video. Then share it to the Seesaw classroom. It’s not just for academic work, and these kinds of shares build the classroom community.
18. Grab images anywhere with the Seesaw Chrome extension. This Chrome extension makes it easy to capture a screenshot of any webpage and add it quickly to a Seesaw post. Then, annotate it and record video to take it a step further.
19. Reflect over time with portfolios. Students add their work to Seesaw throughout the school year. As the school year ends, they’re able to go back and see how their work has changed and improved. All it takes is some time and attention to the students’ growth.
Click here to watch a reading analysis.
20. Share paper/analog work digitally with a photo. Are students doing work for you on paper? No shame there! To save it for reflection later — and for class discussion about it — have students take a picture of it and share it to Seesaw.
Looking for FREE Tech Like A PIRATE resources?
You’ll find a treasure trove of additional ideas and activities related to the book at TechLikeAPirate.com!
For notifications of new Ditch That Textbook content and helpful links:
Are you looking for quality, meaningful professional learning that both equips and inspires teachers?
Matt provides in-person and virtual keynotes, workshops and breakout sessions that equip, inspire and encourage teachers to create change in their classrooms. Teachers leave with loads of resources. They participate. They laugh. They see tech use and teaching in a new light. Click the link below to contact us and learn how you can bring Matt to your school or district!
Is Matt presenting near you soon? Check out his upcoming live events!

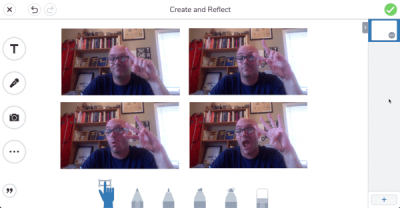


[…] out 20 Seesaw ideas with Chromebooks for K-12 classes for more […]
[…] Seesaw (seesaw.me) is a class collaboration portal. It includes a powerful creative canvas where students can record their screens, add images, draw on the screen, record voice and more. Combine images and text on the screen and record a presentation. Click here to learn how! […]