With Google MyMaps you can take your kids on an educational road trip right from your classroom.

This post is written by Craig Klement, an RTI facilitator, working with teachers and struggling students from Garland, Texas. You can connect with Craig on Twitter @CraigKlement and check out his blog at craigklement.wordpress.com.
This post comes from accepting a challenge.
I’m a regular listener of the Google Teacher Tribe podcast hosted by Matt Miller and Kasey Bell. After listening to an episode about how to use Google MyMaps in the classroom I was inspired to create a choice board using Google MyMaps as the platform. I shared my idea with the GTTribe podcast and received a challenge from Kasey. She said that she loved the idea and told me to go do it, then share.
I was up for the challenge but had two initial doubts:
1. I’m no longer in the classroom, so how would I even try this with students?
2. I’m a former math teacher and this doesn’t look like it would fit in a math class.
Despite my fears, I accepted the challenge and I can proudly say that I have successfully implemented this lesson with 75 different high school seniors that thoroughly enjoyed it. They said that it was way better than what they usually do in a math class. Students loved having the choice of what to work on along with the variety of options that I prepared for them.
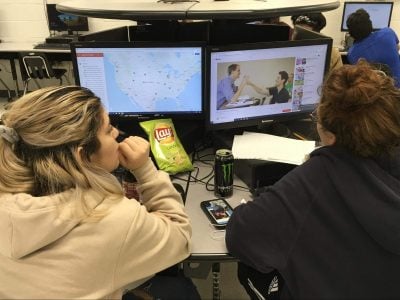 So I got high school seniors to do something not required (let that sink in), in April (has it sunk in yet?), and I dare say they even enjoyed it (how about now?). Notice the phones on the desk and not in their hands?
Note: I did encourage students to bring snacks and headphones for music, so this could be a proper road trip. And students had the option of working alone or carpool with a classmate(s).
I’ve even had teachers come ask me about the “map activity” that their students keep talking about! Apparently, the word is spreading, because I’ve had a couple of teachers from other high schools in the district ask me about this activity too.
So what did I do?
Take a look at my Road Trip Math Activity.
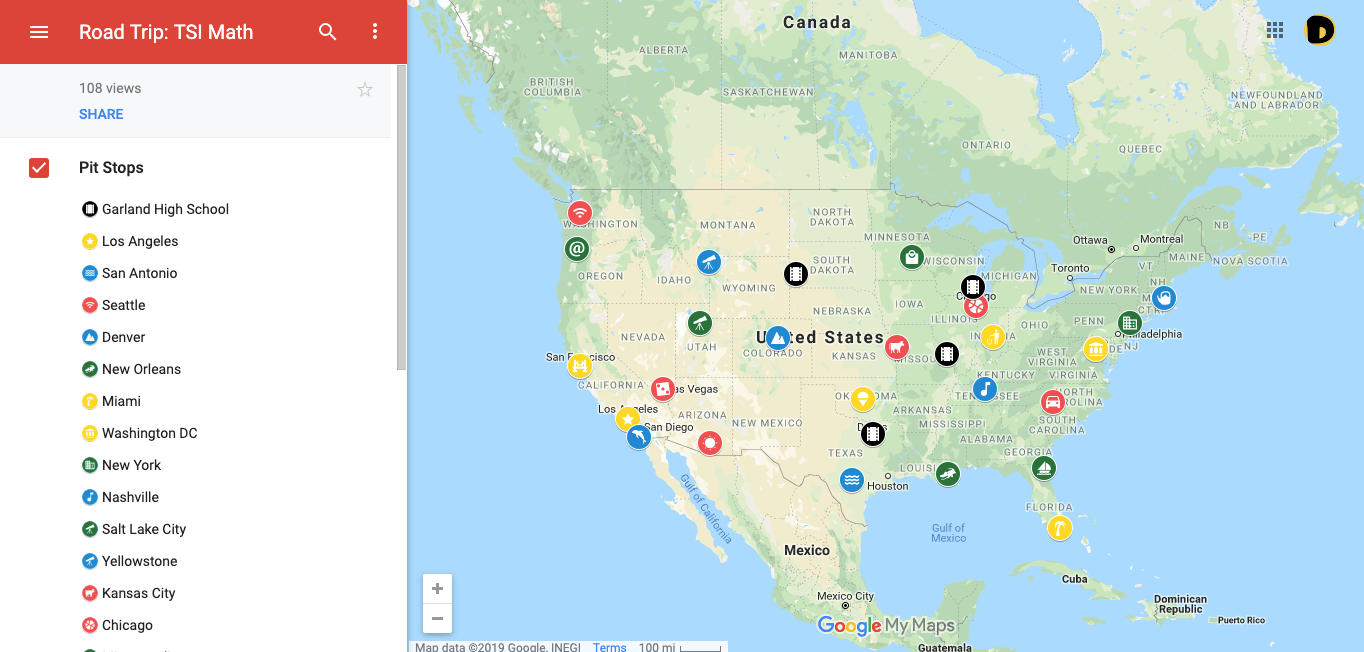
Students completed the activities as they visited each spot on the map. I utilized a variety of activities from Desmos, Khan Academy, Youtube videos/Ted Talks, and even some pictures of problems from the practice guide for the test we were preparing for.
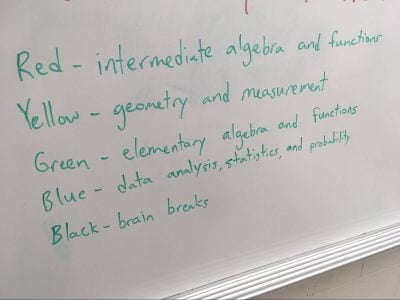 There were four main math topics that I needed to review with students, so I assigned each a color. We had an hour and a half to work on this assignment, so I told students to work on at least two of each color (then focus on the color that they needed the most work in based off assessment data).
I even threw in a fifth color for brain breaks that they could take when needed.
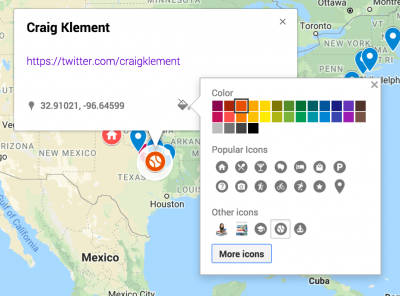
For my road trip activity, I chose touristy locations across the USA. Even these “random” locations served a purpose. I was able to relate to this group of seniors, the majority of whom I’ve never met, by talking about common places we have visited/lived, food from various locations, music, sports, etc.
To wrap up the lesson, we had a class discussion on highlights of their road trip (what they learned) and where they needed a jump start (what they are still struggling with).
Ready to create your own? Let’s get started.
How to create a Road Trip choice board with Google MyMaps
Check out this tutorial video or follow the directions below to get started. Here is a copy of my map without all the math activities. Feel free to click on the 3 vertical dots and make a copy, so you can edit as you wish.
Directions for creating your own educational road trip.
1. Create your MyMap.
- Start in your Google Drive and click on the multicolored “+ New” button.
- Scroll down to “More”, another menu will pop up.
- Finally, click on “Google MyMaps”.
2. Set up your markers. To add markers you can click the marker button and place it at the location of your choice, or search a specific location, then click + add to map.
The locations could be touristy places like in my activity or they can be more meaningful to your content. Your students could be learning about a specific region (or even city), biomes, migrations, battles in a war, or even comparing and contrasting various locations.
To make things more visual, you can edit the markers with different icons and colors.
3. Add your activities. Once you have your pins set, then you add the sights or learning activities at each pit stop.
Some ideas you might link to:
- Videos related to your content
- A Google form or quiz for students to complete
- A Slides presentation created by you or even other students
- Flipgrid link for reflection
- Even a digital escape room for a fun brain break or challenge activity
Doing this activity throughout the school year could really help you get to know your students and for them to get to know you. It’s a simple way to help build a relationship of trust.
So give it a try and take your kids on an educational road trip right from your classroom!
Related resources:
- The Teacher’s Guide to Digital Choice Boards from the Shake Up Learning blog
- Interactive Learning Menus and Choice Boards from the Shake Up Learning blog
- 60 ideas for using Google MyMaps in any content area
- 20 ways Google MyMaps can enhance lessons in any class
For notifications of new Ditch That Textbook content and helpful links:
- like Ditch That Textbook on Facebook
- follow @jmattmiller on Twitter
- check out the #DitchBook community on Twitter
- follow Ditch That Textbook on Pinterest
- subscribe to the Ditch That Textbook YouTube channel!
Interested in having Matt present at your event or school? Contact him by e-mail!
Matt is scheduled to present at the following upcoming events:
[getnoticed-event-table scope=”upcoming” max=”15″ expanding=”false”]

[…] Road trip choice boards with Google MyMaps […]
[…] toe, bingo, complete x number out of y possibilities, etc) and I even had the privilege to write a guest blog for Ditch That Textbook on using Google My Maps as a platform for a choice […]
[…] esta experiencia del profesor estadounidense Matt Miller quien con sus alumnos planifican un Road Trip (viaje por […]
[…] the 12th episode of Season 2, I talk with Craig Klement about spicing up standardized test prep, Google My Maps choice boards, digital badges, eduProtocols, Google Forms, Google Sheets, pre-filled form links, some Google […]