This post is written by Sam Kary, Founder and CEO of New EdTech Classroom, a teacher-led professional development startup dedicated to helping educators design innovative classrooms with technology. Sam is a former classroom teacher and instructional coach of a decade who spent his early career skeptical of technology’s role in education. Sam is an ISTE Certified Educator, keynote speaker, and frequent presenter at national edtech conferences. Follow him on Twitter @newedtechclass or visit his website at www.newedtechclassroom.com.
Teachers, administrators, students, and families have faced challenges over the past two years,
In light of that, I remain optimistic that pandemic-induced remote teaching will ultimately lead to long-overdue changes in education.
There’s still work to be done, but today ...
- more families have access to high-speed Internet,
- more students have access to personal computers, and ...
- more educators have been brought up to speed in how to teach with technology.
Now, more than ever before, we are poised to take advantage of technology’s potential to turn the vision of creating a more student-centric education system into a reality.
Yet we also risk slipping back to the comfort of 20th century practices if we don’t continue educating teachers how to best make use of the powerful technology tools at their disposal.
Fortunately, CAST’s Universal Design for Learning (UDL) framework offers educators a clear vision of what meaningful technology integration should look like. Unfortunately, UDL still remains purely a theoretical model in the vast majority of schools.
UDL isn’t something you just roll out of bed and start implementing. Designing accessible, choice-based lessons that foster student agency through hands-on learning demands specific skills and knowledge at the intersection of technology, pedagogy, and content (TPACK).
We need a practical, replicable process for training teachers how to do it.
That's why my team and I have created the 7 Core 21st Century Teacher Competencies.
Our goal: identifying knowledge educators must develop to create universally designed lessons.
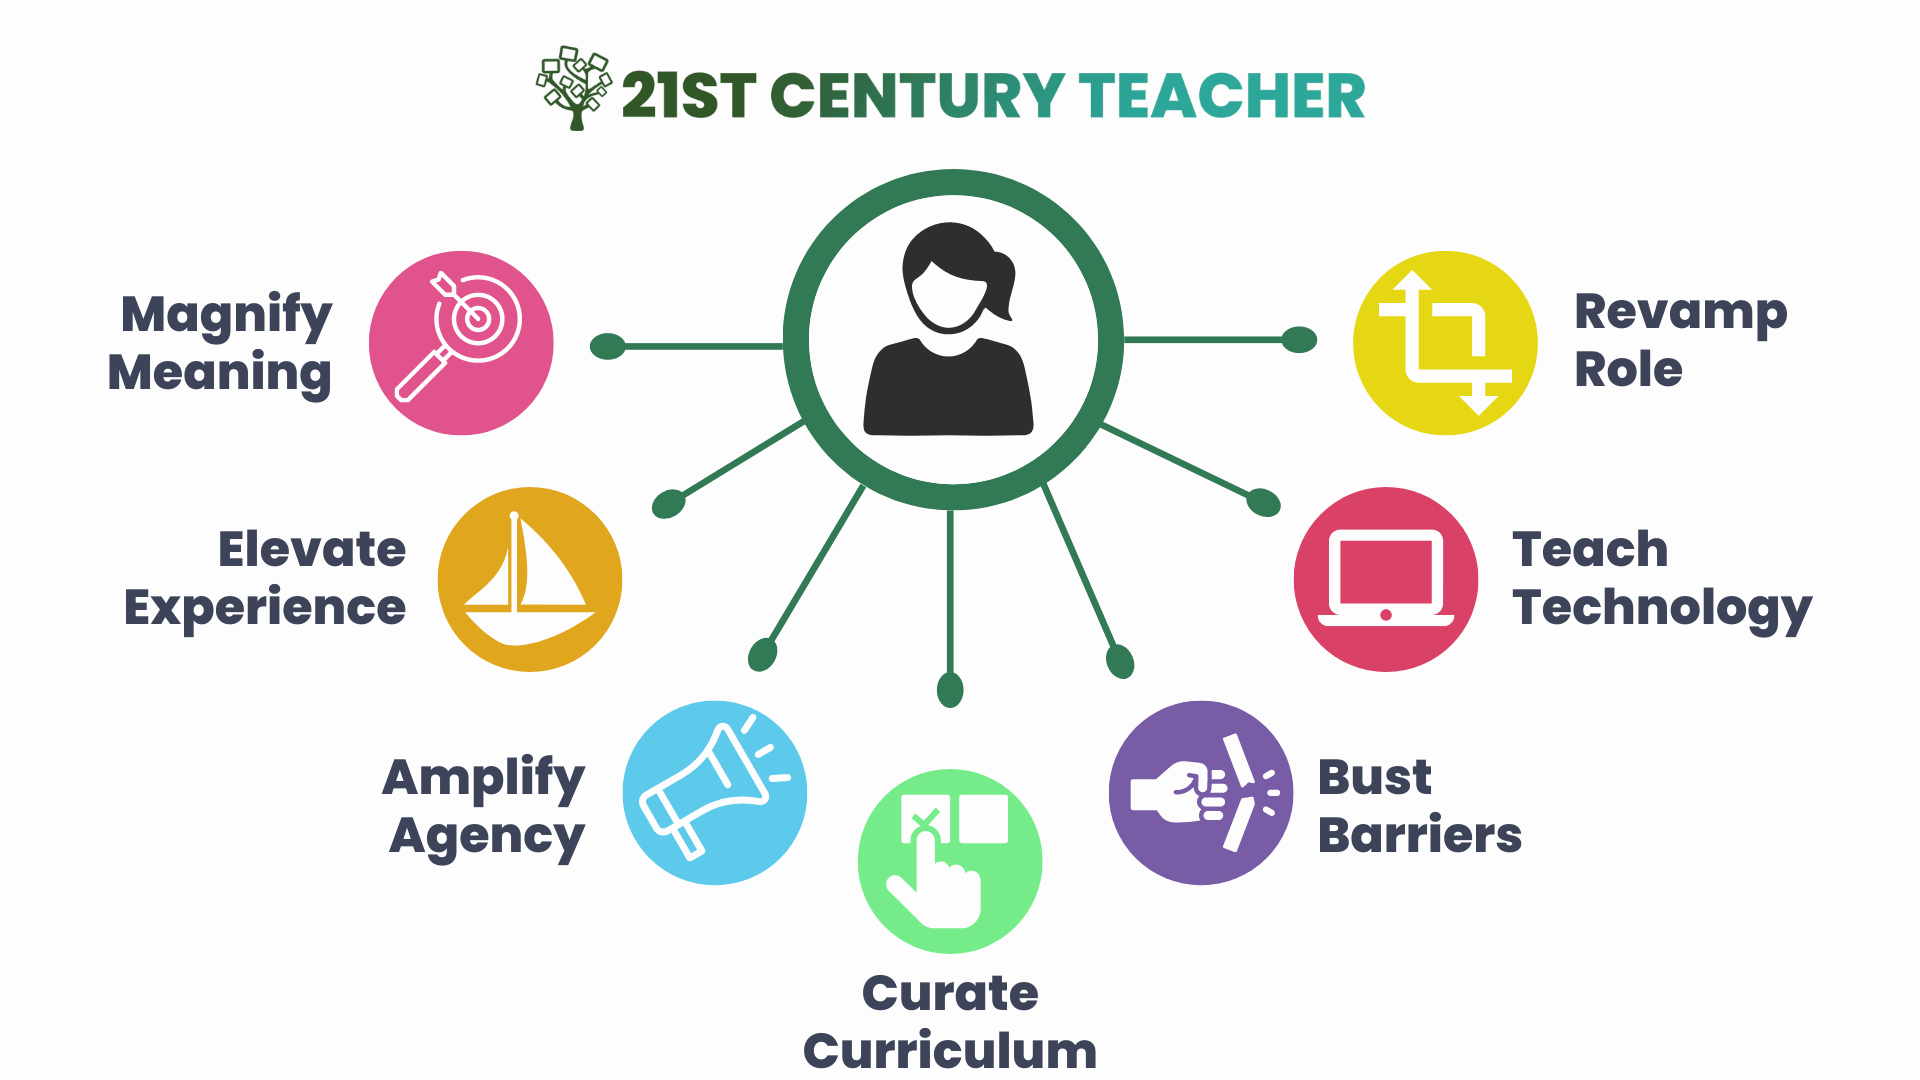
The 7 Core 21st Century Teacher Competencies
Click on any button below to jump down to its section.
Magnify Meaning
The first competency, Magnify Meaning, refers to an educator’s ability to help students understand why what they are learning is important.
Effectively communicating “the why”, while also guiding students to find their own sense of purpose, is a foundational skill upon which the other competencies are built. Providing “multiple means of engagement” through helping students find their “why” is also one of the pillars of Universal Design for Learning.
Designing lessons with essential questions is one of the most effective ways to keep “the why” front and center. In general, to qualify as an essential question, the question needs to be:
- Open-ended
- Thought-provoking/Interesting
- Timeless/not bound to your specific class
- Important
Teaching with essential questions can feel intimidating, but doing so doesn’t need to require a wholesale curriculum revamp. To the contrary, incorporating a bigger picture “why” into your lessons is something you can start doing next week.
Here’s how:
Step 1: Imagine a student has just asked you, “Why do I need to learn this?”
Come up with list of 3-5 reasons why what you teach is important. Be as specific as possible, and dig deeper than generic answers like “preparing students for their futures.”
For example, if you teach math, you might say:
“It’s important for students to learn math because math helps people understand real world phenomena.”
Step 2: Rephrase the essence of why what you teach is important in the form of 3-5 overarching essential questions. “Overarching” just means that it’s a question that describes the bigger picture why. Think your entire school year, not just the lesson you are teaching next week.
Future Focused Learning has put together a list of 100 essential questions in all subjects if you need some inspiration.
For example, an overarching question related to my example from Step 1 might be: “How does math help us understand the world around us?”
Step 3: Write a topical essential question based on a unit or upcoming lesson.
Look at your next unit or lesson and determine how the material relates to one of the overarching essential questions you just wrote.
For example, if I were planning a square roots unit and needed to relate it to my overarching question, I could write a topical essential question like,
“How do square roots help us better understand the world around us?”
Note: if your upcoming lesson doesn’t relate the bigger picture “why”, you might want to consider ditching that lesson!
Step 4: Determine an authentic way for students to engage with the substance of the essential question.
Essential questions alone will only take your students so far. In order to truly Magnify Meaning, students will need to grapple with those questions by applying what they are learning in an authentic context.
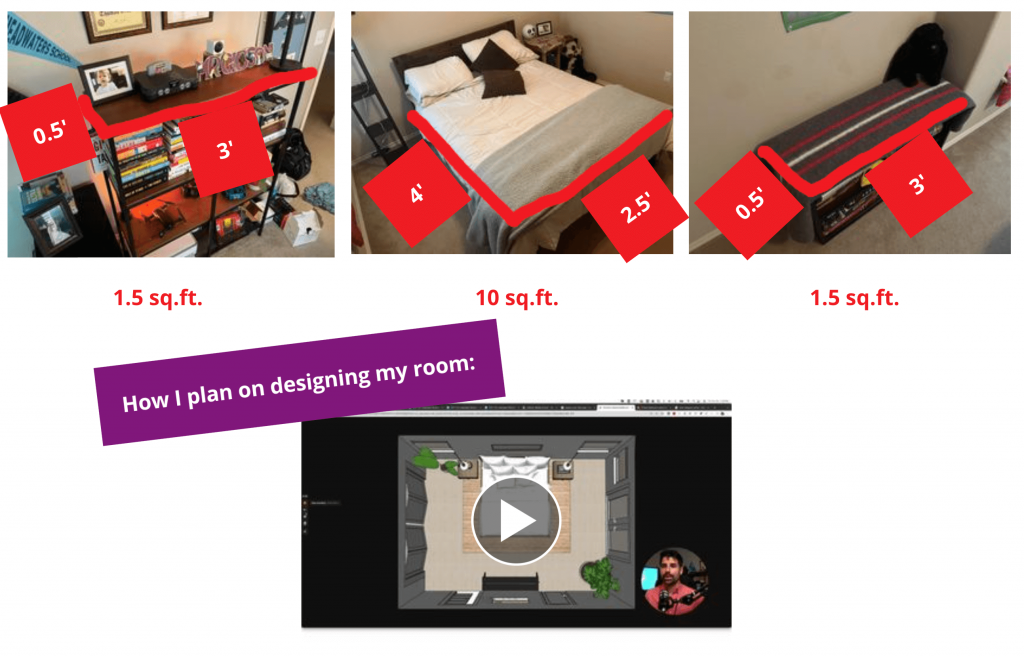
For example, to grapple with how square roots help students understand the world around them, they might create a design of their future dorm room using square roots.
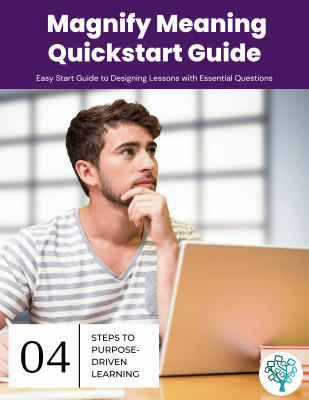
We’ve put these steps together with some additional resources in the following Quickstart Guide for your reference:
Elevate Experience
The next competency, Elevate Experience, pertains to creating active learning experiences where mistakes are embraced as a crucial part of the learning process. Elevate Experience also directly correlates to another core pillar of UDL: providing multiple means of action and expression.
Project-based learning is one of the most effective ways to Elevate Experience, particularly when students are tasked with creating artifacts that engage with meaningful learning, as discussed in the previous section.
For example, one of the topical essential questions students explored in my 6th grade Ancient Civilizations class was, “How did social class impact people’s lives in Ancient Egypt?” Instead of having students take a test on the subject, students created and published green screen video skits showing how the lives of Ancient Egyptians were affected by social class.
During the process of scripting, rehearsing, filming, and editing their videos, they not only engaged with what was timeless and important about the content (how social class impacts people’s lives), they also practiced relevant 21st century skills through working together to create an authentic learning artifact.
Prioritizing active learning doesn’t always be about large-scale projects. For example, an easy way to Elevate Experience in your classroom is by allowing students to explore new concepts before you explain them.
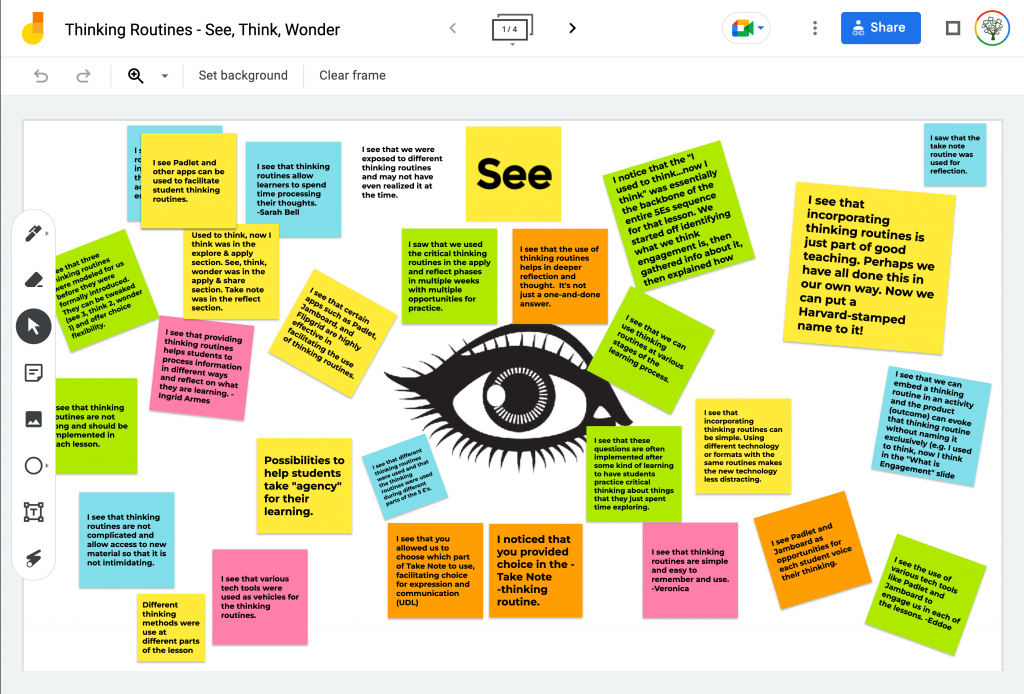
Rather than starting a lesson with direct instruction, give students a multimedia text set like the one below and have them apply the “See, Think, Wonder” thinking routine in Jamboard individually or in small groups to help them process the information.
Simply giving students time to actively explore new concepts first is a proven strategy for making learning more sticky, and having them apply a thinking routine helps ensure they remain active participants throughout the process.
Amplify Agency
Amplify Agency pertains to fostering student voice and choice with the goal of increasing students’ sense of autonomy and ownership over their learning. Cultivating internal motivation is central to two UDL guidelines: “Provide options for self-regulation” and “Provide options for executive functions.”
Choice-based learning is also at the heart of Universal Design for Learning because the simple act of making a choice is inherently an act that asserts agency. Offering students choice can also feel intimidating, which is why I recommend starting with “single variable” choice boards, which still afford the teacher considerable control while also laying the groundwork for more student-centric strategies like Genius Hour.
If you are brand new to choice boards, I’d recommend starting with a Progressive Choice Board, which you can learn more about here.
Another beginner-friendly option is a Thematic Choice Board where students choose subtopics under the umbrella of a larger theme. This type of choice board works well for Jigsaw activities, or can serve as a jumping off point for students to dive deeper into exploring a specific subtopic that most interests them.
If you’ve been Elevating Experience by introducing different projects throughout the year, you could consider using a Pick a Project Choice Board.
Prior to using this kind of choice board, I’d highly recommend going through the process of completing each of these projects at least once as an entire group. Then, after students understand how to do each project, put all of the projects on a single choice board and allow them choose how they’ll show their learning.
Pro tip: include resources to supporting documents such as tutorials and graphic organizers as scaffolds. Each project in the choice board below includes such resources for you to take and use.
In order to fulfill the UDL guideline to “vary the demands and resources to optimize challenge” you could also try a Choose Your Challenge Choice Board. The idea behind this choice board is that all students are able to choose a pathway, but they are all working toward arriving at the same destination.
Click on one of the four levels on the Choose a Challenge Choice Board below to learn how to create your own choice board based on the level of difficulty you’d like to take on yourself!
Curate Curriculum
Designing lessons that fulfill the UDL guideline to offer multiple means of representation while providing access to relevant, up-to-date information requires educators to learn how to Curate Curriculum.
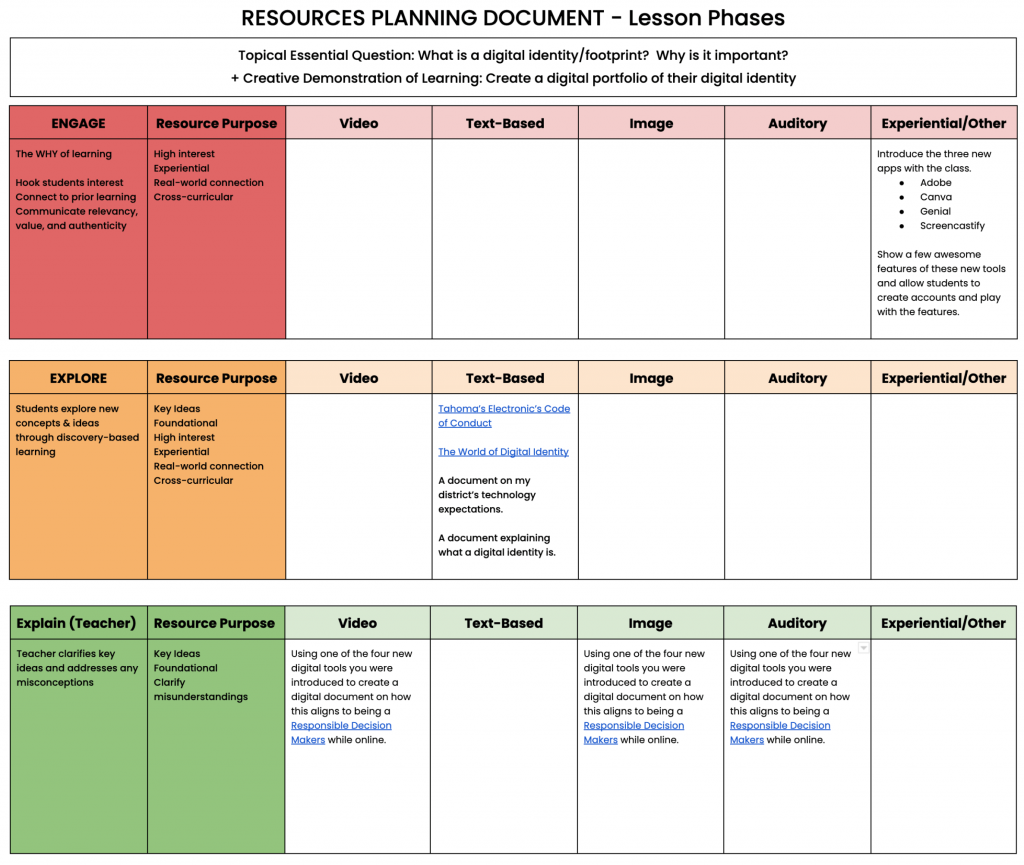
I recommend starting by taking into consideration the different types of resources you offer. If your resources are primarily text and video-based, make a point to incorporate audio, image, and even virtual reality-based resources in order to present content in different formats.
In addition to the types of resources you offer, you’ll also want to take into account the purpose of your resources. For example, you might use resources to:
- Present key ideas
- Provide a hands-on experience
- Excite or amaze
- Make a cross-curricular or real-world connection
- Build background knowledge
I know I personally gravitate more toward using text and videos to communicate key ideas, which is why I created the following graphic organizer as a way to visually organize resources based on their type and purpose, and to help remind me to add more variety.
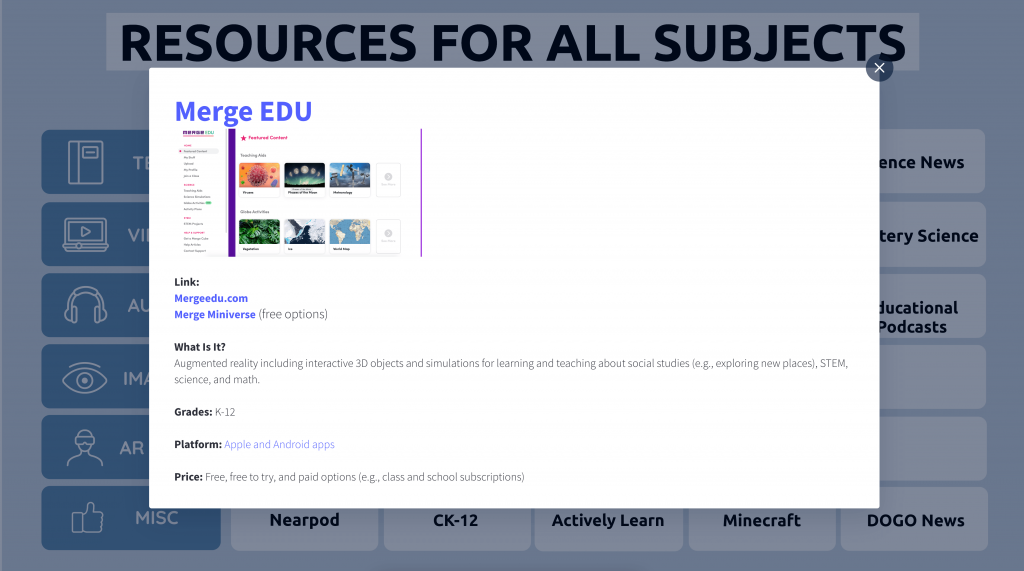
If you’re unsure where to find high-quality resources to supplement your curriculum or simply don’t have the time to do so, we’ve pulled together a Resource Archive sorted by subject and resource type for you to reference.
Each resource includes a brief description and cost (most are free) to help you decide if it’s right for your classroom.
Bust Barriers
To truly leverage the power of technology, today’s teacher must learn how to Bust Barriers by proactively eliminate the obstacles that often stand in the way of learning. Designing lessons with the stated intention of reducing barriers to learning is also the single most definitive characteristic of Universal Design for Learning.
A straightforward, yet highly impactful way to Bust Barriers is by teaching all of your students how to use the different accessibility tools that are available to them. Chromebooks, for example, have a wide array of built-in accessibility features, as do Microsoft apps. Even commonly used programs like Google Docs have numerous built-in accessibility features ranging from voice typing to pre-created templates.
Another way to Bust Barriers is through the use of embedded tools that enable support comprehension such as word translations and definitions. An app like Actively Learn incorporates these features while also allowing teachers to chunk text into smaller sections by adding check-for-understanding questions.
See the video below for tips about how to Bust Barriers with tools like Actively Learn, Google Docs, and Read & Write.
*Note, although Actively Learn sponsored this video, we do not have an ongoing commercial relationship with them, and I would enthusiastically recommend their product under any circumstances!
Similarly, several programs enable you to add check-for-understanding questions to videos, which not only supports student comprehension, but also helps you Amplify Agency by increasing students’ sense of self-awareness.
To find out which interactive video program is right for you, try our Choose Your Own Adventure activity below!
Teach Technology
The competency Teach Technology refers to learning how to choose and use technology tools for your classroom while also creating opportunities for students to do the same. We intentionally dropped “with” from “Teach with Technology” to emphasize the importance of teaching students how to use technology in addition to using it as an instructional tool.
On a practical level, teaching students how to use technology is one way to anticipate potential barriers to learning. Every teacher who experiments with technology has undoubtably experienced the deflating feeling of witnessing a lesson go off the rails due to unforeseen problems cropping up. Plus, teaching students foundational technology skills has clear real-world value that transcends far beyond an individual classroom.
Here are four steps to incorporating foundational technology skills into your classroom:
Step 1: Determine the core technology skills needed for students to be successful in your class
Although you should generate your own list, here are a few core skills, with hyperlinks to corresponding tutorials, that all students will benefit from learning.
Step 2: Give a diagnostic assessment
Just like you would with any other skill, start by assessing your students’ current proficiency in foundational technology skills. In order to glean the most accurate information, set up the diagnostic assessment so that students have to students perform the tasks diagnostic assessment in such a way that students have to perform the tasks you are assessing. For example, have students create a screencast of themselves performing the core skills you have identified.
Here are some example performative questions to include on the diagnostic:
- Go to “x webpage” and copy and paste the first paragraph you see into the box below.
- Create a hyperlink to a favorite school-appropriate website and paste it in the box below.
- Insert an image of your favorite animal in the box below.
- Download this document as a .pdf onto your computer.
- Take a screenshot of this page and paste it below.
CLICK HERE for a remixable copy of a technology skills diagnostic assessment. Note that it also includes an embedded how-to video for students.
Step 3: Set students up to track and monitor their own progress
As you’re evaluating the results, input their scores into a data tracker like the one shown below.
Then, give students their own a slightly modified version of your data tracker.
CLICK HERE for a student-facing version of the template shown above
Step 4: Embed high-leverage foundational technology skills throughout your lessons
Google’s Applied Digital Skills is probably the best free resource available for helping teachers integrate foundational technology skills.
Here’s an overview video about how to use it:
Revamp Your Role
The final competency, Revamp Your Role, is about understanding the ways in which the Internet has fundamentally altered our relationship to information and adapting accordingly. Knowledge is no longer something locked away behind the gates of educational institutions. Anything a person wants to learn can be found online: often delivered in a more interesting and engaging format than a single teacher ever could.
That’s why it’s important for today’s teacher to understand that their role is no longer to deliver knowledge, but to facilitate it.
One of the most concrete ways to shift from a teacher-centric, “deliverer of information” model to a more student-centric, facilitative model is by learning how to “flip” your classroom.
The phrase "Flipped Classroom" originally referred to an instructional practice where students watched video-based lessons for homework in order to free up class time for more hands-on activities.
However, since I’m an advocate for ditching homework, I’d suggest using an “In-Classroom Flip” instead.
An “In-Classroom Flip” still entails students watching instructional videos on their own, but instead of doing so outside of class, all learning activities still occur during class time.
There are many benefits to flipping your classroom inside your classroom. Doing so...
- offers students any time, any place instruction
- increases accessibility & personalization
- lifts the burden on teachers to hold the entire class’s attention
- releases students from the need to sit and listen to you talk for extended periods of time
- frees up your time to work with small groups or one-on-one
Similar to Matt’s idea of “stepping up” to choice-based learning with “progressive choice boards”, you should consider transitioning to a flipped model incrementally. Here’s how:
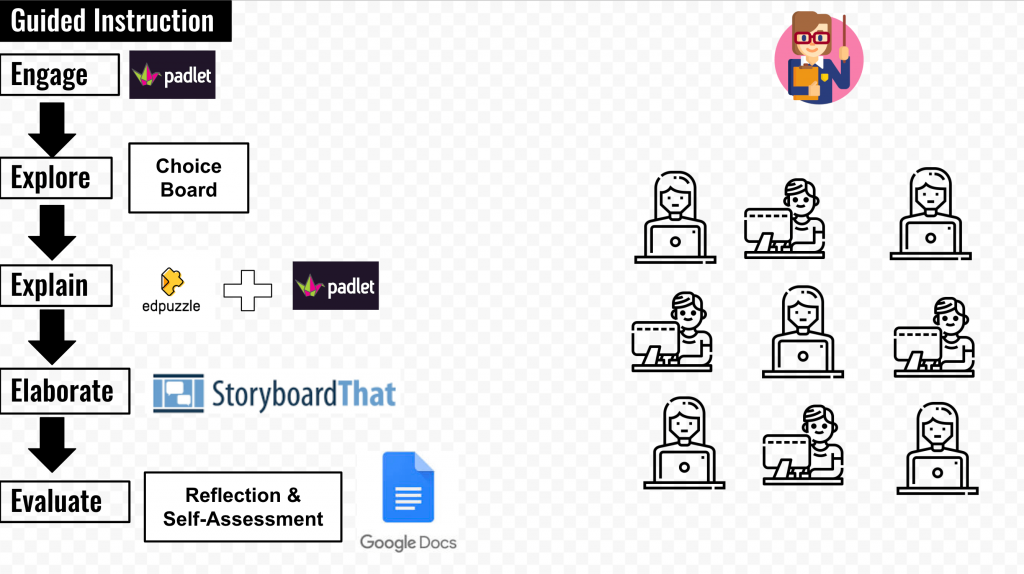
Step 1: Use Guided Practice to Model the “Flipped Experience”
Rather than jumping in head first, set your students up for success by helping them understand the different segments of a flipped lesson.
During guided practice, lead students through each of the steps they would take during a flipped lesson to make sure they know what to do and to call their attention to how long each step takes to complete.
For example, instead of immediately expecting students to get the most out of a pre-recorded instructional video, take time to show them how to used closed captioning, as well as how to speed up or slow down the video. Rather than giving them a choice board and saying “go”, take time to discuss all together why a person might want to make one choice over the other.
Modeling and practicing the metacognitive processes necessary for independent learning will make it more likely for students to be successful.
Step 2: Step Up to Flipped Instruction with Stations
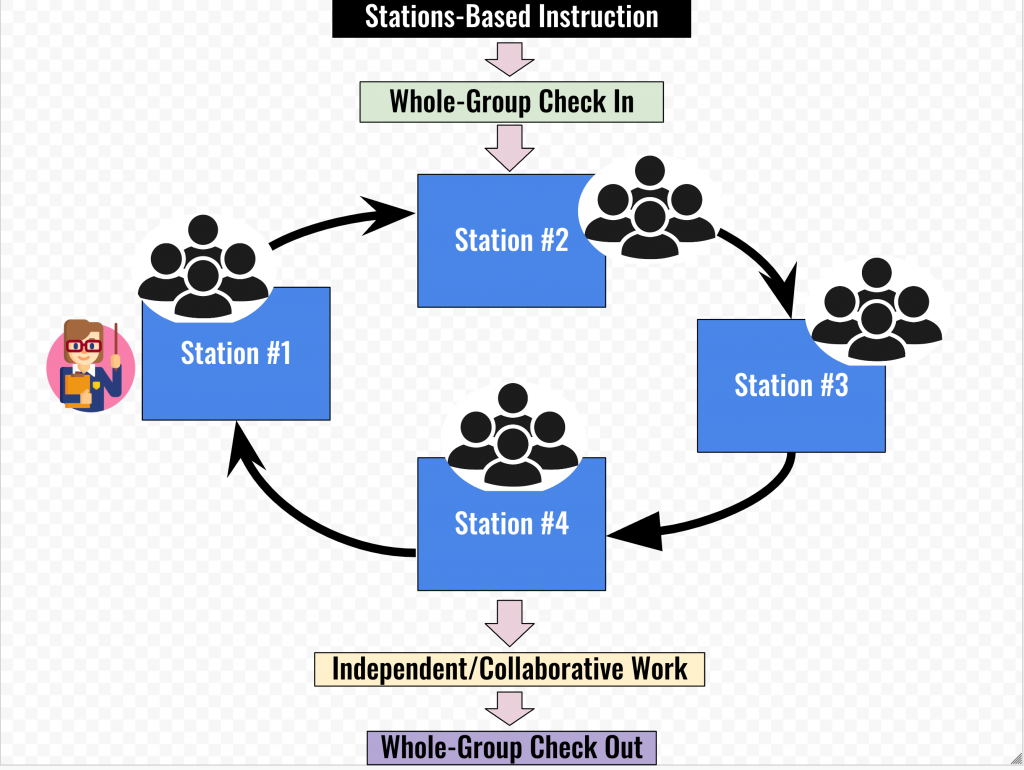
In a stations-based model, students rotate through different learning activities by physically changing locations in the room.
Stations are the next logical transition from whole-group practice because they still allow the teacher to scaffold the pacing of a flipped lesson. For example, you might set a timer for 20 minutes and have students rotate to the next station once the time is up.
The first few times you use stations, rotate around the room to support students as they learn to work independently. Once students develop this skill, you can shift to using one of the stations to provide small-group instruction.
Step 3: Transition to a Fully Flipped Model (In-Class)
Now that you've practiced as a whole-group and gradually released responsibility through stations-based learning, it's time to try using the “in-class flip.”
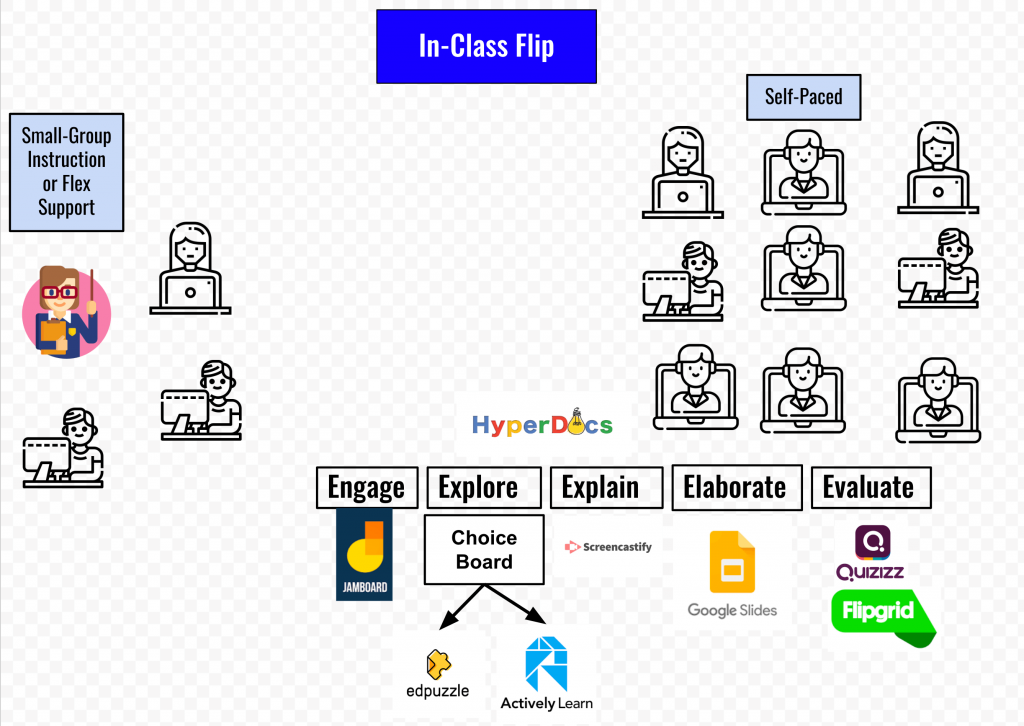
In the example below, students are working independently on a HyperDoc lesson, freeing up the teachers' time to work with a small group of students or to provide flexible, in-the-moment support on an as-needed basis.
The 5 Es lesson at the bottom of the image shows examples of the learning activities you might have students complete while working independently.
21st Century Teacher Scorecard
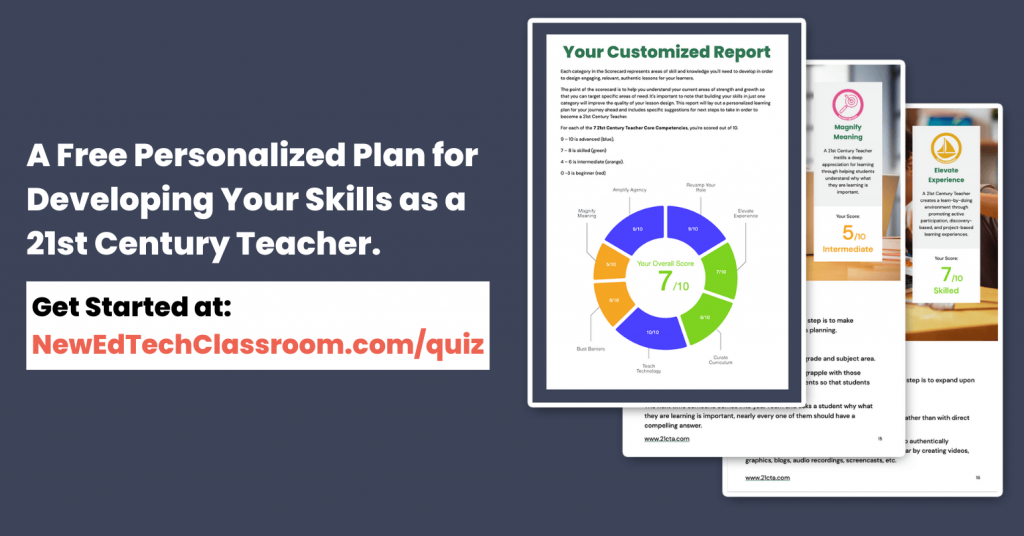
If you’re interested in learning your current areas of strength and growth in the 7 Core Competencies, check out our free 21st Century Teacher Scorecard. Upon completing it, we’ll send you a personalized report detailing suggested next steps as well as send you leveled resources to help you build your skills in a chosen category.
For notifications of new Ditch That Textbook content and helpful links:
Are you looking for quality, meaningful professional learning that both equips and inspires teachers?
Matt provides in-person and virtual keynotes, workshops and breakout sessions that equip, inspire and encourage teachers to create change in their classrooms. Teachers leave with loads of resources. They participate. They laugh. They see tech use and teaching in a new light. Click the link below to contact us and learn how you can bring Matt to your school or district!
Is Matt presenting near you soon? Check out his upcoming live events!



Is there a PDF version of this?