
Jamboard is Google's digital white board tool. Educators have flocked to it because it's very visual, it's easy to use, and it's highly collaborative.
Teachers are using it in so many ways ...
- as a digital white board for face-to-face and remote instruction
- as hands-on, interactive digital activities with drag-and-drop components
- as collaborative thinking spaces for small groups
One of Jamboard's best features is its simple user interface. Just about anyone can pick up Jamboard and start using it without a problem. It's clean and very intuitive.
But just because it's easy to figure out doesn't mean you know everything it does!
In this post, I'll share five things you can do with Jamboard that you might not realize.
Check out the free ebook - 10 ways to use Google Jamboard tomorrow -- at the end of this post!
1. Drag images around (into order or to answer).
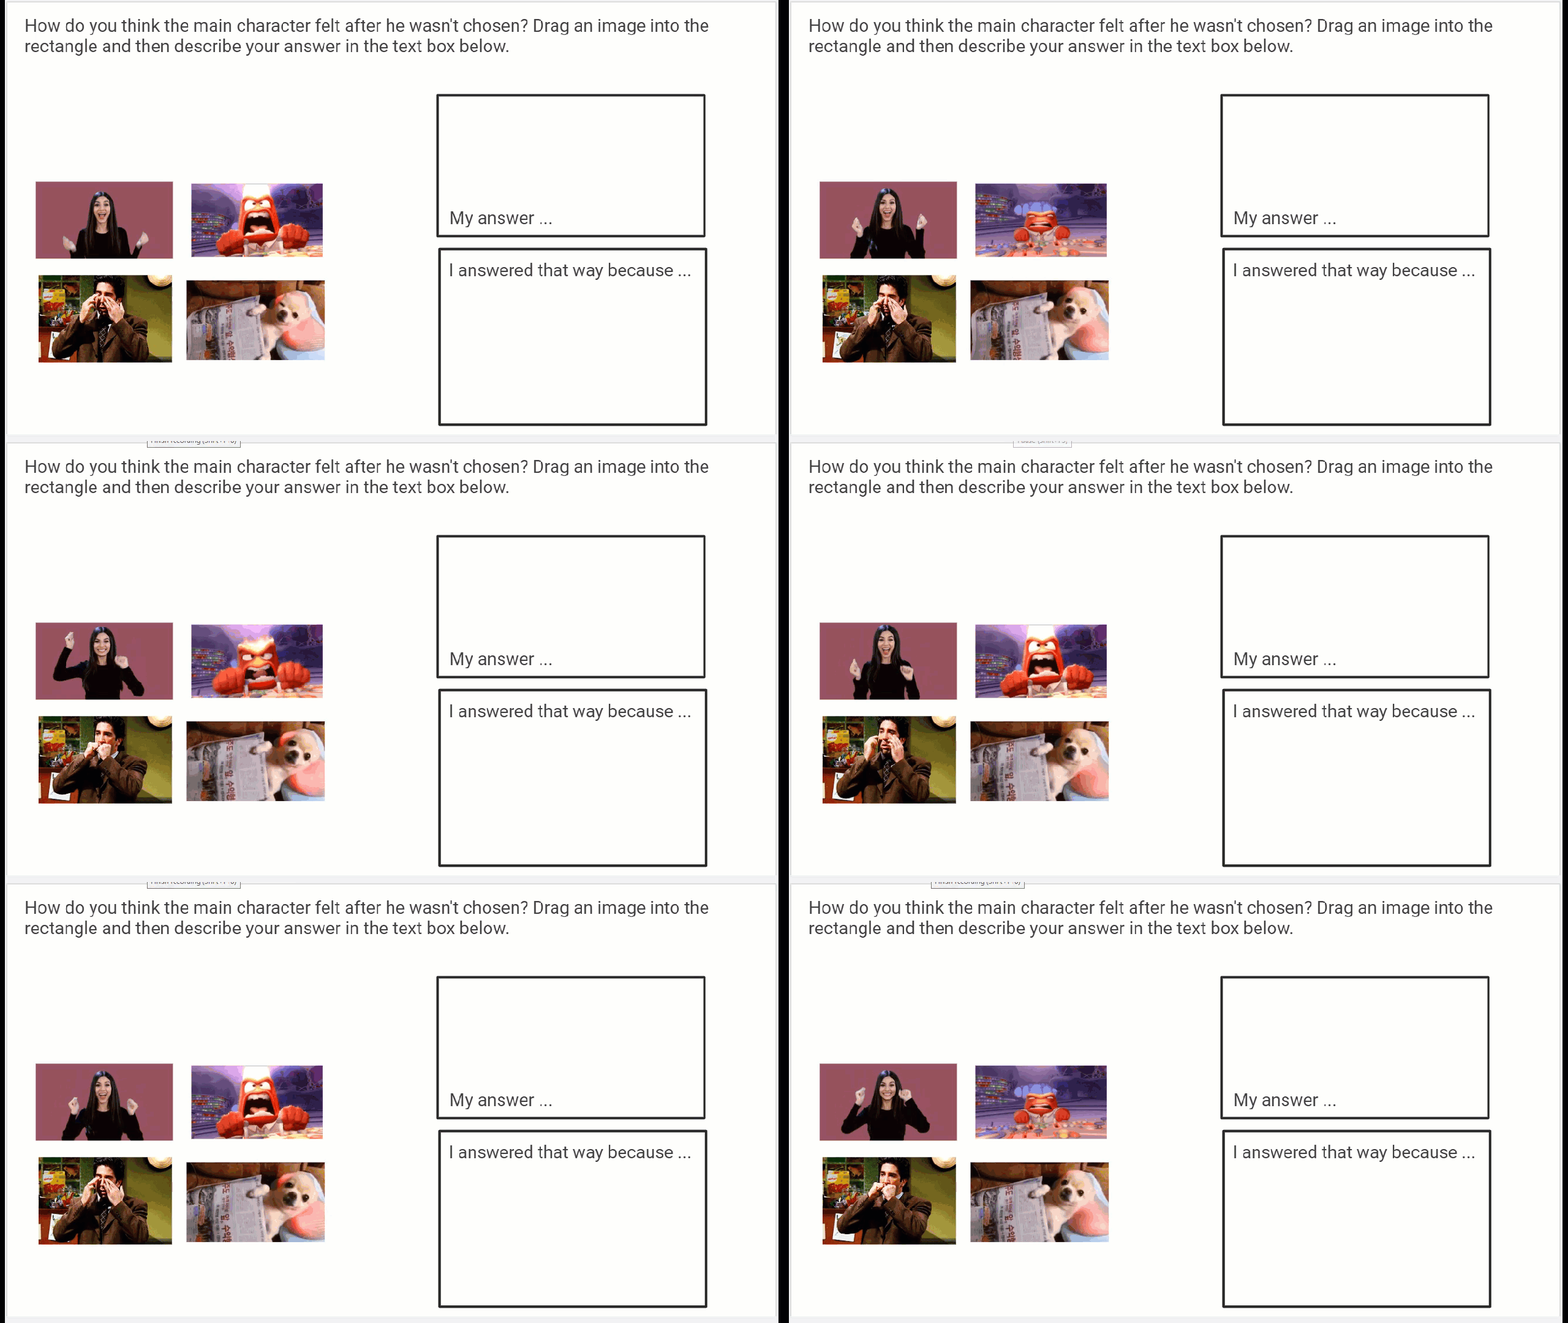
We put an image on a document and it stays there. It's not intended to be moved around. Jamboard opens up lots of different possibilities, though!
Add several images to a jam and ask students to drag them into order. Give them several images and ask them to choose one to answer, describing why they chose that one. It's a virtual version of manipulatives like blocks or cards, and it can change the experience students have with an assignment.
2. Use it with a screen recorder to demonstrate a skill.
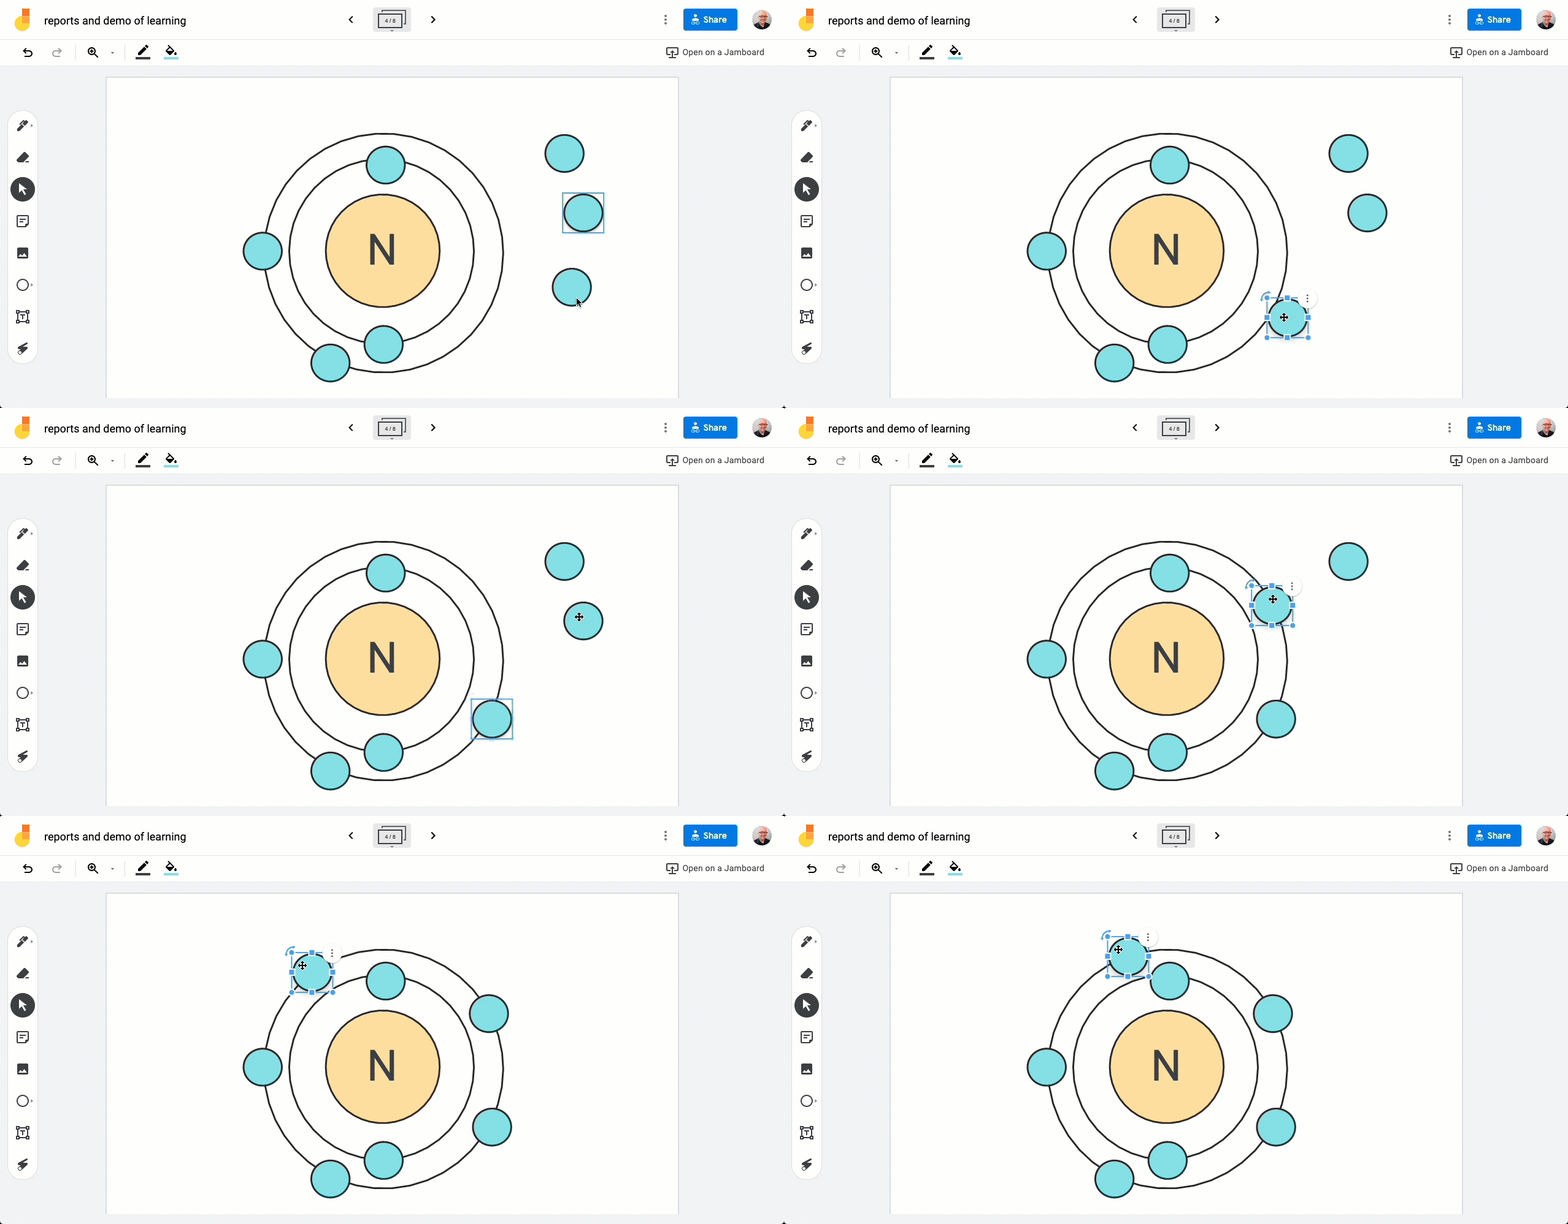
When students turn in work, all we have to understand how they think is the answers they provide. What if we had even more evidence of how a student is thinking?
Have students open up Jamboard -- either a blank one or one where they've done some work. Then, they start recording their screen with a screen recording tool like Screencastify or Loom. As they do work on the screen, moving things around or writing, the screen recording captures it all. Plus, as students describe their process verbally, we get a glimpse of how their mind works with our content. This can be very valuable to guide them on their learning journey.
The Do More with Google Jamboard
Online Course!
This course will introduce you to Jamboard features you might not know. It will give you dozens of ideas for using it in the classroom.
Plus, it provides you with:
- A collection of more than 100 templates.
- 40 activity ideas you can use immediately
- Tutorial slides to use as a quick visual review.
- Interactive infographics you can give your students
- Video playlists, posts, and extra resources.
3. Create hidden sections with the pen tool.
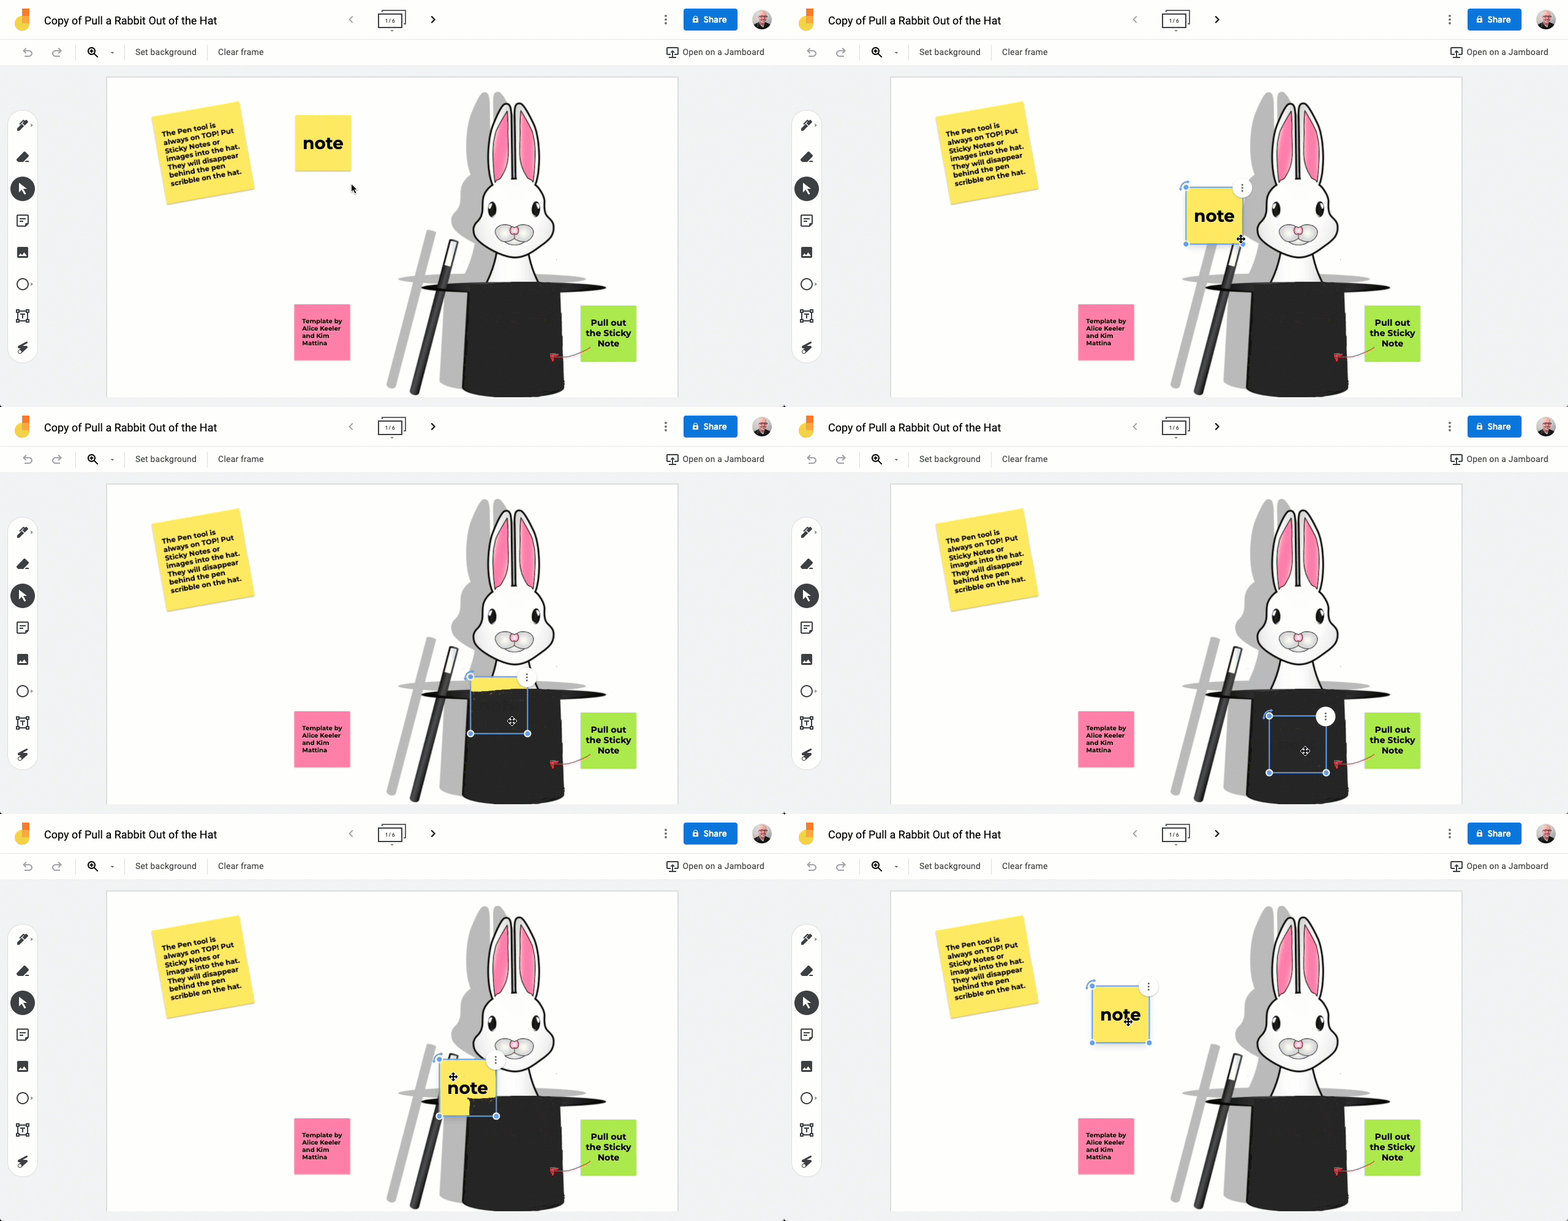
The pen and marker tools in Jamboard have a unique feature. They're always on top. Whether you draw on a sticky note, an image, or anything else, the pen and marker always stay on top.
This creates some fun learning opportunities! Educators have come up with some creative ideas to use this, including:
- Scratch-off activities where the teacher colors in an area with the pen and students erase it to reveal a clue or answer. Check out this example from Esther Park!
- Hidden sections, where the teacher colors in an area on the jam and hides a sticky note or image behind it. Check out this example from Alice Keeler and Kim Mattina!
- Scratch-off drawing where the teacher colors the entire Jamboard frame and adds a colorful background, then the student draws on it by erasing. Check out this example from Eric Curts!
4. Insert Google Drive files right on a jam.
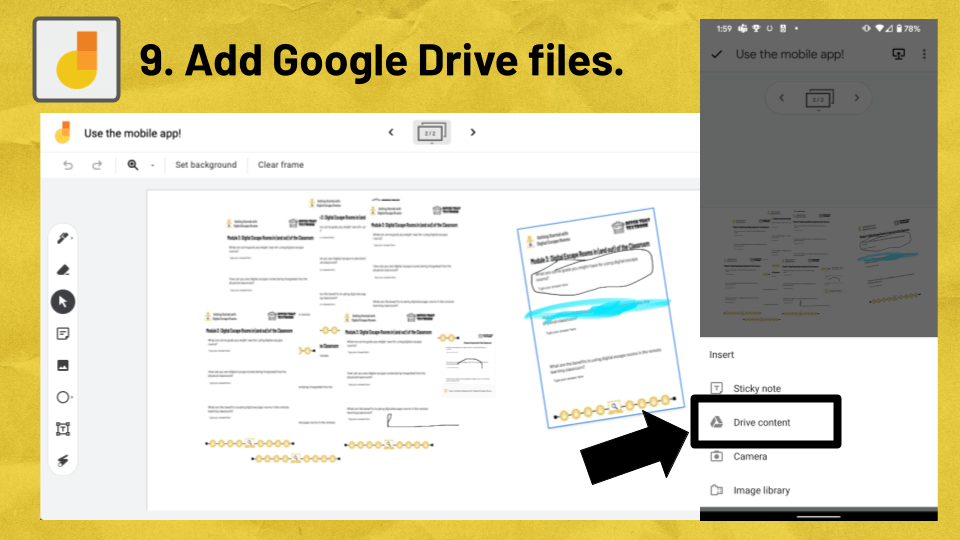
In Jamboard, you can add a slide or page from a document directly on your jam. That way, students can see it and even annotate on it. But you can't do it from the web version of Jamboard.
Open the mobile app (on iOS or on Android). Open a Jamboard file, and then tap the plus ("+") icon. Choose "Drive content." You can insert a file from Drive directly on a jam. Resize it. Rotate it. Duplicate it. Move it around. Write on it!
5. Use a smart phone/tablet in conjunction with the web version.
@ditchthattextbook This ##Jamboard trick will blow your mind! More: ditch.link/jamvid ##teachersoftiktok ##tiktokteacher ##googleedu
♬ FUTURE HOUSE - Sergey Wednesday
If you don't have a touchscreen laptop or Chromebook, you can still draw on Jamboard without a clunky mouse or touchpad. Just use a tablet (like an iPad) or a smart phone as a secondary device!
Open a jam on your laptop. You can project it on a screen or even share your screen on a video call. While it's on that screen, open the same file on a tablet or smart phone and draw with your finger or a stylus. The drawing or writing appears instantaneously on the other screen!
When you're done, hit the "Share" button and set it as "Anyone with the link can view." Give students that link, and they'll have a copy of your notes they can access any time.
There's even more you can do with Jamboard!
This post just scratches the surface on what you can do with Jamboard! Here are some of my other Jamboard resources that show you even more you can do ...
- Copy and assign these free Jamboard templates to your students right away
- Make Jamboard backgrounds with animated GIF images -- or just download ours
- Browse these 20 ways to use Jamboard in the classroom
- Watch this four-part video series on doing more with Google Jamboard
Looking for more great Jamboard ideas? Check out this free ebook, 10 ways to use Google Jamboard tomorrow! Click here to download!
What are your favorite tips or tricks for using Jamboard in the classroom? Tell us in a comment below!


Can’t wait to explore Jamboard!
Jamboard should be banged
Seriously i didn’t use jam board up to now but after reading this article i would like to use it.
Again a Nice Post by you.
I was Looking for the Same on Google, finally reach to this Page
I was very Much Excited for Jamboard Features
Take Care. Because You are Amazing
I want to Try This… This Looks Nice
Thanks for this Valuable Information